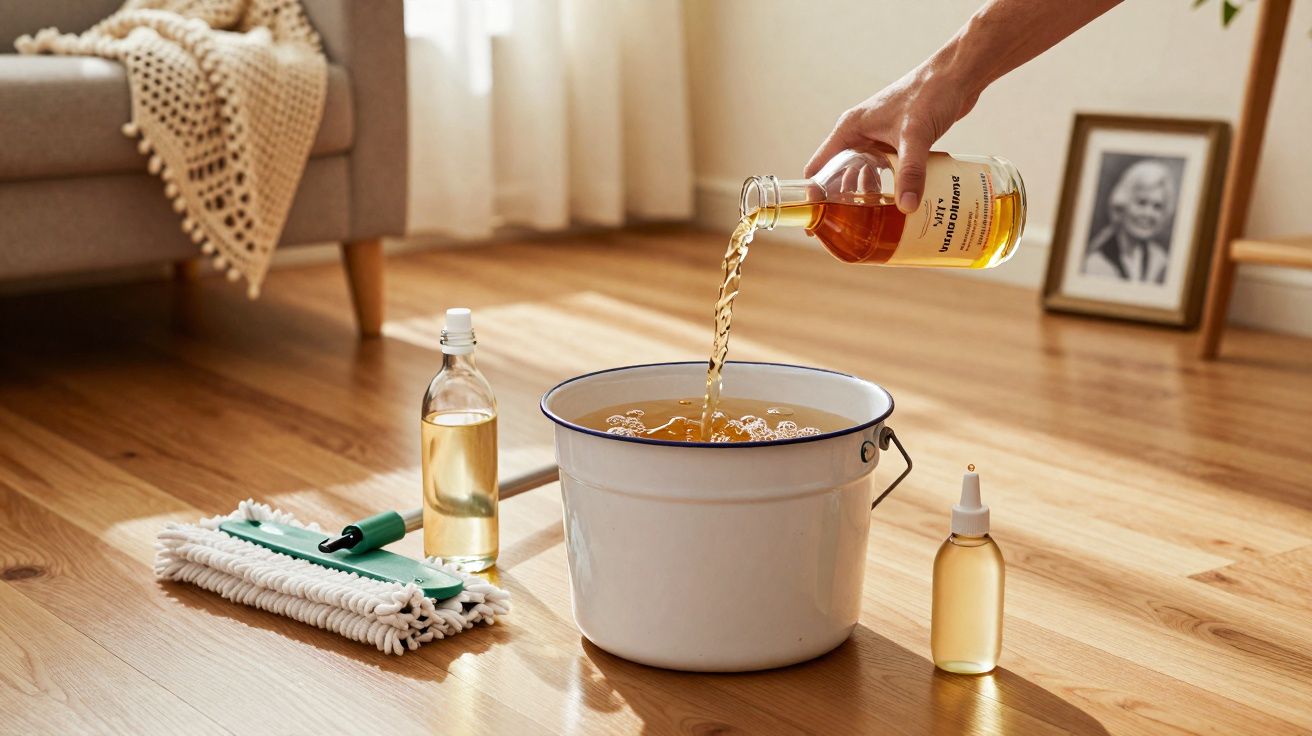
The bucket was made of metal, knocked in at three different points, and it had clearly been around longer than anyone gathered in that room.
It gave a faint clink as Grandma tipped hot water from the kettle into it, then reached for three humble supplies that looked almost too basic to be taken seriously. There was no pricey aerosol, no plastic bottle claiming “ultra gloss” by tomorrow. Instead: a battered spoon, a jar with a hand-written label, and a tiny bottle carrying a soft, citrusy, soapy scent.
Our floorboards had endured decades of footsteps, toys with sharp little wheels, and at least two dogs who treated mops as optional. Still, as she guided the cloth in slow, confident strokes, the tired-looking boards seemed to come back to life. Thin ribbons of light appeared, as if the wood had been switched on from the inside. Without lifting her gaze, she smiled and said, “You don’t need much if you use the right thing.”
The most surprising part was how quickly the whole room felt different.
The quiet strength of a time-tested recipe
These days, many homes have a cupboard crammed with cleaners shouting promises in bright labels: one for tiles, another for wood, another for laminate, another purely for “shine”. Yet the same floor can look weary again within 48 hours. Grandma’s approach runs the other way entirely: three or four ingredients, one bucket, and a method you could explain in under a minute.
That kind of simplicity is oddly disarming. In a world of microfibres and “multi-surface” formulas, it almost feels too plain to work. You watch the cloth slide across the boards; you see the floor dry in clean, mark-free patches; and you catch yourself thinking, “Is that really it?” The finish isn’t the harsh, plastic glare you see in adverts. It’s a gentle, lived-in gloss-clean, calm, and natural.
A few years back, a small survey of professional cleaners in the UK turned up something many people wouldn’t expect: a significant number still leaned on homemade mixes for difficult floors, particularly older wood and tiles. Not for show, but for the jobs where expensive products kept failing. One cleaner described her secret as “nan’s water”, then laughed when asked what it actually contained: water, white vinegar, a few drops of dish soap, and a little oil when the floor was wooden.
That same theme appears again and again. A lot of so-called “trade secrets” are really family formulas, passed along quietly between kitchens and back rooms. They’ve been proven the hard way-through spilled juice, muddy paws, winter boots, and sand tracked in during summer. No slogans, no marketing claims-just one test: does the floor look better, and does it stay better?
From a practical angle, the results aren’t mysterious. Vinegar helps lift mineral marks and old product build-up. Mild dish soap tackles everyday grease from cooking and life in general. A small amount of oil can feed wood and create that warm, muted glow. And the hot water does much of the heavy work.
What makes the difference is the balance. Add too much vinegar and your home will smell like a chip shop condiment aisle. Add too much soap and you’ll leave a dull, sticky film. Add too much oil and you’ll be sliding down the hallway. This grandmother mix for shining floors isn’t magic-it’s tiny doses, combined consistently, until the hands no longer need measuring spoons.
The exact grandmother mix for shining floors (white vinegar, dish soap and oil)
This is the simplest, most commonly repeated version of the old recipe, with only small variations between families.
- Start with 4–5 litres of hot water (hot, not boiling) in a standard bucket.
- Add 120 ml white vinegar (roughly ½ cup).
- Add up to 5 ml gentle dish soap (no more than 1 teaspoon).
- For wooden or laminate floors, whisk in 15 ml vegetable oil or olive oil (1 tablespoon).
Stir using the mop handle or a wooden spoon until the water turns slightly cloudy-an easy sign that everything has combined. Dip in a clean mop or cloth, wring it out thoroughly, and clean in small sections. Allow each area to air dry before walking on it. The shine doesn’t pop immediately; it settles as the floor dries and the very thin layer of oil spreads evenly.
On paper, it looks almost laughably straightforward. In practice, the difference is in the small habits:
- Don’t overload the cloth or mop head.
- Replace the water once it starts to look grey or gritty.
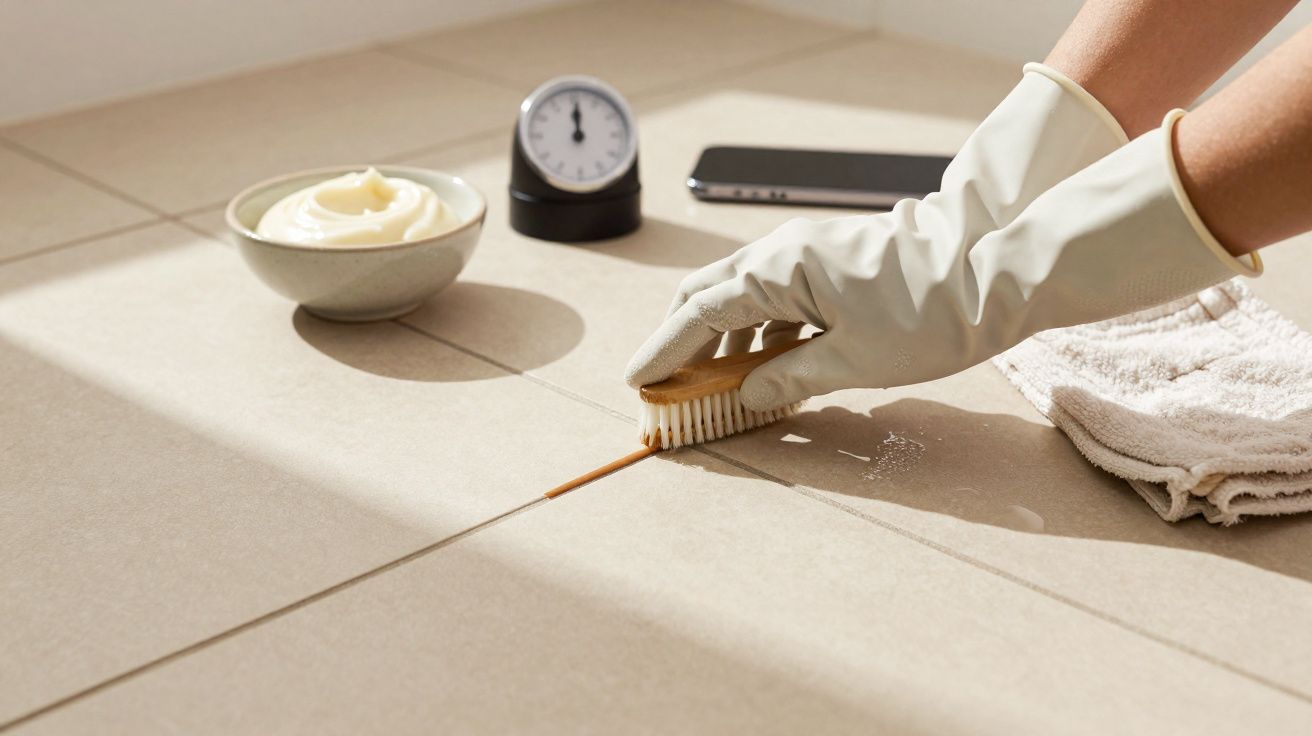
- On tile or vinyl, skip the oil and stick to vinegar plus soap.
- On real wood, keep the cloth much drier-more like damp polishing than wet washing.
- You’ll often finish faster than a “deep clean” using three shop-bought products, because you’re not swapping tools and bottles every few minutes.
One of the most common stumbling blocks is human nature: the urge to add “a bit more” of everything, assuming more product equals more shine. It usually does the opposite. Too much vinegar can gradually dull certain finishes and leave a lingering smell. Too much soap creates an invisible layer that clings to dust. Too much oil leaves footprints and streaks that can look worse than the original dirt.
Another frequent error is not giving the floor time to dry. People mop, then immediately move chairs or walk across in socks, and the marks make it seem as though cleaning “didn’t work”. In reality, the mix has done its job-it just needed ten more minutes of peace. And let’s be honest: nobody is doing this every single day. Most households only need this deep shine treatment once a week or once a fortnight; in between, a quick mop with hot water alone is plenty for everyday dust and light dirt.
There’s also the worry about “ruining the floor” with vinegar or oil. If you’ve got a delicate or premium finish, testing a small, hidden area first is sensible. That said, many older floors are tougher than they appear: they’ve already survived bleach, harsh detergents, and years of neglect. A diluted, gentle mix applied carefully is often kinder than the so-called heavy-duty products people reach for out of frustration.
“When I went back to my grandmother’s floor mix, something funny happened,” a reader from Manchester told me. “Guests started asking if we’d replaced the flooring. We hadn’t-we’d just stopped smothering it with products.”
That reaction helps explain why these recipes keep resurfacing on social media, TikTok cleaning clips, and family WhatsApp messages. Old-school doesn’t mean obsolete; it often means thoroughly proven. Plenty of people are tired of paying for bottles that promise the world and deliver a mediocre shine for a day or two.
A few boundaries keep the trick safe, predictable, and effective over time:
- Use white vinegar only; coloured vinegars can stain.
- Avoid strongly perfumed dish soaps that cling as an overpowering smell.
- Skip the oil altogether on very glossy, factory-coated laminates.
- On wood, wring the mop until it’s just damp.
- The first time on any sensitive surface, test a small, hidden patch.
On a quiet Sunday morning, with the windows cracked open and the light falling across the floor, following these small rules can feel more like a ritual than a chore.
A little preparation that makes the mix work even better (grandmother mix)
Before you start, sweep or vacuum properly-especially along skirting boards and under chairs. The grandmother mix shines floors best when it isn’t being asked to drag grit around, which can cause tiny scratches on both wood and some tiles.
It also helps to choose the right cloth. A clean cotton cloth or a well-rinsed microfibre mop works well, but avoid anything that’s already coated in fabric conditioner or leftover cleaner, as residues can cause streaks regardless of how perfect your vinegar/soap balance is.
Why this small ritual still matters today
This old mix is about more than glossy boards or brighter tiles. Underneath it is a philosophy of “enough”: enough product, enough effort, enough time-without excess or exhaustion. Modern life often pushes cleaning into the last 20 minutes of the day, squeezed between emails and dinner. In contrast, a bucket, a short recipe, and a few steady passes across the floor can feel unexpectedly grounding.
The practical savings are real, too. Vinegar costs very little. Dish soap is already in most kitchens. Oil is usually in the cupboard. There’s no need to buy a “wood shine booster”, a “tile reviver”, and a “floor deodoriser” as separate purchases. That kind of simplicity also fits a quieter shift towards fewer chemicals at home: fewer plastic bottles, fewer confusing labels, fewer competing fragrances lingering in the hallway.
There’s an emotional side as well. We’ve all had that moment when the house is finally tidy, the floor is clean, and the calm returns all at once. A shining floor isn’t just cosmetic-it changes the way you move through a room and how the space feels. You notice light under the table. You catch a clean, faint scent rather than a synthetic “ocean breeze”. You might even remember the sound of a dented metal bucket in someone else’s kitchen.
That’s why people talk about these old mixes with a kind of warmth. It isn’t only vinegar and soap. It’s the comfort of a solution that works across generations without needing a rebrand every year-quietly effective, whenever you give it a chance.
To be clear, Grandma’s old floor mix won’t mend a broken board or erase deep gouges. It won’t transform a rental into a palace. What it will do is make what you already have look cared for again: less dullness, less stickiness, and more glow-a stubborn, gentle glow that says, “This place is lived in, but looked after.”
Maybe that’s why this humble recipe keeps appearing in search results, in the comments under viral clips, and in neighbour-to-neighbour chats in shared stairwells. It’s proof that not everything needs an upgrade. Sometimes the best way forward is a dented bucket, three ingredients, and a method learned from someone who was cleaning floors long before “gloss finish” became a marketing slogan.
| Key point | Detail | Why it matters to you |
|---|---|---|
| Minimalist mix | Hot water, white vinegar, a few drops of dish soap, and a little oil for wood | Easy to remember; ingredients are usually already at home |
| Precise quantities | 120 ml vinegar, up to 5 ml soap, 15 ml oil per 4–5 litres of water | Helps avoid streaks, protects floors, and gives a lasting shine |
| Adaptable ritual | With or without oil depending on floor type; test a small area on delicate surfaces | Works across different floor finishes; safer and easy to personalise |
FAQ
Can I use this mix on all types of floors?
It suits most tiles, vinyl, and many wooden floors. Leave out the oil on glossy laminates and always test a hidden patch on delicate finishes.Will vinegar damage my wooden floor over time?
At this low dilution, with a well-wrung mop, it’s generally fine for sealed wood. The bigger risk is soaking the floor, not the vinegar itself.How often should I use the grandmother mix?
For most homes, once a week is enough (or once a fortnight). In between, a quick mop with hot water covers everyday dust and light dirt.What if I hate the smell of vinegar?
Add a few drops of essential oil (for example lemon or lavender), and/or open windows while you clean so the scent disappears more quickly.Why does my floor look streaky after using it?
Streaks usually come from too much soap or oil, or from using a mop that’s too wet. Next time, reduce the product and wring the mop more thoroughly.


Comments
No comments yet. Be the first to comment!
Leave a Comment