I stood in front of that puny tomato cane for the third day running. On the left, the neighbour’s plants were carrying absurdly heavy trusses; on the right, my own was managing a miserable, miniature haul. The compost looked ashy, the pot was bone-dry around the rim, and my neighbour gave me that polite, sympathetic look people reserve for lost causes. I even leaned in to smell the soil as if it might confess what it needed. Nothing-just dust, with a faint hint of autumn.
That evening I fell down the rabbit hole of gardening forums: half-anonymous usernames, wonky phone photos, and heated debates about everything from slug pellets to moon cycles. Buried in the noise was one claim that kept resurfacing-one simple fertiliser recipe that supposedly makes everything grow. Balcony pots, borders, houseplants. It sounded far too good to be true.
After half a notebook of scribbles, a healthy dose of scepticism, and the kind of curiosity that’s hard to ignore, I crept into the back yard with an old glass bottle. What happened next, looking back, felt almost like a little stop-motion film-only it was real.
A quiet revolution in the watering can
Most of us know the feeling: you water, you glance at your plants on the way past, and-if you’re honest-nothing really changes. They don’t die, but they don’t thrive either. They sit in that dull “fine, I suppose” zone: green-beige, neither here nor there. After a while you accept it the way you accept mediocre canteen food.
The one simple fertiliser recipe people whisper about doesn’t flip the switch overnight. It’s subtler than that-more like turning down static until the music in the room suddenly sounds right again. Leaves look fuller rather than merely green. Shoots appear faster than you expected. And you catch yourself pausing, properly looking, instead of rushing on.
Because let’s be realistic: hardly anyone is mixing five specialist feeds for five different plants on a Tuesday night. Most people aren’t keeping a fertilising calendar or calculating N–P–K ratios. They grab whatever’s on offer at the garden centre and hope for the best. This recipe works in real life because it turns chaos into a routine-simple enough to stick with even when you’re tired.
Testing it on a “lost cause” (and what changed)
I started with something I felt I could afford to sacrifice: a neglected supermarket basil pot. The leaves were drooping, the stems were turning woody, and mentally I’d already written it off. One last experiment before the food-waste caddy.
I mixed the liquid, poured a small amount around the roots, and put it back on its usual spot by the kitchen window.
For about three days, it seemed like nothing at all happened. Then one morning there it was: fresh, glossy shoots pushing up between the tired old leaves-an almost cheeky, vivid green. Ten days in, I could harvest again. Not the overflowing abundance you see in adverts, but enough to finish a pasta dish and think: right, there’s something in this.
After that, the same mix went to my struggling tomatoes, a weary monstera in the living room, and even the sulky lavender on the balcony. Different plants, same formula. Not a miracle potion that makes everything explode in 48 hours-more like steady tailwind that shifts “barely hanging on” into “wait… when did you get so lush?”
From a science point of view, it isn’t magic. Plants mainly need three key nutrients: nitrogen for leafy growth, phosphorus for roots and flowers, and potassium for resilience. Many hobby gardeners either feed too little or throw in too many products at random. This recipe pulls the basics together: organic matter that releases nutrients gradually, paired with a small amount of faster-available “fuel”.
What’s genuinely interesting is that it works with the growing medium rather than against it. Microorganisms get something to eat, the structure stays airier, and moisture is held more evenly. The fertiliser becomes more than a quick hit-it’s a tiny ecosystem in a bottle. That’s why it’s often not just one plant that improves, but the whole small jungle on a balcony.
The real trick isn’t a single ingredient-it’s the combination and the consistency. A recipe straightforward enough to actually use, and rich enough to be more than sugary water for plants.
The DIY kitchen-scrap fertiliser recipe: simple, cheap, almost universal
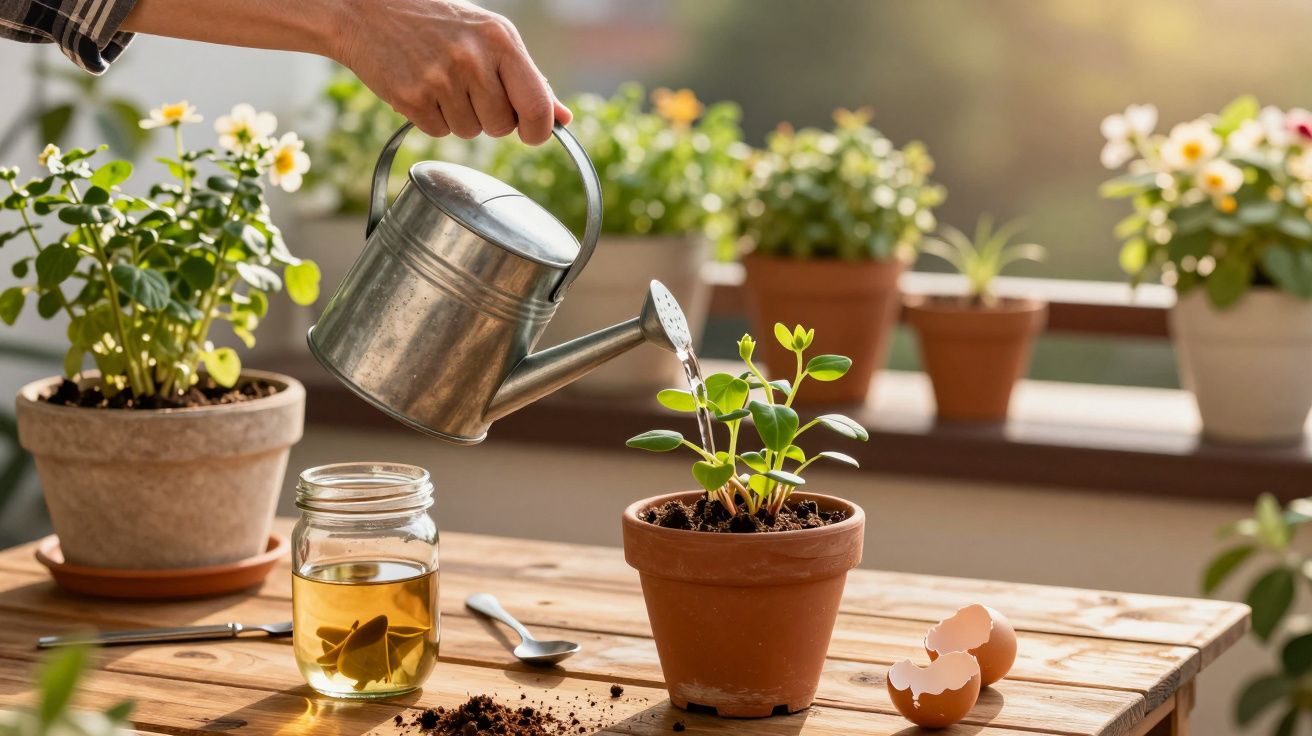
The core version that appears again and again in forums looks roughly like this: coffee grounds, eggshells, banana peel, and-optionally-a little honey or molasses. All things most households generate anyway. No lab kit, no special bottles. Just a large jar or an old bottle with a lid.
Here’s how to make it:
- Over 1–2 days, collect dry coffee grounds.
- Crush 1–2 eggshells into small pieces.
- Slice one banana peel into strips.
- Put everything into your jar or bottle and top up with lukewarm water.
- Add 1 teaspoon of honey (or a small splash of molasses), if you want.
- Close the lid and leave it to steep at room temperature for at least 24 hours-48 hours is better.
Before you use it, shake it well. Then dilute the liquid at about 1:10 with water-think one cup of the brew topped up into a large watering can (around 5–10 litres). For most plants, once a week is plenty. No daily fuss, no complicated schedule-just one set day, one can, one short moment of “right, I’m looking after you now”.
The temptation is to go all-in: more coffee, more shells, more brew, because “it’ll work faster”. That’s exactly where people often derail it. Too-strong fertiliser stresses plants, especially in pots. The compost can turn too acidic, mould is delighted, and roots retreat instead of spreading.
Another common mistake is dumping fresh, still-warm coffee grounds in a thick layer on top of the compost. It looks productive, but it quickly forms a hard crust that blocks water and air. If you want to use coffee grounds directly, let them dry first and sprinkle lightly, crumbly-not claggy. Otherwise, keep it in the liquid mix. And if you’ve just repotted something, let it settle in before you start feeding.
Also worth saying: almost nobody measures a perfect teaspoon every single time or keeps a precise log. If leaves start paling or a plant looks tired, it doesn’t always mean “more feed now”. Sometimes less is better over the long run. Fertiliser is support, not a cure-all for missed watering, poor light, or compacted compost.
A gardener I met at a small city-garden festival said something I’ve not forgotten:
“Most plants don’t die because they get too little-they die because we give too much in a hurry.”
That patient middle ground is where this recipe shines. Yes, it’s made from kitchen leftovers-but you treat those scraps as useful inputs, not rubbish. And you begin to sense when your plants are actually “asking” for food.
What has proved practical in everyday use:
- Start small: test on 1–2 plants first, not your entire collection
- Trust your nose: if the brew smells sharply rotten, bin it and start again
- Don’t water in direct sun; aim for morning or evening
- Watch the foliage: deeper colour and new shoots are good signs
- Refresh compost at least once a year-fertiliser doesn’t replace a soil/compost change
Two extra points that make it work better (and keep it pleasant)
Use a clean bottle or jar and don’t fill it right to the brim. Leave a little headspace, and crack the lid briefly once a day while it steeps to release pressure-especially if you’ve added honey or molasses. It helps prevent messy surprises and keeps the smell under control.
If you garden in hard-water areas (common in parts of the UK), keep an eye on plants that prefer slightly acidic conditions. This brew can gently shift the balance over time. If you notice slowed growth or leaf issues despite feeding, alternating with plain water for a week or two can bring things back to neutral.
Why this “one recipe” is more than a gimmick
A few weeks after my first batch, something odd dawned on me. I stopped hovering in the doorway with the watering can like it was a chore to tick off. I started crouching down, checking leaves properly, running my fingers over the surface of the compost the way you do with a fabric you like. That one simple fertiliser recipe didn’t just feed the plants-it nudged me into regular, calm contact with them.
Chemically, coffee grounds, shells and water aren’t a revolution. The real difference comes from how easy it is to keep going. No expensive bottles, no complicated plan, no guilt every time you water. Plant care stops feeling like homework and starts feeling like a small repeating ritual.
Maybe that’s the quiet centre of this “one recipe that makes everything grow”: it grows more than leaves, roots and flowers. It grows our attention. Our patience. And that low-key sense of wonder when a nearly abandoned basil pot turns back into something alive that smells like summer.
| Key point | Detail | Benefit for the reader |
|---|---|---|
| Simple universal recipe | Coffee grounds, eggshells, banana peel, water, a little honey/molasses | Make an effective fertiliser from household leftovers with no extra cost |
| Gentle application | Steep 24–48 hours, dilute 1:10, water once a week | Lower risk of overfeeding and easy to fit into everyday life |
| Observe rather than overdo it | Read plant responses, reduce feed if stressed, support healthy soil life | Healthier plants long-term and better instincts for your own “micro-garden” |
FAQ
Can I use this fertiliser for all plants?
For almost all, yes-except very sensitive specialists such as carnivorous plants or extremely lime-sensitive species. With orchids and succulents, test at a much weaker dilution first.How long does the brew keep?
Up to one week in a sealed container, stored cool and dark. If it smells strongly rotten or goes mouldy, make a fresh batch.Do I have to add honey or molasses?
No. It works without it. The small sugar addition mainly feeds microorganisms and can help kick-start the process.Can I spray it onto leaves?
Only very heavily diluted, and ideally in the evening. Some plants are sensitive-test on a single leaf first.How quickly will I see results?
Depending on the plant and its starting condition, usually within 1–3 weeks. Fresh shoots, richer colour and sturdier stems are the clearest signs.


Comments
No comments yet. Be the first to comment!
Leave a Comment