The quiet reality of a messy kitchen isn’t the dramatic spill you notice straight away. It’s the gradual haze of cooking oil that drifts through the air, settles on cabinet fronts, and clings on. You wipe it and it streaks. You scrub it and the finish starts to complain. Then, one day, an ordinary household liquid reverses months of build-up with a gentle swipe and a small exhale. No sharp fumes. No endless elbow grease. Just a forgotten bottle already sitting in the cupboard, finally doing the job we kept putting off.
One morning, the proof appeared in the light as streaks. The glossy beige cabinet beside the hob had turned into a tacky film-like a fridge magnet that never quite grips. I reached for my usual spray, pictured the scrubbing, and put it back down.
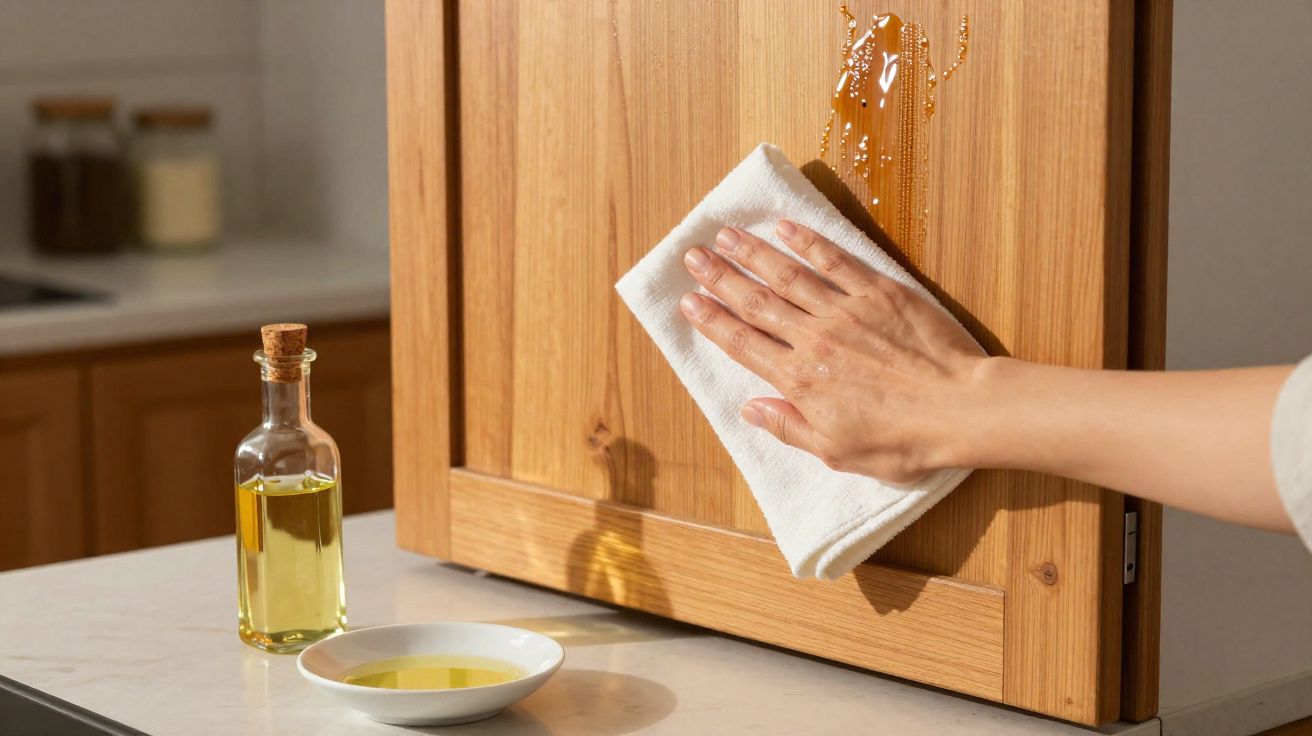
A neighbour once mentioned something that sounded backwards: the very thing that creates the grime can also remove it. I tipped a teaspoon of plain vegetable oil onto a soft cloth and worked a small circle on the door. The sticky dust released as if it had been waiting for permission to leave.
The shine returned before I’d finished my coffee. Not a plastic glare-more of a warm, steady glow. One cabinet became two, then three, and the whole kitchen felt lighter. A quiet trick hiding in plain sight. It felt like a small kind of magic. The simple kind.
The forgotten liquid (cooking oil) that cleans what it caused
Most of us know the exact cupboard: the one nearest the hob that starts to feel like flypaper. You wipe and it smears; you press harder and the tackiness just spreads. The twist is almost annoyingly straightforward: cooking oil-the same oil you use to sauté onions-breaks down that greasy film more effectively than plenty of harsher sprays.
Oil clings to oil. On sealed wood or laminate, it softens the stubborn mix of airborne fat and dust without stripping the finish. There’s no aggression needed; the motion stays gentle. The cloth does the work.
Picture a compact flat kitchen in Queens, New York: two cabinet doors either side of a well-used cooker. The left door was tackled with a citrus spray; the right got a teaspoon of canola oil. The citrus cleaner needed proper scrubbing and left that “tight squeak” feeling. The oil-treated door took about a minute and ended up looking quietly, evenly polished.
By the end of the week, fingerprints still wiped off more easily from the panel that had been treated with oil. A softly buffed surface doesn’t grab dust as fast. And let’s be frank: no one is doing a full cabinet clean every day-so the method has to last.
The “why” is simple chemistry. Cooking grease is nonpolar, and so is oil. Nonpolar dissolves nonpolar, which means the sticky bond gives way. The faint film left after wiping acts a bit like conditioner on finished wood: it brings back a low-sheen glow and a smoother feel.
Matt painted finishes can be fussier, but sealed woods and laminates typically respond beautifully. Think of it as a reset button: soften, lift, buff. That’s the loop. Minimal effort, maximum payoff.
How to do the oil-and-wipe method without fuss
Start with a clean microfibre cloth. Add 5–10 drops of a neutral oil-canola, sunflower, or grapeseed. Work in small circles over one door, leaving the edges until last. Let it sit for 30–60 seconds to loosen the grime, then turn to a dry section of the cloth and buff.
If you prefer a squeaky-clean finish, follow up with a quick wipe of warm water with a small amount of washing-up liquid, then dry immediately.
If the build-up is heavier, mix a gentle paste: 1 tablespoon oil + 1 teaspoon bicarbonate of soda (roughly 15 ml + 5 ml). Dab it on, swirl with small circles, wipe away with a damp cloth, then finish with a dry buff. If the smell of extra-virgin olive oil lingers in your home, choose a more neutral oil instead. And if your finish is delicate or very matte, try a hidden corner first and use the lightest pressure.
Oil lifts oil. That’s the entire principle. But it helps to get the rhythm right, and you’ll feel it after the first door: slow circles, a short pause, a clean buff. It’s the sort of home tip your grandmother might pass on quietly over a cup of tea.
“A teaspoon of oil and a soft cloth did what my scrubber couldn’t. I thought I needed a new finish. Turns out, I just needed five minutes.”
- Best oils: canola, sunflower, grapeseed (light scent, stable).
- Aftercare: a quick warm, lightly soapy wipe if you want zero residue.
- Frequency: when it looks dull or sticky-often monthly near the hob, quarterly elsewhere.
- Skip list: raw wood, chalk paint, fresh paint under 30 days old.
- Microfibre matters: it lifts; it doesn’t just push grime around.
Small warnings, smart tweaks, and why this feels so good
Flat, porous painted cabinets can streak if oil sits on the surface, so use less and keep your touch light. Laminates and sealed woods usually look their best with this approach, especially if you finish with a dry buff (or a brief soapy rinse). If a door turns cloudy afterwards, it’s usually because too much oil was used-go over it again with a barely damp cloth, then dry.
If your kitchen sees heavy use, the areas around the handles collect fingerprints like a guestbook. Treat those sections as needed with a single drop of oil on a finger wrapped in cloth. Then, about once a month, give the “hot zone” around the hob the full minute-long pass. The rest can wait. And if your cabinet handles are grimy, the same trick loosens that sticky ring that builds up around knobs and pulls.
Your cabinets don’t need a miracle; they need a minute. That five-minute reset is strangely satisfying: the wood looks fed rather than glossy, the room smells like… nothing, and the job is so light you’re likely to do it again before it becomes a project.
A quick guide you’ll want to send to a friend (cooking oil cabinet hack)
This little trick spreads for one main reason: it respects your time. No rubber gloves, no headache, no mystery residue. You see a difference on the first pass, which makes the second door feel easier-and the third almost enjoyable. The kitchen starts to resemble what you pictured when you first moved in.
There’s a human rhythm to routines that actually work: one cloth, a spoon of oil, small circles, a soft buff. Pass it on to the housemate who simmers stews for hours, the cousin who swears nothing shifts grease, the neighbour who thinks only heavy-duty cleaners count. Sometimes the calm way is the effective way.
Next time the sunlight catches that sticky halo near your hob, you’ll know exactly what to reach for. And you might smile at how ordinary the fix is. No heroics-just a kitchen staple doing a quiet job on your timetable. Send a photo. Tell the story. Someone else needs it today.
| Key point | Detail | Why it matters to the reader |
|---|---|---|
| Oil-on-oil chemistry | Nonpolar oil dissolves greasy build-up quickly | Faster cleaning with less scrubbing |
| Light, neutral oils work best | Canola, sunflower, grapeseed; mild scent | Clean results without lingering odour |
| Finish-friendly approach | Gentle on sealed wood and laminate | Smooth, conditioned look without damage |
FAQ:
- Will this leave my cabinets feeling oily? A small amount melts grime, then the dry buff removes excess. Prefer a squeak? Do a quick warm-soapy wipe and dry.
- Which oils are best for this? Neutral, stable kitchen oils: canola, sunflower, grapeseed. They clean without heavy scent.
- Is it safe for all finishes? Great on sealed wood and laminate. Go light on matte paints and test a hidden spot first. Avoid raw wood and fresh paint.
- How often should I do it? When the surface looks dull or tacky. Near the stove, monthly is common; elsewhere, every few months is enough.
- What if the grime is really stubborn? Use the oil + baking soda paste. Dab, swirl, wipe damp, then dry buff. Repeat light passes rather than one heavy scrub.


Comments
No comments yet. Be the first to comment!
Leave a Comment