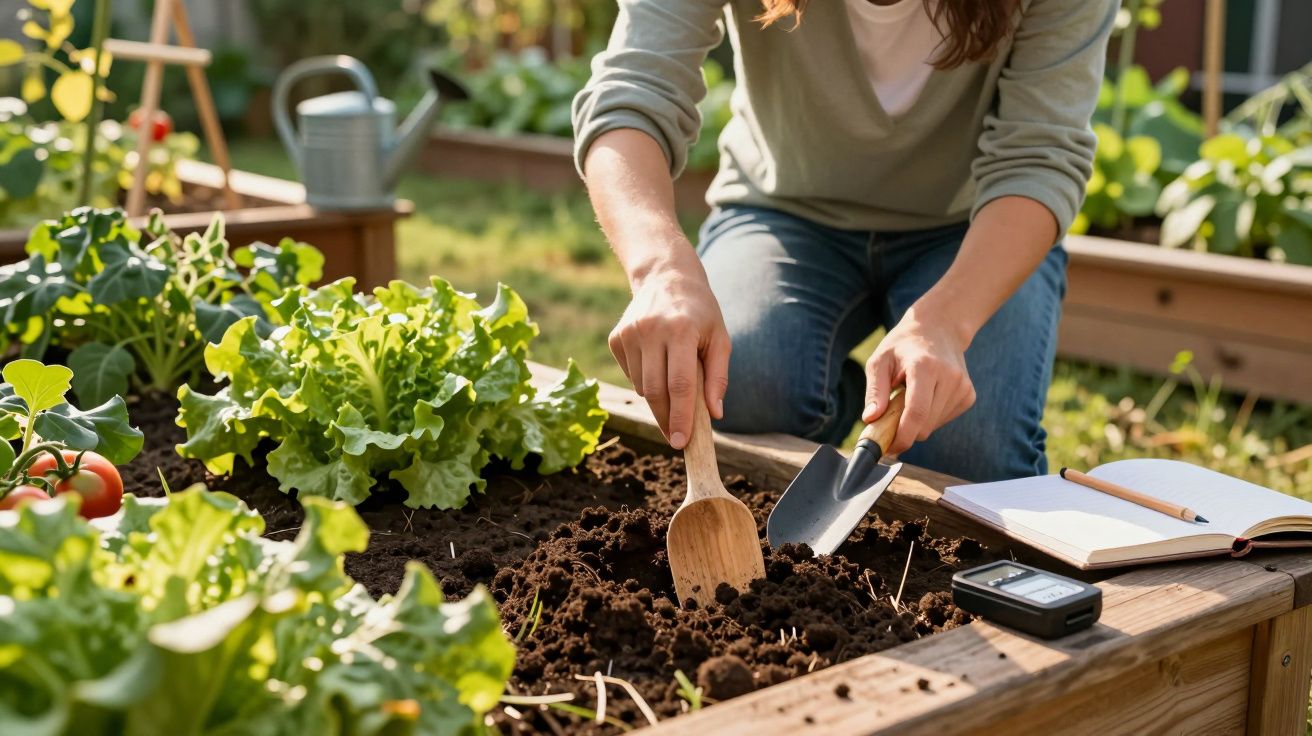
What looks like a quirky tip from garden forums is, in fact, a practical little check: with an ordinary wooden spoon, gardeners can get a feel for how “alive” their soil is and whether they are watering properly. It costs next to nothing, yet it can give surprisingly frank feedback-often in situations where people might otherwise reach for pricey meters.
Why a wooden spoon in the bed can tell you so much about soil life and watering
The idea comes straight from soil science: wood is organic matter. Bacteria, fungi and earthworms naturally break it down. If you push an untreated wooden spoon into the ground and leave it there, what it looks and feels like later provides clues about how actively this “soil organism” is functioning.
A spoon that comes out softened, damaged or partly eaten away usually points to lively, fertile soil-whereas a spoon that looks almost untouched often suggests tired, stressed ground.
Gardeners typically use the spoon in two ways:
- as a quick test of biological activity (soil life)
- as a simple moisture indicator in the root zone
It won’t replace a lab analysis, but it can paint a clear picture of whether your vegetables are enjoying good conditions-or merely coping.
Choosing the right spot for the wooden spoon test
If you shove the spoon into a dry corner at the edge of the bed, you’ll get a distorted result. Pick a location that reflects the “normal” conditions where plants actually grow and are watered.
Good places include:
- the middle of a tomato or pepper bed, where watering is frequent
- between rows of lettuce, which shows drought stress quickly
- a heavily used bed with “hungry” crops such as brassicas (cabbage family)
Avoid areas right beside paths, under overhangs, or in hollows where water pools. In those spots the spoon is more likely to report an extreme rather than everyday reality.
Test 1: Wooden spoon as an indicator of soil life
For the soil life check, the spoon needs to sit deeper-down where most roots and microorganisms are active.
How to do the soil test
- Choose an untreated wooden spoon (no varnish, paint or oil).
- Dig a hole roughly 15–20 cm deep.
- Push the spoon in fully, then firm the soil back around it.
- Mark the spot so you can find it again.
- Leave it in the ground for 30–60 days.
When you dig it up, inspect it closely. Small details matter: cracks, staining, soft patches, frayed fibres, or sections that have broken down.
| Spoon condition | What it suggests about the soil |
|---|---|
| Heavily attacked, fibrous, partly falling apart | Very active soil life, lots of microorganisms, strong humus building |
| Slightly softened, a few feeding marks | Decent, living soil with room to improve |
| Almost like new, hard, hardly any marks | Low biological activity; soil may be nutrient-poor, compacted, or disturbed too often |
An entirely intact spoon is often a red flag. It can indicate a lack of organic matter and a shortage of the tiny habitats microorganisms need. Common causes include repeated deep digging, frequent trampling, or years of relying mainly on mineral fertilisers.
What you can do with the soil-life result
If the spoon is clearly broken down
A noticeably degraded spoon is good news: the soil is processing organic material and making nutrients available. You can maintain that fertility by:
- spreading well-rotted compost regularly
- using grass clippings or leaf mulch to keep the surface covered
- avoiding deep turning and choosing gentle hoeing or loosening instead
This supports stable structure, improves water storage, and helps heavy-feeding crops perform reliably over many seasons.
If the spoon stays hard and almost untouched
If it comes out looking new, take a closer look:
- Intact and dry: low soil life plus lack of water. Add more organic matter, keep a mulch layer, and adjust irrigation. Green manures with deep roots can also help open the soil.
- Intact but damp or slightly mouldy: wet, poorly aerated soil with few organisms-typical of heavy, compacted ground. Repeated compost applications, lighter spade use, and (if needed) better drainage can make a real difference.
If you take the result seriously, it often leads to more effective routines: water less often but more thoroughly, and don’t strip away organic residues-incorporate them carefully or leave them as mulch.
Test 2: Wooden spoon as a moisture indicator for roots
The second use is closer to the surface. Here, the spoon acts as a simple “wood sensor” that reveals whether your watering habits match what’s actually happening around the roots.
How to do the moisture test
- Use an untreated wooden spoon, again with no varnish or paint.
- Push it only about 5 cm deep near the roots-between tomato plants or lettuce, for example.
- Leave it in place for one week and water as you normally would.
- Pull it out and check the surface, colour and smell.
From this, you can infer whether roots are genuinely getting enough water or sitting too dry.
- Spoon pale, dry, almost clean: the soil is too dry, or water is draining away quickly. This can point to small waterings, very sandy soil, or intense sun exposure.
- Spoon very dark, heavy, clammy: likely too much water and prolonged waterlogging, increasing the risk of root rot-especially in sensitive crops such as tomatoes.
- Spoon with mould growth: persistently wet conditions, possibly a compacted layer with too few air pores.
A single wooden spoon can reveal ongoing under-watering or over-watering-exactly where the roots are.
What the spoon test does not control (and what to keep in mind)
The wooden spoon gives a clear signal, but it is strongly influenced by the weather. Cold spells, very dry summers, or long wet periods can change soil activity dramatically. A spoon buried in cool April soil will break down more slowly than one buried in warm July ground.
That is why many gardeners run the test several times a year, or place multiple spoons in different beds at the same time. Patterns quickly emerge: which areas need attention, and which are already functioning well.
Practical examples from everyday gardening
In sandy soils, the spoon often dries quickly and turns lighter again. In that case, building a thicker mulch layer and adding compost regularly can help the soil hold water for longer. In heavy clay or loam, the spoon may come out dark and sticky-suggesting water drains poorly and oxygen is limited.
If you also watch other signs, you’ll get a fuller picture: a crumbly texture, dark soil, plenty of earthworms and visible root remains all suggest active ground. Pale, flattened clods, puddles after rain and very little animal life point to stress-even if plants above ground still look reasonably healthy.
Two extra tips to get more reliable results
First, treat this as a small “repeatable experiment”. Note the date, the bed, the depth and recent weather, and take a quick photo when you remove the spoon. Over time, those notes make it far easier to connect changes (mulching, composting, reduced digging) with improvements in soil life and moisture behaviour.
Second, use a spoon you can sacrifice-and keep hygiene in mind. If you find obvious mould or unpleasant odours, don’t return that spoon to the kitchen. Either dedicate it to the garden for future tests or dispose of it, and wash your hands after handling soil.
Why this simple test pays off in the long run
The wooden spoon forces you to take soil life seriously. If you bury one regularly, you can see the impact of your choices in a tangible way: after a couple of seasons of compost and mulching, does more wood break down than before? Is the soil looser, and does it hold water better?
At the same time, it helps correct watering mistakes. Many hobby gardeners water by feel or by habit. The spoon shows whether water is reaching the root zone as intended-helping you avoid both dried-out lettuce rows and soggy, disease-prone tomato bases.
In the end, the lesson is simple: if you are willing to “lose” a basic wooden spoon to the bed, you gain practical insight into your garden soil-supporting steadier harvests, tougher plants, and less frustration in dry or wet years.


Comments
No comments yet. Be the first to comment!
Leave a Comment