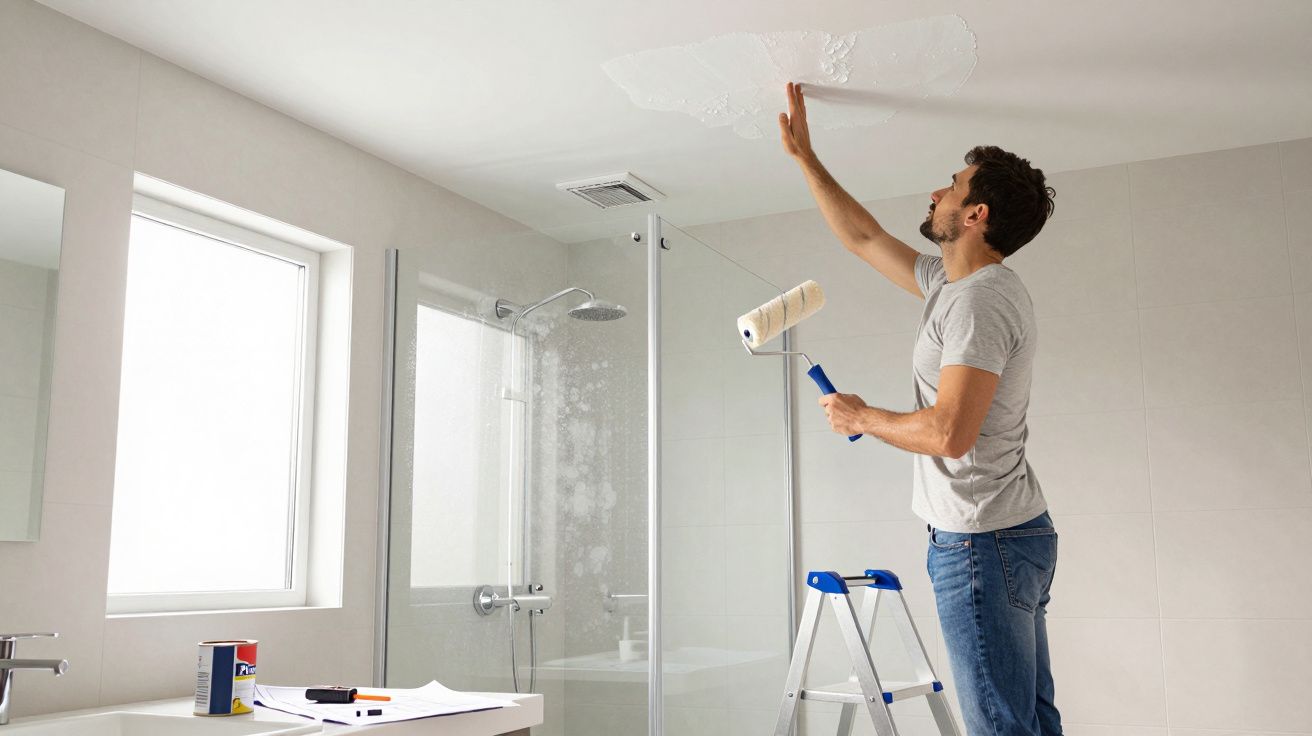
Spring often brings the urge to freshen up your home, and a paint roller is usually the first thing people reach for. A bathroom, in particular, can look instantly brighter and more contemporary with a new coat. Yet many DIYers only discover the problem a year later: choosing the wrong wall paint for a high-moisture room can cause it to literally come away from the surface-showing up as bubbles, flaking, and crumbling patches.
From post-paint pride to a bathroom nightmare
The first few months: it looks flawless
Right after painting, everything seems fine. The finish appears smooth, coverage is good, light bounces around more effectively, and the room can even feel more spacious. In a bathroom, that before-and-after transformation is especially dramatic.
To keep costs down, many people pick up budget tubs from a DIY store-often a standard emulsion intended for dry living spaces. At first, nothing seems amiss. The paint stays put, showers and baths carry on as normal, and there’s no obvious warning sign.
The real damage starts out of sight-within the paint film-well before the first blister appears.
Only after several months do the early clues begin: faint rippling in places, tiny raised spots, and subtle texture changes. Ignore those hints, and the unpleasant surprise tends to follow.
After 6 to 18 months: blisters, bulges, peeling
The most common failure window is roughly 6 to 18 months of everyday use. Then the defects become unmistakable, such as:
- swollen blisters on the ceiling
- bulges and small hollow areas on the wall opposite the shower
- flakes and chips of paint breaking away and falling to the floor
- patchy, dulled areas on walls and ceilings
Two areas usually suffer the most: the bathroom ceiling and the wall zones exposed to direct splash and heavy steam from the shower. In those spots, relative humidity routinely climbs to 80% or more-far beyond what ordinary wall paint can tolerate long term.
Why bathroom paint peels: what’s really happening
Moisture gets behind the paint film
This problem is rarely about “poor technique” or “using the wrong roller”. The deciding factor is the combination of damp air, warmth, and unsuitable paint.
Every shower fills the room with dense water vapour. That moisture-laden air presses into microscopic pores and tiny weaknesses in the coating. Once vapour makes its way behind the paint, the failure mechanism typically unfolds like this:
- Steam condenses on cooler surfaces such as ceilings and external walls.
- Moisture migrates into hairline cracks and unprotected edges.
- The paint layer absorbs water from behind, swells, and loses adhesion.
- Blisters form and then burst under pressure or continued damp exposure.
In the end, paint can detach in larger sheets, the substrate shows through, and the whole finish looks like a temporary bodge rather than a proper renovation.
What NF EN 13300 has to do with your bathroom
Interior paints are commonly grouped by performance classes. In damp rooms, the key requirement is resistance to water and water vapour. That is where the NF EN 13300 standard becomes relevant, which many manufacturers print on the container.
Only use paint that is explicitly approved for damp rooms and has a high resistance class against water.
If you shop based only on colour and price, it’s easy to make the classic mistake: standard wall paint instead of proper damp-room or bathroom paint. Safer options are:
- Glycol resin (solvent-based) bathroom paint (often tougher, but with a stronger odour), or
- a specialist acrylic paint for damp rooms, clearly labelled on the tin.
The crucial difference is the formulation: it contains resins designed to repel water vapour and stop moisture travelling behind the paint film. That single factor can extend the life of the finish dramatically.
Protect your bathroom long term: stop blisters and mould before they start
Primer (Grundierung/Haftgrund) is almost non-negotiable in a bathroom
Rolling paint straight onto an old surface may feel like a shortcut, but it’s usually false economy. With plasterboard, freshly filled areas, or older weakened coatings, you’ll typically need the right primer (Grundierung) or bonding primer (Haftgrund).
A damp-room primer or dedicated adhesion primer helps by:
- stabilising the substrate so it doesn’t soak up paint like a sponge
- sealing pores and micro-cracks that moisture could later exploit
- improving coverage so the topcoat looks even
- boosting adhesion to reduce future flaking and peeling
On ceilings and in the shower area, an extra moisture-resistant first coat is especially worthwhile. You won’t “see” that effort when it’s done-but you’ll notice it years later when the finish still looks calm and intact.
Even the best bathroom paint can’t fix a ventilation problem
Paint systems can offset a lot, but they cannot overcome a persistently wet microclimate. If the room becomes saturated after every shower and rarely gets fresh air, failure is only a matter of time. This is where a practical, technical solution pays off.
Aim for ventilation that exchanges enough air consistently. As a rule of thumb, a typical bathroom should extract around 30 cubic metres of air per hour (30 m³/h). In everyday terms, it means steam clears quickly instead of soaking into ceilings and walls.
If your mirror clears again within a few minutes after showering, humidity control is usually heading in the right direction.
A working extractor fan, adequate make-up air (so air can actually enter the room), and regular short, wide-open window ventilation can keep humidity below the critical threshold of around 65% relative humidity. Below that level, both paint and plaster tend to last significantly longer.
Two coats, cross-rolled-and allow proper curing time
Applying paint looks straightforward, but many failures come down to one detail: drying and curing. Bathroom paint needs time to harden properly.
A proven approach is:
- apply the first coat evenly, without overworking the surface
- allow at least 24 hours to dry completely; use the bathroom as little as possible
- apply the second coat at right angles to the first (cross-rolling)
- wait another full day before taking hot showers
Cross-rolling tightens the film, closes minor weak spots, and creates a more durable barrier against vapour and condensation.
Extra consideration: sheen level, cleaning, and keeping mould at bay (added)
When choosing bathroom paint, it’s also worth considering finish and maintenance. A slightly higher sheen (often described as silk, satin, or soft sheen) is generally easier to wipe clean and less likely to hold grime than a dead-matt finish. That matters around sinks and near shower zones where residue can build up.
Also remember that mould prevention is largely moisture management plus hygiene. Wipe down wet tiles and silicone edges after showering, keep toiletries and towels from blocking airflow, and deal promptly with any recurring black spotting-paint can mask marks temporarily, but persistent mould usually signals ongoing humidity or cold-bridging that needs addressing.
What to check before your next bathroom project
Spot issues early rather than repainting everything later
If you can already see bubbling, hairline cracking, or dull, chalky patches in your bathroom, it’s worth investigating now. Typical warning signs include:
- soft blisters that can be pressed in
- areas that sound hollow when tapped
- dark shadows or stains with no obvious direct water contact
- mirrors and windows fogging heavily even after a short shower
The sooner you act, the less surface you’ll need to sand back or rebuild. Often it’s enough to remove damaged sections cleanly, fill and smooth them, apply primer (Grundierung/Haftgrund), and then repaint using proper bathroom paint.
Practical planning tips for a smoother renovation
If you’re renovating in spring or summer, a few simple decisions can prevent a lot of hassle:
- In the DIY store, ask specifically for “bathroom paint” or “damp-room paint (Feuchtraumfarbe)” rather than choosing purely by colour.
- Check the stated resistance to water and wet scrubbing, not just “high opacity”.
- Inspect the extractor fan: does it work, does it run on long enough, and is the airflow path clear?
- While painting, keep at least one window slightly open or create airflow so moisture can leave the room.
- Between coats, avoid showering in the bathroom so the drying process isn’t interrupted.
Approach a bathroom project this way and you avoid the frustrating scenario of returning a year later with filler, sandpaper, and a roller. The combination of the right bathroom paint, solid preparation, and consistent ventilation turns a quick cosmetic upgrade into a finish that stays sound for years-without blisters, cracks, or peeling.

Comments
No comments yet. Be the first to comment!
Leave a Comment