Many amateur gardeners give away a chunk of their harvest every year-simply because they don’t know an astonishingly easy cup method for their raspberry bush.
Anyone who has picked their own raspberries from a garden bed or a container knows the difference: nothing matches the flavour of berries eaten straight from the cane. Yet all too often the canes look sparse, bowls stay half-full and the disappointment is real. With a straightforward trick that uses an ordinary cup and coffee grounds, savvy gardeners help their bushes hit peak form in spring-and reliably end up with noticeably more fruit.
Why raspberries often crop less than they could
Raspberries are generally easy-going, but they do need the right basics to produce heavily. Many plants get enough water and light, yet the soil conditions are off-then growth stays thin and the berries remain small.
- Raspberries prefer slightly acidic soil
- The position should be airy, but not exposed to harsh draughts
- The ground needs to be loose and rich in humus
- Regular feeding encourages more flowers and fruit
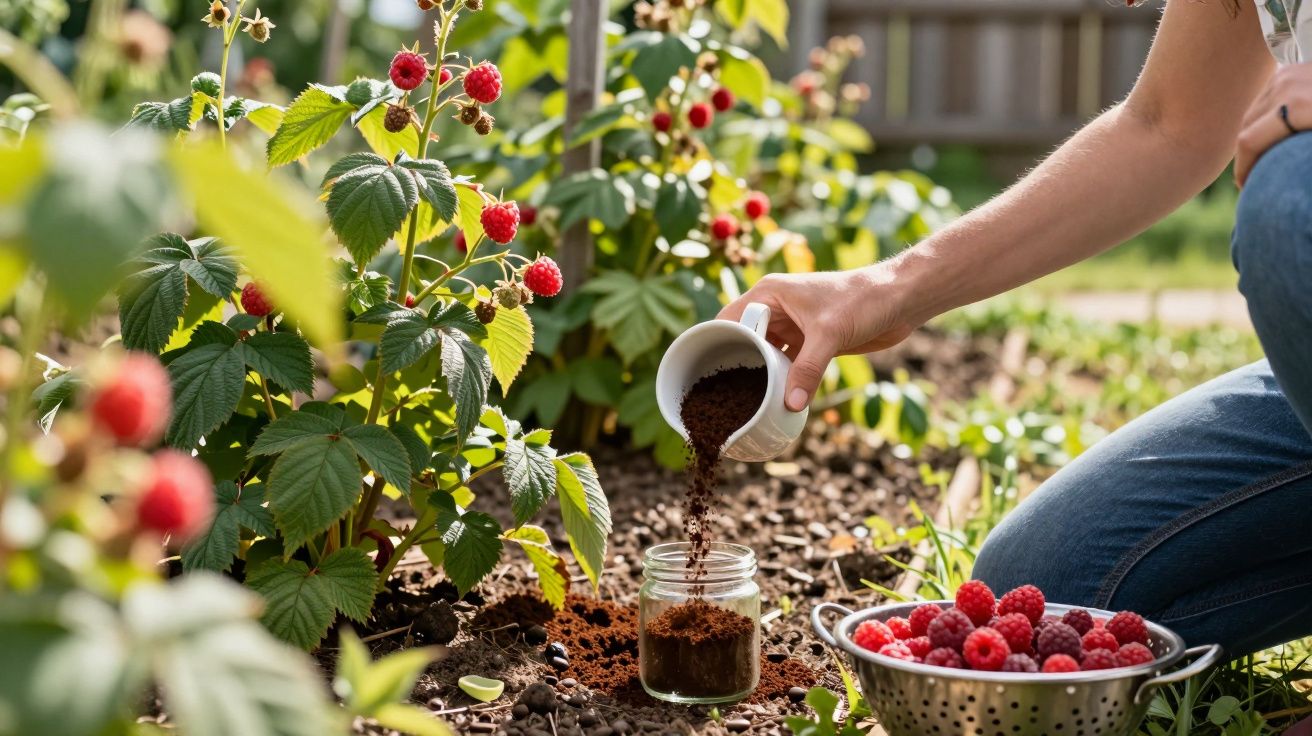
This is exactly where the trick comes in: instead of buying pricey specialist feeds, you can use something many households generate every day-coffee grounds. The cup simply helps you put the right amount in the right place.
The cup method with coffee grounds works like a natural turbo boost for healthy, high-yielding raspberry bushes.
The raspberry bush cup method: how the spring trick works
The best time to use the cup method is in spring, once the soil is free of frost and the first buds are starting to show. At that point the plant is funnelling energy into new growth-ideal timing to give it targeted support.
Step 1: Prepare the coffee grounds properly
Fresh grounds from a coffee machine or French press are still damp and can go mouldy if you tip them straight on in larger amounts. A short drying period is the better option.
- Spread the used grounds out on a plate or baking tray.
- Leave them to air-dry for 1–2 days.
- Turn them now and again so they don’t clump together.
Once dry, the grounds still smell pleasantly of coffee, but they no longer stick in a wet mass and are much easier to apply evenly.
Step 2: Measure with a cup
A cup acts as a simple, always-to-hand measuring tool. There’s no weighing-just adjust the amount to suit the size of your raspberry bush.
| Size of raspberry bush | Amount of coffee grounds (cups) |
|---|---|
| Young plant in a container | ¼–½ cup |
| Medium bush in a bed | 1 cup |
| Large, established bush | 1–2 cups, spread over several spots |
Important: don’t pile the coffee grounds right up against the base of the plant. Apply them in a loose ring around it so the nutrients reach the fine feeding roots more effectively.
Step 3: Work in and cover
To get the best effect, incorporate the grounds lightly into the top layer of soil.
- Gently loosen the soil around the bush with a hand hoe
- Scatter the “cup ring” of coffee grounds
- Rake in lightly so it mixes with the soil
- Finish with a thin layer of mulch (leaves, grass clippings, bark mulch)
Mulch helps stop the soil drying out and ensures nutrients are released more slowly and evenly.
Why coffee grounds work so well for raspberries
Coffee grounds naturally contain several things raspberries appreciate: plenty of nitrogen, a little potassium and various trace elements. That combination supports multiple processes in the plant at once.
Coffee grounds act like a mild, long-lasting feed that stimulates growth without “scorching” the plant.
More leaf growth, stronger canes
The nitrogen in coffee grounds promotes robust, deep-green foliage. A healthy leaf canopy means more photosynthesis-so more energy for flowers and fruit. Canes also become sturdier, bend less easily and can carry more weight when the berries set.
Soil structure improves noticeably
Coffee grounds help keep the soil open and also serve as food for soil life. Earthworms, bacteria and fungi break the material down gradually. Over time, you get humus-rich, crumbly soil that holds moisture well while still draining excess water-exactly what raspberries prefer.
Unwanted visitors are discouraged
Many gardeners report fewer slugs, ants and certain other pests in beds where coffee grounds are used. The slightly gritty texture and some of the natural compounds appear to make the area less appealing. It won’t replace proper barriers, but it can significantly reduce the number of nibblers and slime trails around your raspberries.
Common mistakes when using the method-and how to avoid them
Useful as the cup method is, it still needs a bit of restraint. Too much coffee grounds at once can compact on the surface and form a crust.
- Don’t overdo it: several smaller applications through the year are better than one thick layer in spring
- Never apply soaking-wet grounds: always let them dry a little first
- Keep away from tender new shoots: leave a small gap every time
- Mix with other materials: combine with compost or mulch rather than laying down thick, pure layers
Following these points greatly reduces the risk of mould, poor aeration in the topsoil and unwanted shifts in pH.
Coffee grounds versus traditional fertiliser
Garden centres are full of specialist feeds for soft fruit. Many contain similar nutrients to coffee grounds, just in a more concentrated form. The advantage of coffee grounds is that they’re free, already available, and they feed more gently.
For a typical home garden, regular use of coffee grounds is often enough to grow healthy, productive raspberries.
If you’re dealing with very nutrient-poor sandy soils or badly exhausted ground, you can pair the cup method with a small amount of organic berry fertiliser. That gives the plants a broader nutrient base while still keeping feeding steady and mild.
Two extra points that make the cup method even more reliable
If you’re growing raspberries in containers, pay close attention to drainage. Coffee grounds and mulch help with moisture retention, but pots can become waterlogged if drainage holes are blocked. Use a free-draining compost mix, keep saucers from holding standing water, and loosen the surface occasionally so air can reach the roots.
It’s also worth being careful about what ends up in your grounds. Coffee itself is fine, but avoid tipping in leftovers that contain sugar, syrups or milk, as these can attract pests and encourage unwanted growths. Plain used grounds-dried and applied as described-work best.
More practical tips for a big raspberry harvest
The cup method alone won’t guarantee record yields. It works best when it’s part of solid, everyday care.
Prune and tie in correctly
Old canes that have finished fruiting should be removed, while strong new shoots are kept. That lets more light reach the young canes and reduces the chances of fungal problems. A simple support of posts and wires keeps growth upright and improves air flow.
Water well-especially during flowering
Raspberries have shallow roots and are quick to suffer in dry conditions. During flowering and as fruit forms, they need consistent moisture. A mulch layer alongside lightly worked-in coffee grounds helps the soil hold water for longer.
How often should you fill the cup? A rhythm that works
In many gardens, a straightforward routine has proved effective:
- First cup: in early spring, as soon as the buds begin to swell
- Second application: shortly before flowering
- Third, smaller application: after the main crop, to strengthen the plant for the next season
If you drink coffee daily, you’ll usually have enough grounds not only for raspberries but also for other plants that enjoy slightly acidic conditions-such as blueberries, hydrangeas or roses.
What to know if you’re new to gardening with coffee grounds
Plenty of people still throw coffee grounds in the bin because they see them as waste. In the garden, they gradually become a valuable soil improver. If you have a compost heap, you can add coffee grounds regularly in thin layers. Compost microorganisms transform the brown material into fertile, usable compost over time.
Another useful point: most of the coffee’s acidity ends up in the drink, not in the grounds. Dried coffee grounds are therefore only mildly acidifying and won’t push the pH down too aggressively-one of the reasons they suit raspberries so well.
If you have several bushes, it’s easy to see the impact of the cup method: feed one group with coffee grounds consistently and leave another group without. After just one season, you’ll usually notice clear differences in vigour, leaf colour and the size of the harvest. These small, practical tweaks are exactly what can turn an average patch into a raspberry hotspot year after year.


Comments
No comments yet. Be the first to comment!
Leave a Comment