A small, almost unnoticed change is putting an end to a familiar kitchen irritation.
Anyone who cooks every day knows the scene: plates piling up, damp worktops, and a bulky dish drying rack parked right beside the sink. A growing trend is tackling that exact spot - and it’s surprisingly straightforward: the traditional dish drying rack is moving off the worktop and on to the wall.
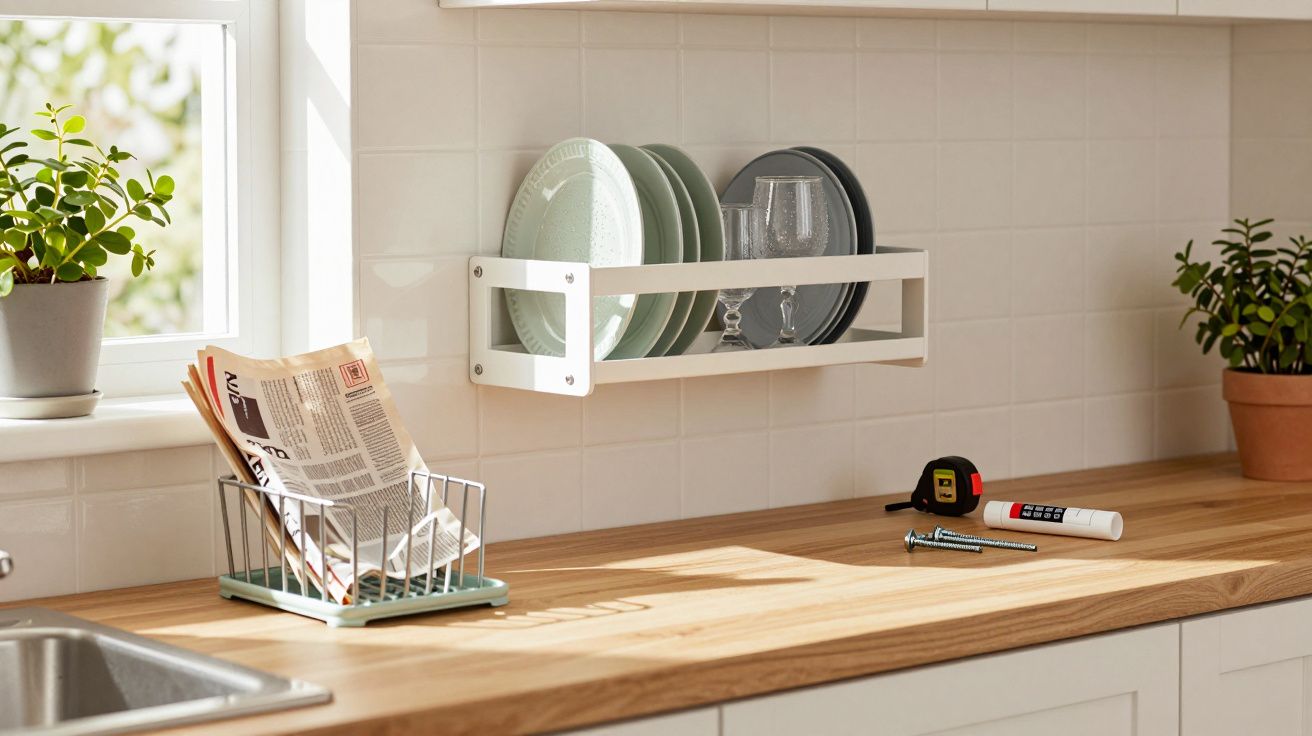
The new trend: a wall-mounted dish drying rack instead of a worktop rack
Rather than keeping a clunky rack on the work surface, more and more households are fitting a purpose-built wall shelf above the sink or directly next to it. The crockery dries in the open air, and the space underneath stays clear for actual cooking.
It sounds like a minor tweak, but it changes how the kitchen feels day to day. Once you’ve reclaimed the corner beside the sink as usable worktop, most people don’t want to go back.
Why the traditional dish drying rack is starting to annoy people
For years, the dish drying rack has felt as essential as the cooker and fridge. But many only realise how inconvenient it is when they try living without it. Kitchen designers and fitters hear the same complaints time and again:
- Constantly damp surfaces: Water collects underneath the rack. Marks appear, laminate can swell in the worst cases, and silicone sealant can discolour.
- Visual clutter: Plates, mugs, plastic containers - everything sits out in the open. Even a tidy kitchen can look busy and unsettled.
- Lost worktop space: In smaller kitchens especially, the rack steals valuable prep space you need while cooking.
There’s another drawback that’s easy to underestimate: food residue, limescale and grease can build up in the rack’s gaps and joints. If you don’t regularly scrub it with a brush and cleaner, it can quickly become a not-so-lovely bacteria haven right next to the sink.
The dish drying rack has been the default for decades - but in modern, often smaller kitchens, it simply no longer fits everyday reality.
Benefits of moving the drying area on to the wall
A well-designed wall-mounted draining shelf is more than a “tidier” version of the same thing - it changes the workflow around the sink.
The key advantages at a glance
- More usable worktop: The area by the sink is finally free for a chopping board, blender or ingredients instead of being blocked by a rack.
- A drier sink zone: Many wall models channel drips straight back into the sink - no puddles and far fewer water marks.
- A calmer look: Plates and glasses sit neatly in sections, often slightly higher up, which looks more organised than a jumble at eye level.
- Impressively practical storage: Good systems hold up to around 10 kg and include separate spaces for plates, bowls, cups and cutlery.
- Straightforward installation: Depending on the model, it’s either a drilled fix into the wall or (for lighter options) heavy-duty adhesive pads/strips.
This is particularly effective in fitted kitchens with narrow worktops, where every centimetre counts. Even in rented homes, many landlords would rather see a properly installed wall solution than a wooden worktop gradually damaged by constant moisture.
What to consider before buying a wall-mounted draining shelf
Before you order, it’s worth checking dimensions, materials and the type of wall you’ll be fixing into. Not every wall-mounted dish drying rack suits every kitchen.
Step 1: Measure the available wall space
Measure carefully above the sink or to the side of it:
- Width between a wall unit and the side wall (or any adjacent cabinet)
- Height between the worktop and the underside of the wall units
- Clearance around the tap, so nothing knocks or restricts movement
For one- or two-person households, a slimmer rack is often enough. For families dealing with stacks of plates, lunchboxes and cups, wider double-tier racks tend to work better.
Step 2: Check weight capacity and design
Manufacturers typically state a maximum load. As a practical guide:
| Household | Recommended load capacity | Recommended width |
|---|---|---|
| Single | up to about 5 kg | 40–50 cm |
| Couple | 6–8 kg | 50–70 cm |
| Family | 8–10 kg | 70–90 cm |
If you regularly hand-wash large saucepans or heavy glass dishes, it’s wise to size up and choose a model with solid screw fixings rather than relying on lighter mounting hardware.
Step 3: Choose materials with hygiene in mind
Two material types are especially popular:
- Stainless steel: Low rust risk, durable, easy to wipe clean - ideal for frequent use and humid kitchens.
- High-strength plastic: Lighter, often cheaper, available in various colours - well suited to smaller households.
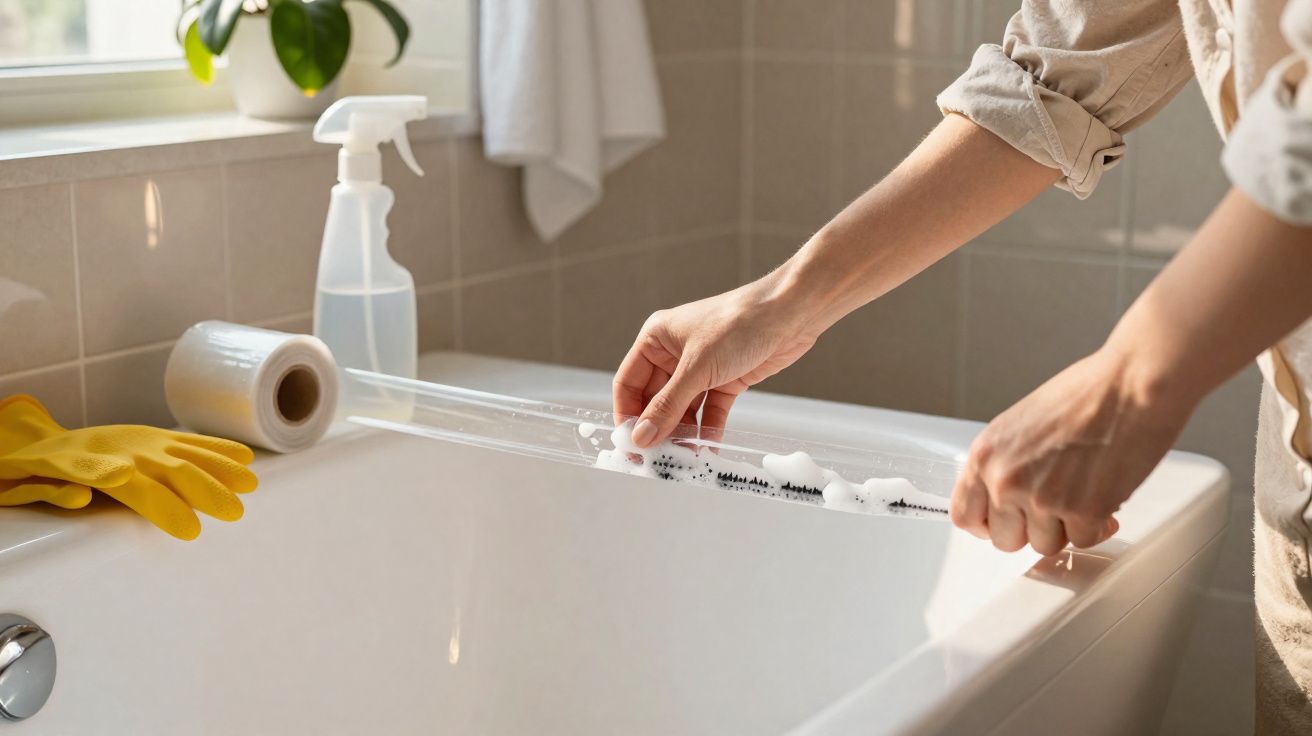
Look for removable drip trays or built-in channels that guide water straight into the sink. That keeps nearby tiles, grout lines and sealant drier - and reduces the chance of mould forming in persistently wet corners.
Installation: adhesive or drilling?
Whether you need to drill depends mainly on your wall surface and how much weight the rack will carry.
- Drilling: The most secure option for tiles, concrete or brick. Best for heavier metal racks and higher load ratings.
- Adhesive fixing: Only suitable for lightweight models and smooth, well-bonded tiles. A good choice for renters who want to avoid holes.
Adhesive systems only work if the surface is completely free of grease and soap residue. If you’ve been cleaning or washing up nearby, wipe the area thoroughly and finish with an alcohol-based cleaner before applying any pads or strips.
The higher the load rating, the more sense it makes to use wall plugs and screws - otherwise plates and glasses can end up in the sink sooner or later.
When the switch is genuinely worth it
A wall-mounted dish drying rack is particularly useful in three common situations:
- Tiny city kitchens: Every square centimetre of worktop matters.
- Open-plan kitchens: If you can see the sink from the sofa, you’ll appreciate less visible clutter.
- Families doing lots of hand-washing: Without a better system, items can stack up beside the sink very quickly.
Many people say that after a few days they stop thinking about it - reaching up for a plate becomes as normal as opening a wall unit.
Common risks and mistakes - and how to avoid them
The idea is simple, but there are a few recurring pitfalls:
- Overloading the rack: If you store more than the rated capacity, screws can loosen or pull out of the wall.
- Fixing into the wrong surface: Thin plasterboard won’t hold standard wall plugs reliably. Use suitable cavity fixings if you’re mounting on plasterboard.
- Poor positioning: If it’s installed too high, sliding in heavy plates becomes awkward and tiring.
If you’re unsure, follow installation guides specific to your wall type or ask an experienced DIYer for a quick second opinion. A careful first install saves a lot of hassle later.
How it changes your kitchen routine
The biggest difference is in everyday flow: wash a few items, place them straight into the wall rack, and let the water drip back into the sink - while the worktop stays clear. When you cook, you don’t have to shuffle a rack around just to make space.
Many people pair the wall system with a small foldable silicone draining mat that only comes out when needed - for example, for large baking trays or frying pans. Afterwards it folds away into a cupboard, while the wall-mounted draining shelf remains the default for everything else.
There’s also a subtle behavioural benefit: when fewer items are scattered across the worktop, people tend to put things away faster. The kitchen looks tidy for longer, even after a rushed dinner.
Extra considerations: ventilation, style and long-term upkeep
A wall-mounted draining rack works best when there’s decent airflow. If your rack sits tight under a deep wall unit, consider a model with more open wire spacing or ensure the area dries fully after heavy use - particularly in winter when windows stay closed.
Aesthetics matter too. Stainless steel suits most modern fitted kitchens, while white or charcoal plastics can blend into minimal schemes. Some systems also include add-ons like a detachable cutlery cup, a chopping board slot or hooks for dish brushes - small details that can reduce clutter around the sink even further.
Practical verdict: a small change with a big day-to-day payoff
The move towards a wall-mounted dish drying rack isn’t a flashy gadget - it’s a straightforward, practical response to a common problem: too little space and too much visible mess around the sink. If you’re willing to drill (or carefully use adhesive fixings for a lighter model), you can end up with a kitchen that feels more open, stays drier, and looks more structured - without a major renovation.


Comments
No comments yet. Be the first to comment!
Leave a Comment