Then comes that soft rip of paper that refuses to play along. You tug, the sticker tears, and a miserable grey ring of glue stays fused to the surface. The mug feels spoiled, the laptop suddenly looks tacky, and a new window somehow seems old. A tiny bit of paper has just beaten you.
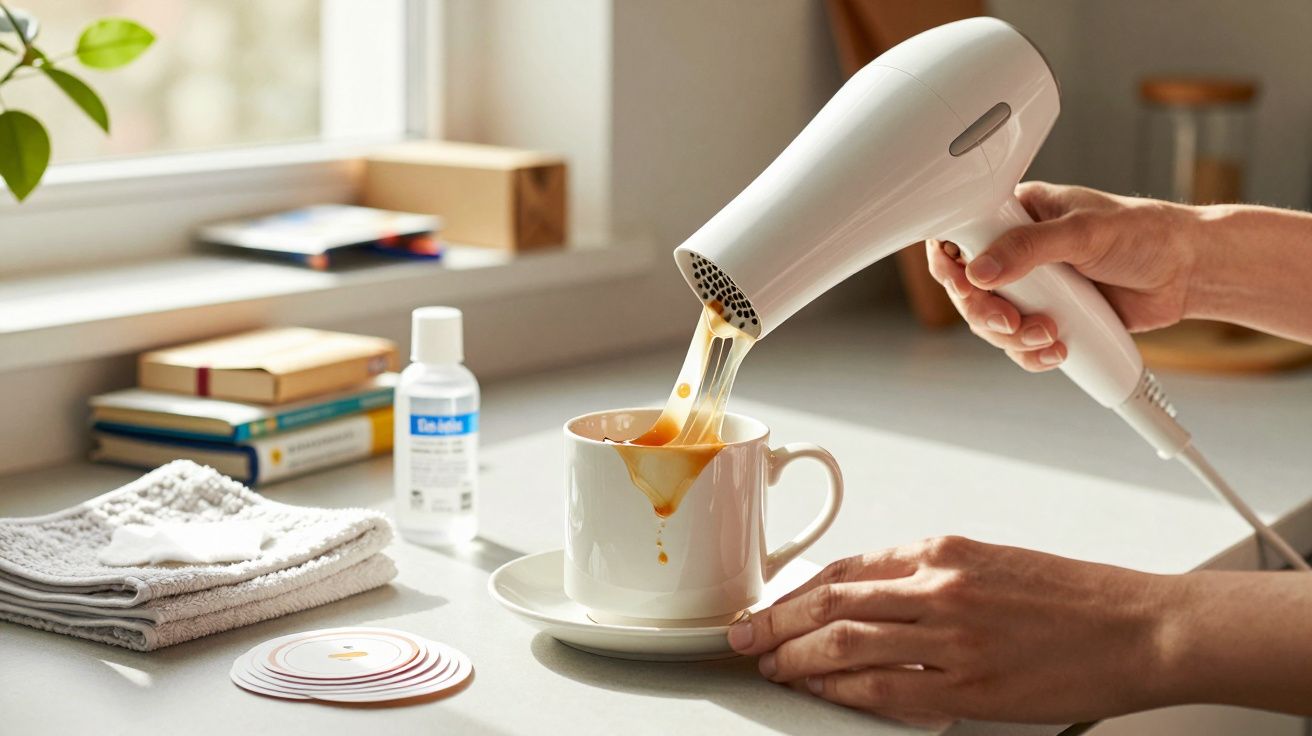
Someone inevitably says, “There must be a trick for this,” and-almost automatically-reaches for the hair dryer. A rush of warm air, a few seconds of humming, and the edge of the sticker starts to lift as if it’s had a change of heart. The adhesive turns pliable rather than spiteful. Before you know it, the whole label slides off in one smooth, oddly satisfying peel.
The surface underneath is clean and untouched, as though nothing ever happened. The “tool”? The same thing you use to dry your hair before leaving for work.
Why a hair dryer beats your fingernails every single time
The secret is as straightforward as it gets: heat. Most everyday labels and stickers rely on pressure-sensitive adhesives that stay firm at room temperature. When they’re cool, they grip hard-almost like they’ve locked into place. Warm them gently and they soften just enough to release without turning into confetti.
A hair dryer gives you that warmth in a controlled, targeted way. It’s far less aggressive than a heat gun and much less chaotic than sloshing hot water everywhere. Hold it a few centimetres away, sweep the airflow side to side, and you can practically watch the sticker relax. The material underneath stays protected while the glue quietly gives up.
Your hands notice the change immediately. Instead of that dry, brittle tearing, the edge bends and stretches slightly-then peels away in a single ribbon. It’s the sort of small household win that improves your mood out of proportion to the effort involved.
One cold Saturday morning I watched a friend battle a huge price label stuck squarely in the middle of a brand-new glass frame. Fingernails, a credit card, hot water-nothing helped. The label broke into jagged scraps, and every new attempt smeared the glue into a greasy film.
Finally, fed up, she fetched a hair dryer from the bedroom. After about 30 seconds on a medium setting, held roughly 5–10 cm away, the edges of the label began to lift and slightly blister. She pinched one corner and pulled. The entire rectangle came away in one go, leaving clear glass-and a look of genuine disbelief.
Later she laughed and said, “I’ve been scrubbing stickers off things my whole life and the answer was sitting in my bathroom drawer.” That’s exactly why this method spreads so quickly in real conversations, long before anyone bothers to search for it.
There’s also a perfectly ordinary bit of science behind this domestic “miracle”. Most sticker adhesives are made from blends of polymers, resins and plasticisers. At everyday temperatures, those materials hold tightly to both the label backing and the surface beneath, creating a bond that resists casual peeling. That’s why a cold sticker feels stiff and stubborn.
Introduce controlled heat and those molecules become more mobile. The adhesive turns more elastic and less glass-like, and its grip weakens just enough. You’re not melting the glue away-you’re changing its behaviour. It moves from “locked on” to “rubbery and cooperative”.
That’s where the hair dryer shines: it delivers moderate heat quickly without cooking what’s underneath. The adhesive softens before the plastic, paint, glass or finish has time to complain. In other words, you soften the glue-not the object.
How to remove stickers with a hair dryer without wrecking anything
Keep it uncomplicated. Plug in the hair dryer and choose medium heat with a medium airflow. Hold it around 5–10 cm from the sticker and move it slowly from side to side. The aim is to warm the whole area evenly, not scorch one tiny point.
After about 20–40 seconds, pause and test a corner with a fingernail or a plastic card. If it lifts without a struggle, start peeling. If it still feels stiff, give it another 20 seconds of heat. Pull steadily and slowly, folding the sticker back over itself at a low angle. That low angle matters because it drags the adhesive along the surface rather than yanking it straight up.
If the label is particularly stubborn, work in a cycle: 30 seconds of heat, peel a little, then another 20 seconds of heat. The trick is rhythm, not force.
Most people run into trouble not because they’ve chosen the wrong tool, but because they rush. They crank the dryer to maximum, hold it almost touching the surface, and then wonder why plastic warps or paint starts to look dulled. Or they pull too hard too soon, shredding the sticker before the adhesive has properly softened.
Treat it as a “feel” job rather than a military operation: warm, test, peel. Several short bursts work better than one long blast of hot air. If you’re dealing with something delicate-like a laptop lid, a guitar finish, a baby toy or a painted wall-err on the cautious side with lower heat and more passes.
And let’s be honest: nobody actually practises this every day. The first attempt might feel a bit awkward, and that’s fine. You’ll know you’ve nailed it when the sticker lifts in one piece and you no longer hear that dry, cracking tear.
“I used to scrape stickers with knives and always ended up scratching the surface,” a reader told me. “With the hair dryer, the glue stops feeling like cement and starts feeling like warm chewing gum. That’s when I know it’s ready.”
That comparison-glue changing from cement to warm gum-is the exact sign to look for. After the label is gone, you may still be left with a faint sticky film. At that stage, you’re no longer battling the sticker, just the remaining adhesive.
- For glass and ceramics: a little cooking oil or rubbing alcohol on a cloth usually finishes it off.
- For painted or plastic surfaces: use mild soap with warm water, and avoid harsh scrubbing.
- For wood: use a tiny amount of oil on a soft cloth, and always test first in an inconspicuous area.
- Short bursts of heat, gentle movements and patience will beat any aggressive scraping tool.
Extra tips for sticker removal with a hair dryer (labels, price tags and packaging residue)
If you’re working on items you care about-gift boxes, framed prints, books, or anything with a glossy finish-take a moment to reduce the risk of marks. Use a plastic card rather than a metal blade, and try to peel slowly enough that the sticker comes away as a single sheet. If the label starts tearing, stop, reheat, and continue rather than “winning” by force.
For larger stickers, it often helps to warm the centre briefly as well as the edges. Adhesive can hold most strongly in the middle where pressure was applied during manufacturing or packing. A quick, even sweep across the whole label makes the peel more consistent and reduces the chance of leaving a patchy glue halo behind.
When a hair dryer becomes a tiny act of control in a messy world
There’s something quietly rewarding about beating a stubborn sticker using nothing more than warm air and a bit of patience. Life is full of big, vague problems you can’t solve in an afternoon; this is one small battle you can win. Heat, peel, clean surface-and the object feels like it belongs to you again, not branded or tagged by someone else.
We all recognise the annoyance of leftover glue rings. Price labels stuck on gifts. Barcode stickers on book covers. Security labels on electronics that refuse to budge. We’ve all had that moment where a simple purchase turns into a 15-minute clean-up you never agreed to. Sharing the hair dryer method feels like passing along a small survival code.
Yes, it’s a domestic hack-but it’s also a quiet way of reclaiming your things from the endless packaging and marketing that clings to nearly everything we buy.
| Key point | Detail | Benefit for the reader |
|---|---|---|
| Warming the adhesive | The hair dryer softens the glue without damaging the surface | Remove stickers in one piece, with minimal marks |
| Gradual movement | Heat in short sessions, then pull slowly at a low angle | Reduce tearing and keep control of the peel |
| Gentle finishing | Oil, alcohol or soap to remove leftover adhesive | A truly clean surface, ready to reuse or give as a gift |
FAQ:
Can a hair dryer damage plastic or paint?
Yes-if you use maximum heat too close for too long. Stick to medium settings, keep a few inches (about 5–10 cm) away, and keep the air moving to protect the surface.How long should I heat the sticker before peeling?
Begin with 20–40 seconds and test a corner. Repeat in short bursts until the sticker feels soft and lifts easily instead of cracking or tearing.Does this work on car stickers and bumpers?
Often, yes-especially with newer stickers-but be careful with car paint. Use low to medium heat, increase the distance, and test a small area first.What if glue residue stays after peeling?
Use a soft cloth with a little cooking oil, rubbing alcohol or mild soapy water depending on the surface. Rub gently and wipe clean rather than scrubbing hard.Is a heat gun better than a hair dryer for this?
A heat gun is stronger, but it’s also much riskier on delicate finishes. For most household jobs, a hair dryer provides enough heat with far less chance of warping or damage.


Comments
No comments yet. Be the first to comment!
Leave a Comment