Does your loaf cake smell heavenly, but come out of the oven disappointingly flat?
Three quick tweaks during prep can change that straight away.
Plenty of home bakers will recognise the pattern: you mix the batter carefully, grease the tin, preheat the oven - and yet the cake comes out flat as a board. The good news is that it’s rarely a lack of skill. More often, it comes down to a few overlooked details involving the butter, the tin, and how the bake gets started. A pastry chef shares a surprisingly simple approach that helps a loaf cake rise reliably and develop that distinctive “bakery bump” right down the centre.
Why a cake can stay flat even with baking powder
Baking powder is often treated as a guarantee that batter will rise. In reality, you can end up with a cake that smells wonderful and browns nicely on top, yet still has a tight, heavy crumb. The cause is usually a combination of two things: heat being managed poorly, and a crust that sets too quickly.
Baking powder is triggered by warmth. If the raising gases form too early and escape, there’s very little “lift” left when the cake actually needs it in the oven. At the same time, the top can firm up into a crust that effectively pins the batter in place. Instead of doming neatly upwards, the cake may split at the side - or simply never gains height.
"If you manage the heat so that baking powder and crust formation work together at the right moment, you’ll get an airy cake with a pronounced dome in the middle."
That is exactly what the pastry chef’s three tricks are designed to influence: when the baking powder does its job, how soft the batter stays in the centre, and where the mixture is able to push upwards.
Three simple steps for a loaf cake that visibly rises
1) Use butter that’s only lukewarm, not hot
A common mistake is melting the butter completely and adding it to the batter while it is still very hot. It feels convenient, but it throws the baking powder out of sync. The raising reaction can start in the bowl or immediately after the batter goes into the tin - before the oven heat can do its real work.
A better approach is to melt the butter, then leave it for a few minutes until it is just lukewarm. It can remain liquid, but it should feel pleasant on your finger rather than scorching.
- too-hot butter: the baking powder kicks off early, and the cake later sinks
- too-cold butter: the batter turns stiff, combines poorly, and you lose air bubbles
- lukewarm butter: the batter stays smooth and the baking powder works at the right time in the oven
This tiny adjustment shifts the moment the batter “starts producing gas”. The lift is then available precisely when the oven heat takes effect - which is when the cake actually needs to grow.
2) Add a strip of butter or oil along the centre of the tin
The second move is almost ridiculously simple: once the batter is in the tin, run a thin stripe of soft butter or a narrow drizzle of neutral vegetable oil lengthways down the middle, from one end to the other.
What sounds like a gimmick has a clear purpose. That extra line of fat keeps the central zone softer for longer. The edges of the tin heat up first, so a firm crust forms there quickly. Along the middle, the film of fat delays the surface setting slightly - giving the batter a “softer route” where it can expand upwards.
"The fat stripe down the middle acts like an ‘ascent ramp’ for the batter - this is where the cake domes upwards."
The result is the familiar, even bulge in the centre you expect from a good butter loaf cake, marble cake, or lemon cake. It also looks more professional, and the slices tend to cut more neatly.
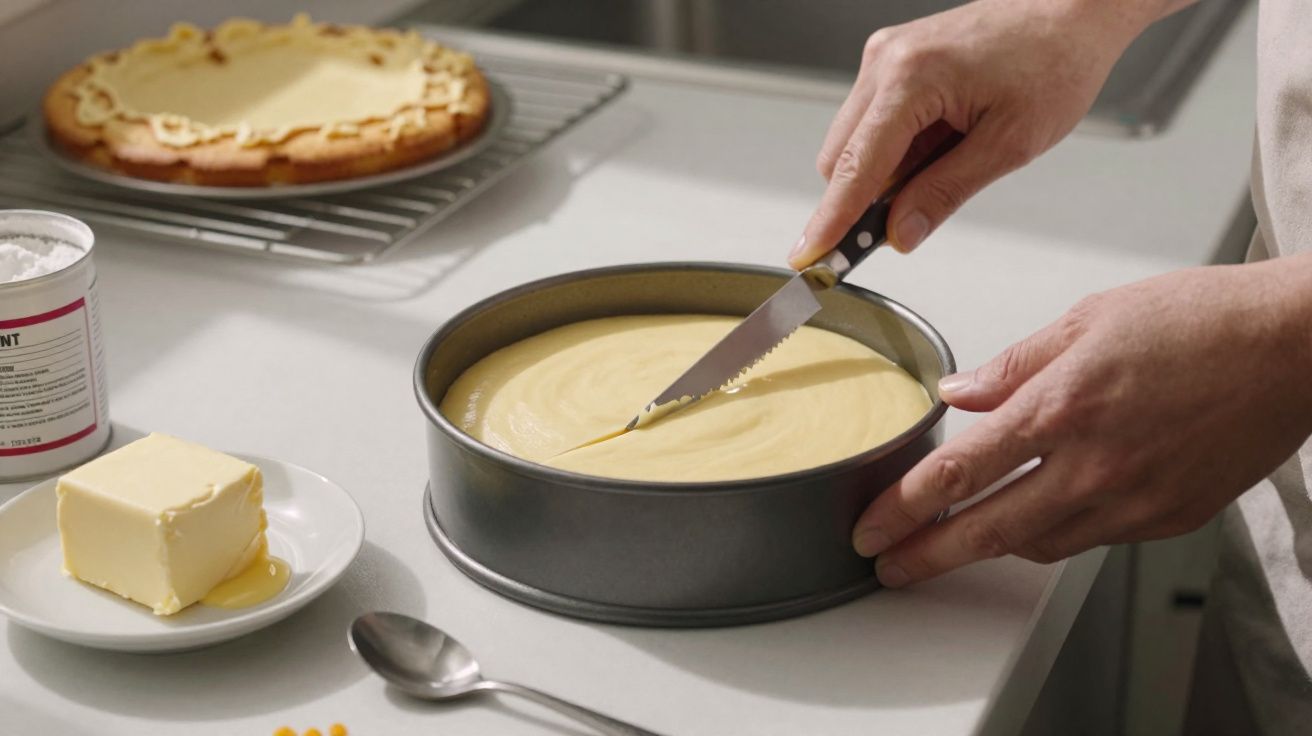
3) Make a deliberate cut to give the batter a controlled “exit”
The third step sounds technical, but it’s easy once you’ve done it once: a clean slit across the top of the batter. This narrow line becomes a planned weak point for the crust and the expanding cake.
How to do it: as soon as the cake starts forming a light skin in the oven, draw a straight cut lengthways through the centre using a sharp knife or a razor blade. The blade should be hot (dip briefly in hot water, then dry it), which helps it glide cleanly.
That cut allows steam and gases to escape in a controlled way. As the cake rises, the batter follows that line rather than tearing unpredictably elsewhere.
Timing is the key:
- cut too early: the surface is still too fluid, and the line closes up again
- cut too late: the crust has already hardened, and the cut has little effect
- ideal: when the surface has just turned matte and feels lightly elastic
Many pastry chefs use this technique specifically to control the look of loaf cakes. The cut “guides” the dome to the centre and reduces uncontrolled cracking along the sides.
Oven, tin and batter: how to get the most from these loaf cake tricks
These three small steps work with almost any classic butter-based loaf cake batter: marble cake, lemon cake, date cake or carrot cake, nut cake, vanilla cake. A few practical conditions help make the result even more consistent.
Choose the right baking temperature
For most loaf cakes, the sweet spot is 160 to 180 °C in a conventional oven (top and bottom heat). With fan settings, many batters dry out faster, which speeds up crust formation and tends to suppress the dome rather than encourage it.
| Batter type | Recommended temperature | Note |
|---|---|---|
| Classic butter-based batter | 170–180 °C | Place the tin in the lower third of the oven |
| Heavy batters (with nuts, dried fruit) | 160–170 °C | Bake a little longer so the centre cooks through |
| Very sugar-rich batters | 160 °C | Otherwise the surface browns too quickly |
If the oven is set too hot, the cake can surge upwards briefly and then collapse. Too cool, and the bake drags on - the crust dries out while the centre can remain damp.
Use the right tin and filling height
Loaf tins are particularly good for showing a clear central dome. A simple rule of thumb: fill the tin only to just over half full. If you fill it almost to the rim, the batter has no visual room to rise - and the dome is practically guaranteed to be disappointing.
Grease the tin well and dust it lightly with flour so the batter doesn’t cling to the sides. That supports upward movement. With silicone tins, extra greasing can be worthwhile too, as the batter can behave differently than it does in metal tins.
What can still go wrong - and how to prevent it
Even with the technique right, a few classic missteps can spoil the result. These are easy to avoid:
- Opening the oven too early: the sudden temperature drop can make the cake sink. Avoid opening the door for the first 20 minutes.
- Using too much baking powder: more raising agent doesn’t automatically mean more height. Oversized gas bubbles collapse and the cake drops.
- Over-mixing the batter: especially after adding the flour, mix only briefly. Too much mixing makes the batter tough and knocks out air.
- Ingredients not at room temperature: ice-cold eggs or milk slow the baking powder reaction and make the batter unstable.
If you stick to the sequence - lukewarm butter, a fat stripe down the centre, and a precise cut at exactly the right moment - you’ll quickly notice the difference: your loaf cake looks like it came from a pastry shop, without making the recipe any more complicated.
Why baking powder demands so much attention
Baking powder typically contains a raising agent (sodium hydrogencarbonate), an acid, and starch. With heat and a little moisture, it produces carbon dioxide, which enlarges the air bubbles in the batter. If that process is triggered at the wrong time, the gas can escape before the structure of the cake has set.
That’s why ingredient temperature matters so much. Over-hot butter starts the reaction too soon. Lukewarm butter supports the batter’s structure without sabotaging the chemistry. The control you gain from cutting the surface at the right moment complements this balance perfectly.
Once you understand how it works, you can apply the same logic flexibly: in loaf cakes, but also in certain breads or sweet braided yeast bakes where you want a clean, controlled “split” along the centre. These three small tricks function like a toolkit for anyone who wants to stop pulling flat cakes out of the oven.


Comments
No comments yet. Be the first to comment!
Leave a Comment