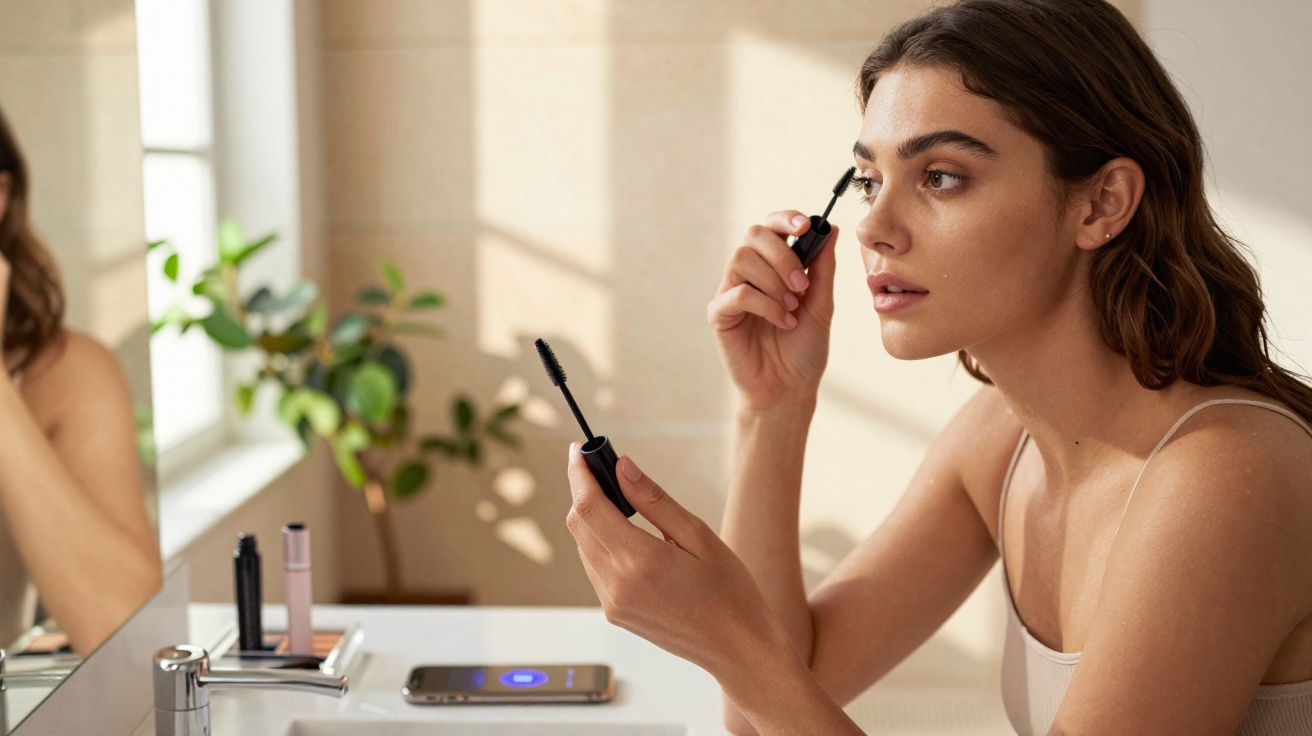
The first thing she mentions as soon as she settles into the make-up chair has nothing to do with foundation, concealer for dark circles, or lipstick.
It’s her eyelashes. “By noon they’ve dropped straight back down,” she says with a tired look at the mirror, as if it’s let her down. The eyelash curler is sitting on the table - that familiar little silver clamp every beauty fan recognises - yet the “lift” never seems to survive the day.
I watch what she does next. A quick squeeze, a fast coat of mascara, and she’s already moving on. By the time she grabs a coffee, the curl has started to collapse. By lunch, you’d never guess she curled them at all. And she’s far from the only one - spend five minutes on any beauty forum and you’ll find the same complaint repeated in a thousand different posts.
What most people don’t clock is this: the issue isn’t always the curler or the mascara. Very often, it’s when you apply each step. Adjust the timing, and the whole result can shift.
The real reason your curl doesn’t last
If you’ve ever curled your lashes, loved the instant “that’s better” moment, and then watched them sink before the day’s even properly started, you’re not making it up. Eyelashes can be stubborn - like tiny glossy springs that naturally want to point downwards instead of holding a soft, lifted curve. It’s easy to blame the kit: buy a new eyelash curler, swap mascara formulas, layer waterproof over regular, and then feel personally victimised by the mirror when nothing changes.
The part that’s usually missing is what happens in the narrow gap between curling and mascara. That tiny window - seconds rather than minutes - often decides whether your lashes stay lifted or give in. Because it’s so quick, it feels irrelevant, so hardly anyone questions it. But it can quietly make or break the curl you’ve just created.
A make-up artist in London began paying attention to this with clients and noticed a pattern: the ones who paused for a moment, curler still in hand while they chatted, tended to keep their curl longer than the people who went straight in with mascara. Same tools. Same technique. Different timing. She tested it deliberately, changing only the gap between the final squeeze and the first swipe of mascara - and the results were hard to argue with.
A tiny pause improved staying power. No pause at all? Droop by lunchtime. Not because of luck, but because of physics (and a bit of patience).
Right after you release the curler, each eyelash is still “malleable”. Think of it like a very fine hair that’s been briefly reshaped with pressure and a little warmth from your fingers or the metal tool. In that moment, the lash wants to spring back to its default position. If you immediately coat it with wet, heavy mascara, you’re weighing it down at exactly the point it’s deciding what shape to hold. As the mascara dries, the curl can deflate - a bit like a damp jumper pulling down a washing line.
If, instead, you let the lash sit for a few seconds in its lifted position with no product on it, the balance changes. It cools, the surface tightens, and the curve becomes more stable. When mascara goes on after that micro-window, it isn’t battling gravity on its own - it’s working with lashes that have already settled into the shape.
The secret isn’t crushing the curler harder or piling on extra coats. It’s letting time do a sliver of the work.
The 10–15 second timing trick with an eyelash curler and mascara
Here’s the simple tweak that keeps appearing backstage, on photo shoots, and in everyday bathroom mirrors: curl your lashes, then wait 10–15 seconds before applying mascara. Not five. Not “as quickly as you can yank the wand out of the tube”. A genuine, counted pause.
Curl at the base, and if you usually do it, add a gentle pulse at the mid-lengths. Release slowly - then do nothing for a moment.
In those 10–15 seconds you can swap hands, put the cap back on an eyeliner pencil, or glance at your phone. The point is to let your lashes sit in their new arc with zero weight on them. If you want to take it a step further, some artists lightly pinch the lashes between clean fingers straight after curling, holding the curve as if you’re pressing a hem into place. Then they breathe, count to ten, and only then reach for the mascara wand.
It sounds too minor to matter until you try it properly. Do a side-by-side test: one eye with your usual “curl-and-go” routine, the other eye with a deliberate 10–15 second pause before mascara. Look again four hours later. It can genuinely seem like two different people did your make-up.
People who test it often find the “timed” eye still looks lifted, while the rushed eye has sunk halfway down the lid. Same curler, same mascara, same face - no lash serum, no new products. The only difference is that protective gap of air and time. On humid days, or if your lashes are naturally straight and heavy, the contrast tends to be even more noticeable.
Some social media users who tried it even said they could skip waterproof formulas on ordinary days. One woman joked that she finally understood why her wedding trial make-up looked so much better than her usual routine: the artist spent ages talking, and those little pauses between steps accidentally allowed the curl to “set”. Her everyday five-minute bathroom sprint never stood a chance.
The timing works because wet mascara behaves like a small weight training session for your lashes. Applied too soon, it turns each lash into a tiny pendulum, gradually tugging the curl down as the formula dries. Delay that load by just a few seconds and the lash has time to cool in its new shape, so it behaves more like a spring that wants to stay curled rather than a rope being pulled downwards.
There’s also a mental benefit. Waiting 10–15 seconds forces you to slow down and treat lashes as a real step rather than a last-second afterthought between emails. That shift often improves your technique without you even trying: your hand steadies, you coat from root to tip more deliberately, and you stop rushing at the ends. The finish looks cleaner, more lifted, and more “awake”.
We like to believe it’s all product - but timing is a quiet technique: invisible, but remarkably effective.
How to build the timing trick into your everyday routine
The simplest way to make this stick is to attach it to something you already do. Curl your lashes, then immediately do a tiny “in-between” task while the curl sets: tap on concealer, blend a corner of eyeshadow, or blot your lips. Choose one mini-action that reliably takes around 10–15 seconds - that becomes your built-in curl timer.
If you use a heated curler, timing matters even more. Curl while the pads are warm, release, and then let your lashes cool fully in the air. It’s similar to letting hair cool after using a curling iron before you brush it out. Once your lashes feel cool again - usually around that same 10–15 second window - then go in with mascara. The heat creates the curve; the pause helps it hold.
Most people trying to “fix” a lash curl go bigger rather than smarter. They clamp harder, add two, three, four coats, and twist and tug until lashes start snapping or refusing to behave. This timing trick is the opposite approach: gentler pressure, less product, and more respect for what lashes can handle day after day.
A few common mistakes show up quickly:
- Moving straight from curler to mascara with no pause
- Using a heavy, very wet formula that takes ages to dry
- Curling after mascara “for extra lift”, which can bend lashes at awkward angles or break them
- Using an old, rigid curler pad that pinches rather than shapes
None of that means you’re “bad at make-up”. It usually means nobody has shown you a realistic, low-effort way to let the curl set before you weigh it down.
When mornings are chaotic, it’s tempting to cut corners and hope for the best. We’ve all looked at the clock and thought, “That’ll do.” That’s why this trick suits real life: it doesn’t require a new product or a 20-minute tutorial. You’re simply borrowing seconds you already have.
“When people slow down between the curler and mascara, their lashes stay lifted for longer. It really is that simple,” says a professional make-up artist. “The tools haven’t changed - their timing has.”
Try thinking of your routine as small, timed beats rather than one frantic blur: curl, pause, then coat. That rhythm alone can turn a flat-lash day into something that survives meetings, coffee, and the commute home - and it also reduces the urge to overwork delicate lashes in search of “more drama”.
A quick cheat sheet
- Curl first, then count to 10–15 before mascara.
- Start with a lighter first coat, concentrating at the roots rather than loading the tips.
- Don’t curl after mascara - it increases the risk of breakage.
- Choose one tiny task (like blending concealer) to act as your built-in “curl timer”.
- Let’s be honest: nobody does it perfectly every day… but on the days you do, you can see the difference.
Two extra habits that help the timing trick work even better
Clean tools make a bigger difference than most people expect. If your eyelash curler has residue on the pads, it can slightly stick to the lashes and interfere with the shape you’re trying to set. A quick wipe of the curler (especially the silicone pad) with a clean tissue or a little micellar water on a cotton bud can make the curl feel cleaner and more consistent.
It also helps to keep an eye on the condition of the curler pad. When the pad gets old, it can become stiff or uneven, which increases pinching and reduces the smooth “curve” effect. Replacing the pad when it looks worn can improve comfort and results - without changing your mascara at all.
The tiny pause that changes how you see your own face
On paper, it’s just a timing trick: a 10–15 second pause between curling and mascara so your lashes keep their curve instead of collapsing by noon. But once people start doing it, something small and meaningful often shifts. They stop blaming their face - their “bad lashes” or “tired eyes” - and start noticing how a human, doable adjustment can change the whole look.
On days you’re already behind schedule, it won’t feel glamorous. It’s simply you, an eyelash curler, and a quiet count in your head. You might be thinking about emails, children, bills, traffic. That small gap between curling and mascara can become a pocket of control in a messy morning - no elaborate routines, no extra gadgets, just a choice to let your lashes breathe before you load them with product.
We’ve all caught our reflection at about 3 p.m. and thought, “I look exhausted,” even when we aren’t. A lifted lash won’t change your life, but it can change how you feel in that split second. Some people find they rely less on extra eyeliner to “fake” definition because the curl alone opens the eye area more.
What tends to stick is the sense that your make-up has stopped fighting you. The products you already own start behaving more like the adverts always promised - because you gave your lashes a few seconds of grace.
Next time you reach for that little silver tool, treat it like the starting gun, not the entire race: press, release, wait. Let your lashes settle into the shape they’re going to hold. It may not headline glossy campaigns, but it travels quickly through bathrooms, group chats, and the quiet places where we learn how to meet ourselves in the mirror.
| Key point | Detail | Why it matters to you |
|---|---|---|
| 10–15 second timing | Wait a few seconds between the eyelash curler and mascara | Noticeably improves how long the curl lasts without buying anything new |
| Light first coat of mascara | Keep the first coat minimal and focus it at the roots | Prevents lashes being weighed down and helps the curve hold all day |
| Anchor the habit in your routine | Use a mini-task (concealer, blending) as a natural “timer” | Makes it easy to repeat, even on rushed mornings |
FAQ
- How long should I actually wait after curling? Ideally 10–15 seconds per eye. That’s enough time for the lash to cool and “hold onto” the curl without dragging out your routine.
- Does this work on very straight or Asian lashes? Yes - and it often works even better if you pair it with a heated curler and a waterproof or semi-waterproof mascara as the first coat.
- Should I curl again after mascara for extra lift? No. That can snap lashes or bend them at odd angles. Use the 10–15 second timing trick and, if you need more impact, add a second light coat instead.
- What if my mascara dries too fast while I’m waiting? Don’t load the wand while you’re curling. Curl, pause, then dip the wand and apply.
- Do I need special products for this to work? Not necessarily. A clean, well-shaped eyelash curler and a mascara that isn’t excessively wet are enough. The real game-changer is timing, not spending.


Comments
No comments yet. Be the first to comment!
Leave a Comment