The issue usually comes down to two simple care mistakes.
Plenty of houseplant lovers get frustrated with their spider plant: lush leaves, strong roots - yet not a single baby plant at the end of those long arching stems. That can feel baffling, because the spider plant is widely known as a propagation powerhouse. Once you understand the cues it needs to produce plantlets, you can nudge it in the right direction and quickly turn one plant into a whole collection.
How a spider plant (Chlorophytum comosum) decides whether to make plantlets
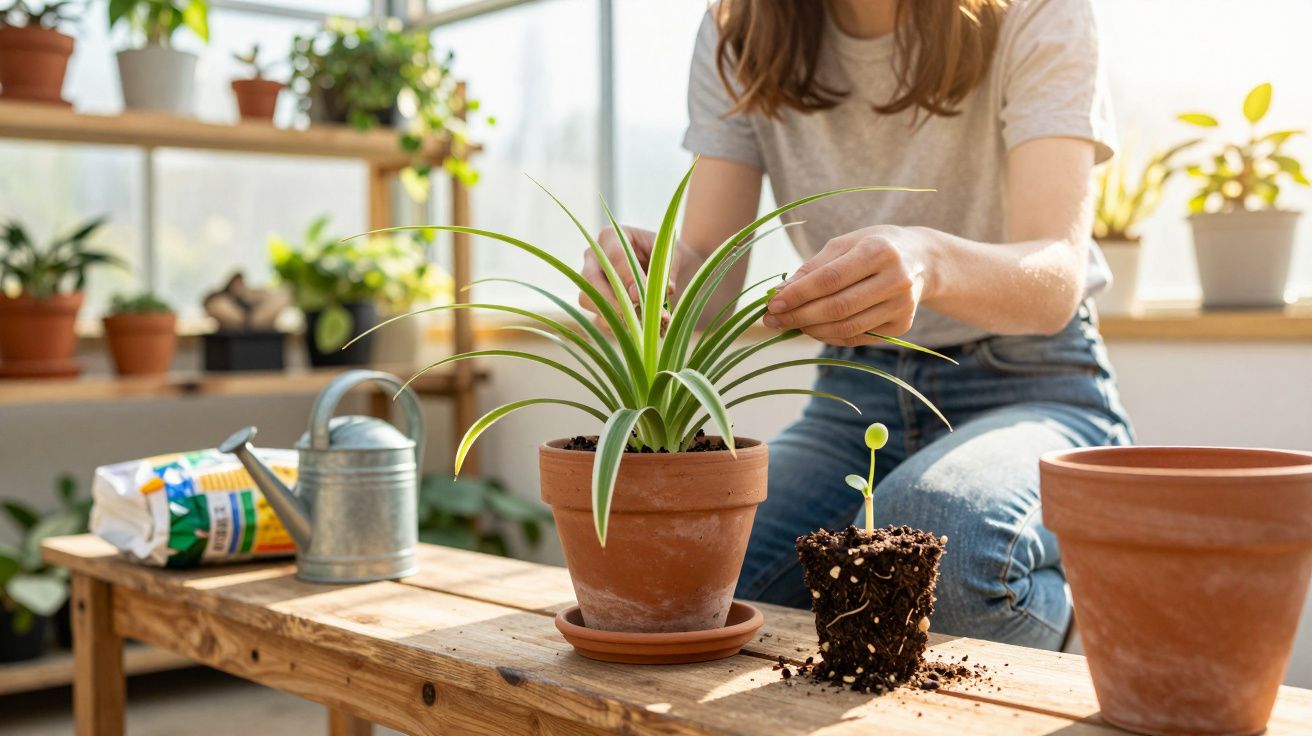
The common indoor spider plant (botanical name Chlorophytum comosum) usually doesn’t begin producing lots of offspring until it’s around 1–2 years old. When it’s ready, it sends out long, drooping stems known as runners (or stolons). At the tips, small leaf rosettes form - these are the plantlets.
These mini plants are essentially fully formed spider plants in miniature. At first they remain attached to the parent plant and are supplied with water and nutrients through it. The spider plant’s thick, fleshy roots act as storage organs and provide the energy for this relatively demanding type of reproduction. Only once the plant has built up decent reserves does it switch into “offspring mode”.
A spider plant without plantlets usually isn’t being “stubborn” - it’s simply not in the right mode yet. The wrong light pattern and too much comfort can suppress the propagation trigger.
At the same time, spider plants respond strongly to their environment. Light levels, pot size, feeding, and even a small amount of stress can determine whether the plant keeps funnelling energy into roots and leaves - or starts investing in flowering and plantlets.
Light and spider plant plantlets: why very long days can hold them back
Spider plants thrive in bright, indirect light. If they sit in low light, growth becomes weak and leggy. Less obvious is this: even in a bright spot, very long daily light exposure can slow down the formation of plantlets.
In nature, shorter days act as a seasonal signal. The plant responds by flowering and, afterwards, producing plantlets on its runners. You can mimic that indoors by adjusting conditions for a few weeks:
- Place it near an east- or west-facing window, away from harsh midday sun
- Aim for bright light, but avoid hours of direct sunlight
- Keep the light period under 12 hours per day for several weeks
If you use grow lights, set the timer intentionally shorter. Around three weeks of “shorter days” is often enough for the plant to produce flowers first and then plantlets on the runners.
Pot size and roots: a little snugness encourages offspring
A second, often overlooked factor is the pot. Many owners move their spider plant into a generously sized container in the hope of “spoiling” it - and that’s exactly what commonly prevents plantlet production.
Spider plants are happiest when the pot is lightly root-bound. They like their roots to fill the space well so the root ball stays firm. That moderate tightness sends a clear signal: space is getting limited, so reproducing is worthwhile.
| Pot situation | Likely response from the plant |
|---|---|
| Very large pot, lots of fresh compost | Strong root and leaf growth, few or no plantlets |
| Lightly root-bound pot | Good chance of flowers, runners (stolons) and plantlets |
| Extremely cramped pot, almost all roots | Growth stalls, stress, leaf tips may dry out |
Repotting every two years is usually sufficient. When you do repot, go up by just one pot size, rather than jumping straight to a very large pot. That way, the gentle “space pressure” that helps trigger propagation remains in place.
Water and nutrients: why “too kind” backfires
A lot of indoor gardeners water and feed their spider plant very generously. That does create plenty of leafy growth, but it can push the plant into a pure “growth mode” rather than “reproduction mode”.
To make plantlets much more likely, aim for care that’s supportive but not excessive:
- Feeding: in spring and summer, fertilise once a month with a standard liquid feed at a low dose
- Watering: only water again once the top layer of compost has dried; avoid waterlogging completely
- Temperature: ideally 18–22 °C; keep it away from cold draughts
- Humidity: normal household humidity is fine; occasional misting won’t hurt
This combination - good care plus mild dry-down between waterings - often places the plant precisely in the “make runners and plantlets” mode.
A practical extra: compost choice and drainage for healthier runners
Even when light and pot size are right, poor drainage can undermine the whole process. Spider plants store water in their roots, so constantly wet compost can weaken growth and reduce the energy available for flowering and plantlets.
For best results, use a free-draining houseplant mix and ensure the pot has drainage holes. If your compost tends to stay wet, mix in a drainage material (such as perlite) so excess water can move through more quickly.
Separating and rooting plantlets properly
Once you can see early root nubs on the small rosettes at the ends of the runners, the plantlets are ready to start life on their own. If you can, wait until spring or early summer, when young plants establish fastest.
Cut off or peg down first? Two reliable methods
You’ve got two safe approaches:
- Direct separation: use clean scissors or a sharp knife to cut the runner about 2 cm below the rosette. Plant the small “handle” into compost or place it in water.
- Pegging into a pot: place the plantlet into a small pot of loose compost but leave it attached to the parent plant. Once it has clearly rooted and sits firmly, cut the connection.
Both work well. If you’re unsure, start with pegging: the parent plant continues supporting the plantlet while it develops its own roots.
Rooting in water or straight into compost
You can also choose how to root them:
- In a glass of water: place only the lower part of the plantlet in water; keep leaves out of the water. Within 1–3 weeks, roots usually reach 2–3 cm. Then pot it into compost.
- Directly in substrate: plant the plantlet into a loose, well-draining mix, firm gently, and keep it evenly moist without making it soggy.
Young spider plants do best in a bright, gentle setting: no blazing sun, steady temperatures around 20 °C, and slightly higher humidity if possible. Hold off on fertiliser for 4–6 weeks, then feed very weakly.
If you still don’t get plantlets despite all the tweaks
Sometimes a spider plant remains slow to respond even when conditions are improved. These checks often explain why:
- Plant age: very young plants (under one year) usually focus on building leaves and roots first.
- Cultivar differences: some cultivated varieties naturally produce fewer runners and plantlets than the classic green-leaved form.
- Stress factors: draughts, big temperature swings, or permanently wet compost can weaken the plant so it has no spare energy for plantlets.
If the plant otherwise looks healthy, patience often pays off. A change in season with more natural day length is sometimes all it needs - and suddenly several runners appear, each carrying multiple plantlets over the rim of the pot.
How many spider plants can one home handle?
Once you’ve cracked the system, you may run into a pleasant “problem”: one established plant can produce an entire squadron of plantlets in a short time. Because spider plants are robust, they make excellent gifts or swap plants.
One more note: spider plants are often described as relatively air-cleaning because they can absorb certain pollutants from indoor air. However, their fleshy roots and leaves can be very tempting to cats. Small nibbles are usually not a major issue, but larger amounts can cause stomach upset. If you live with a curious cat, place the plant somewhere out of reach.
By managing light duration, pot size, watering, and feeding deliberately, you can encourage your spider plant to propagate on cue. The two most common brakes - overly long lighting and pots that are too large - are easy to fix. With a few adjustments, a single clump can soon become a home-grown jungle of new plants.


Comments
No comments yet. Be the first to comment!
Leave a Comment