A simple tweak can make an old sponge surprisingly useful in your garden.
Between eggshells, used coffee grounds and leftover compost, many households have another small “hidden gem”: the worn-out washing-up sponge. What usually ends up as everyday rubbish can become a genuinely handy tool for window boxes, the veg patch and houseplants-provided you clean it properly first and use it thoughtfully.
Why an old sponge suddenly makes sense in the garden
Washing-up sponges are made from porous material. That’s exactly what makes them interesting for gardeners: they hold on to water, release it gradually and can provide a little insulation as well. In a small way, they can do jobs people often buy pricey add-ons for.
A retired kitchen sponge can be turned into a mini water reservoir, a germination aid for seeds, or even a gentle, natural deterrent for pests.
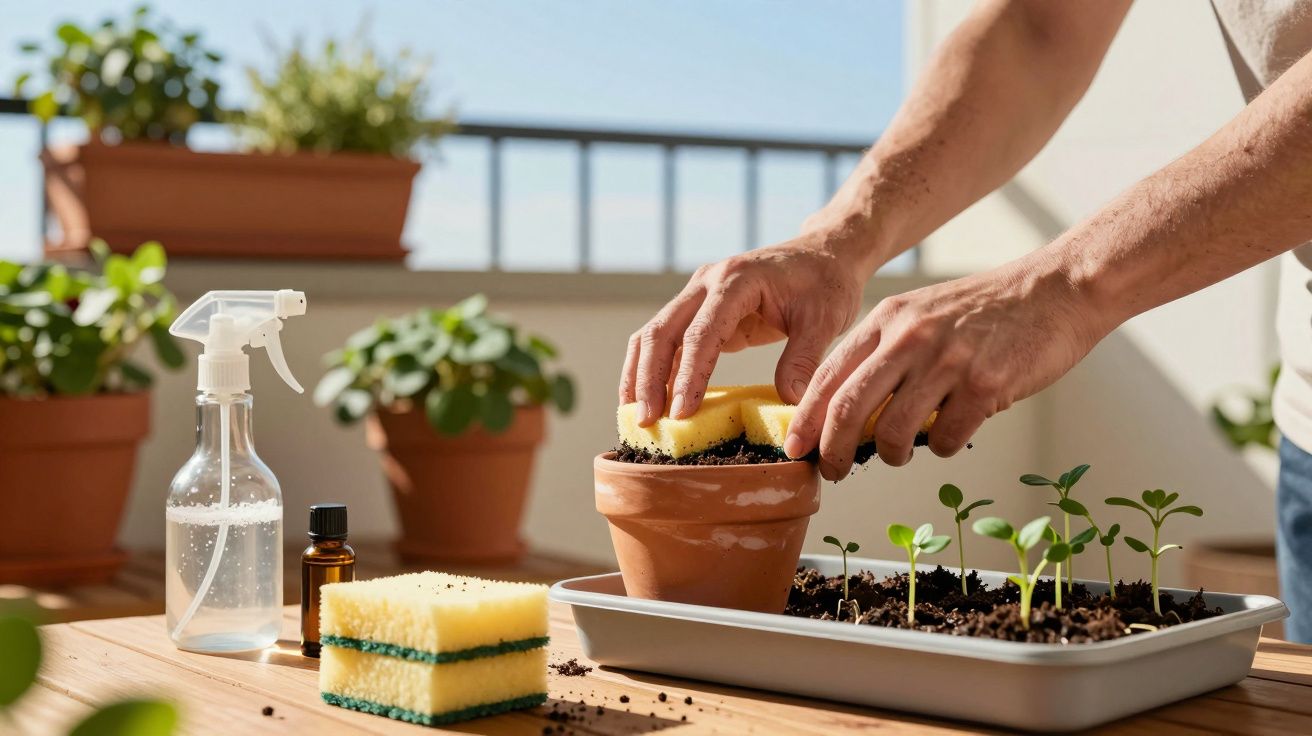
Before trying any of these ideas, one step matters most: thorough cleaning. A kitchen sponge can harbour plenty of bacteria. If you want to use it around plants, reduce germs first so you don’t transfer anything to sensitive seedlings or roots.
Cleaning a sponge: turning kitchen waste into a garden helper
A quick rinse isn’t enough to reuse a sponge safely. Heat- or acid-based approaches are more dependable and will cut down germs significantly.
Gentle ways to disinfect
- Boiling water: Put the sponge in boiling water for a few minutes, then allow it to cool fully and squeeze it out.
- Microwave: Heat a damp sponge for about 1 minute on a medium setting. Only do this without any metal and keep an eye on it throughout.
- Vinegar soak: Leave the sponge in a mix of water and clear household vinegar for several minutes.
Afterwards, the sponge should smell neutral and have no visible food residue. If it’s crumbling, badly stained, or falling apart, bin it-at that stage it’s more likely to cause problems in a pot than solve them.
Mini water reservoir: a sponge as relief during dry spells
The most practical everyday use is as a small water store. On sunny balconies or with plants that dislike drying out, it can make a noticeable difference.
In pots and window boxes as a hidden water reserve
Anyone growing plants in pots or planters knows the frustration: the compost can feel damp at the top while the root zone below is already drying out. A sponge can help even things out.
- Moisten the sponge well (damp, not dripping).
- Either place it under the compost near the root ball or set it on the base of the pot before adding compost.
- Position the soft side facing the compost and the abrasive side down.
The sponge absorbs surplus watering and releases it back as the compost dries. Many home growers use this approach for geraniums, petunias, herbs on a windowsill, or window boxes that bake in midday sun.
A practical holiday trick
If you’re away for a weekend and nobody can water, tuck several damp sponge pieces into your planters. Lay them near the base of the plants and lightly cover with compost.
Several damp sponges in a window box can extend the time between waterings by one to two days-often enough for a short break.
Water thoroughly before you go. A sponge won’t replace proper care for weeks, but it can buy time and reduce rapid drying during hot weather.
Sponges as a germination aid: seeds on a soft bed
The same material can also support raising young plants. Professionals often use airy, evenly moist growing media to encourage reliable germination-a sponge in miniature can work in a similar way.
How to germinate seeds on sponge pieces
- Cut a cleaned sponge into small cubes or flat strips.
- Moisten thoroughly, but don’t leave it waterlogged.
- Press one seed lightly into each piece.
- Place the pieces in a shallow tray and cover (for example with a clear lid or cling film).
- Keep in a bright spot, but out of direct, scorching sun.
The sponge provides steady background moisture while still allowing some air around the surface. Once seedlings are a few centimetres tall and have visible roots, you can plant the entire sponge piece into compost. The roots will usually grow through the material and into the potting mix quickly.
This method is especially useful for:
- Cress, rocket and other fast germinators
- Tomatoes, peppers and chillies started early indoors
- Lettuce and some herbs such as basil
Temperature protection: using a sponge as mini insulation
Container plants suffer more from temperature swings because their root zone has little mass. A sponge can act as a small extra insulating layer.
How a sponge cushions the root area
If you place a damp sponge soft-side down on the compost surface and weigh it lightly with a small stone, it forms a simple “pad”. At night it helps hold a little warmth in the pot; during the day it shades the surface from direct sun.
It acts a bit like a miniature mulch:
- Temperature changes around the root ball are less extreme.
- The top layer of compost dries out more slowly.
- Delicate young plants can get going more steadily.
This is particularly helpful for early sowings in spring or for patio pots on a balcony exposed to the season’s first chilly nights. In very hot summers, the cover can also let you stretch the watering routine slightly.
Natural pest deterrent with scented sponges (for your garden)
Sponges aren’t only useful for water-they also hold scent. Some insects avoid particular smells that people find pleasant or barely noticeable.
Using essential oils to discourage crawling visitors
Soak small sponge pieces with strongly scented plant-based oils and place them around vulnerable plants. Many home gardeners find these options work well:
- Peppermint oil
- Lemongrass or citronella oil
- Lavender oil (especially near seating areas)
A few drops are enough to create a light scent barrier. The pieces stay put instead of blowing away like dried herbs. If children or pets use the area, use a light touch and choose high-quality oils.
Sponge pieces with scented oils can create a subtle fragrance barrier in beds and pots-without resorting to chemical sprays.
No garden is ever completely free of nibbling, but these gentler measures can help reduce the need for harsher products.
When sponges can be a bad idea in the garden
Despite how handy the trick is, it has limits. Not every sponge suits every plant, and some materials shouldn’t go anywhere near your soil.
- Heavily soiled sponges: Anything with greasy grime or food residue is better binned.
- Persistent odours: If it smells musty or chemical, don’t use it.
- Very hard tap water: In hard-water areas, be cautious to avoid mineral build-up in pots over time.
- Cheap dyed or very abrasive scouring pads: Brightly coloured, ultra-hard types may leach dyes and are less suitable right next to roots.
If you want the safest option, choose plain, neutral household sponges without added treatments. Outdoors, check them regularly and replace if they begin to mould or break down.
Practical combinations for everyday growing
In day-to-day gardening, the sponge trick pairs well with other familiar habits. If you use coffee grounds or crushed eggshells as a soil improver, you can also place a sponge piece near the root zone so moisture and nutrients are distributed more evenly through the pot.
For balcony and urban gardens-where every centimetre and every litre of water matters-small changes like this can make life easier. Whether it’s a tomato tub, a herb shelf or a mini bed on a windowsill, a well-placed old sponge helps maintain steadier moisture, protects roots and reduces the number of watering trips.
Choosing the right sponge material (and a quick sustainability note)
Not all sponges are the same. Many standard washing-up sponges contain plastics and can shed tiny fragments as they degrade. If you plan to use sponges regularly in pots, consider cellulose-based or plant-fibre alternatives, and keep them contained (for example, on the pot base rather than mixed through the compost) so you can remove them easily later.
When a sponge starts to crumble, take it out promptly and dispose of it appropriately. Most synthetic sponges should go in general waste rather than compost, while fully plant-based types may be compostable depending on the manufacturer-check the packaging so you don’t accidentally introduce plastics into your soil.
In dry summers or homes without automatic irrigation, this turns a would-be throwaway item into a useful part of a more sustainable gardening routine. Once you see it working, you may find yourself setting worn sponges aside on purpose-not for the bin, but for the next planter.


Comments
No comments yet. Be the first to comment!
Leave a Comment