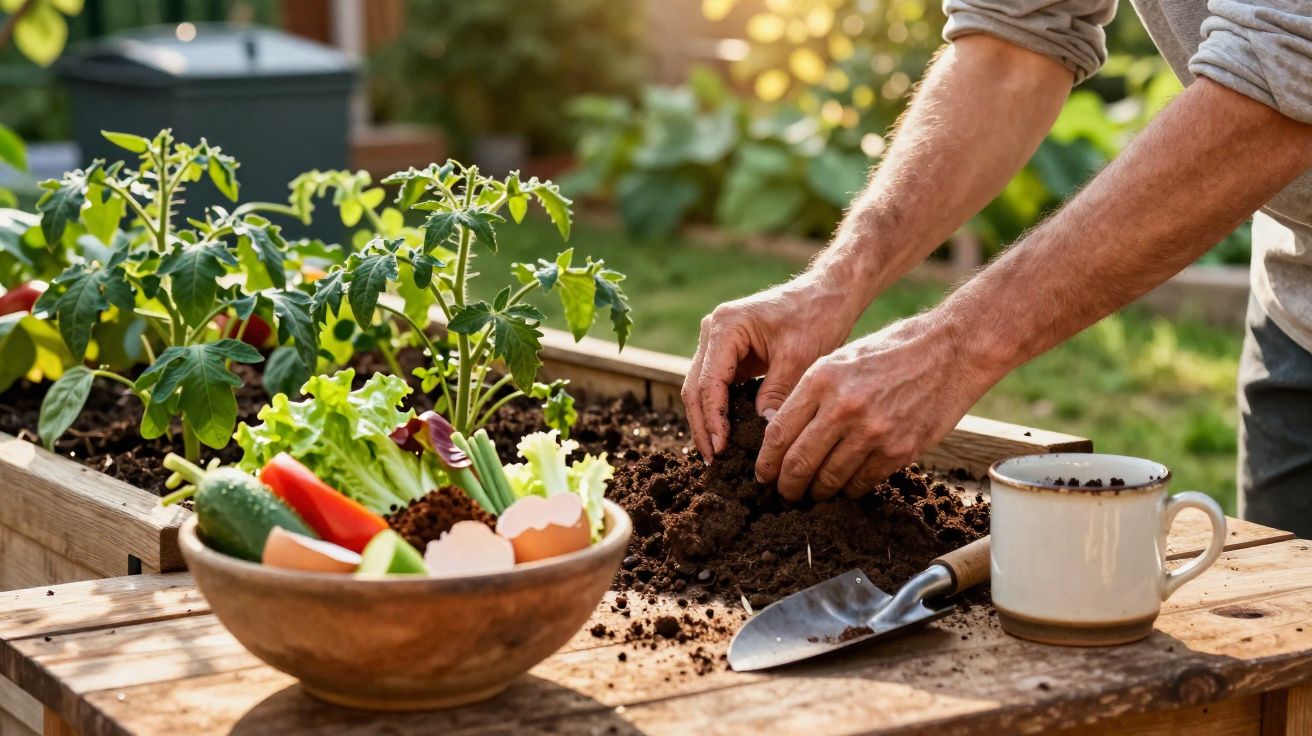
Carrot tops, onion skins, a fistful of parsley gone limp, and the last forlorn leaves from a lettuce all sat in a bag by the door. Outside, the beds looked worn out: the soil had set into a crust after a summer spent pouring everything into tomatoes, roses and over-enthusiastic courgettes.
A neighbour wandered past in muddy boots, wearing a knowing grin, and nodded at the bag. “You’re binning your best fertiliser,” she said, as though it ought to be common knowledge. Ten minutes later we were in the garden with our sleeves pushed up, wrists deep in soil, turning “waste” into what she called her secret weapon.
The surprising bit came later. Within a few weeks the ground really did seem changed-darker, looser, almost lively. That was the moment those kitchen leftovers stopped feeling like rubbish and started looking like a missed opportunity.
From kitchen scraps to soil gold
Many gardeners have the same quiet, slightly guilty routine: scrape peelings and plate scraps into a liner, tie it up, and send it out with the rest of the rubbish. It’s automatic. Yet those scraps contain exactly what most commercial fertiliser is trying to supply-except yours arrives with biology built in.
Look closely and harvest leftovers are like a nutrient time capsule. The goodness that helped grow your carrots, tomatoes, pumpkins and herbs is still there, stored in skins, stems and roots. Harvesting doesn’t make that energy disappear; it simply pauses it, waiting for its next job in the soil.
So when garden experts say leftovers can outperform commercial fertiliser, it isn’t poetic language. It’s an observation of what happens when you let natural cycles complete themselves.
Think of that familiar end-of-season clear-out: you haul out the last tomato plants, cut down bean vines, and trim kale that’s pushed past “robust” into downright bitter. The pile of biomass can look scruffy-almost embarrassing-next to neat bags of store-bought feed.
One gardener in Kent tracked the difference over two seasons. On one side of her allotment were raised beds given balanced NPK pellets. On the other side: only chopped plant residues and kitchen scraps, either tucked into the soil or used as thin mulch layers. By the second year, the “scrap” beds produced thicker stems, deeper-coloured leaves, and needed roughly half as much watering.
She also noticed how the soil behaved. Beneath the scrap beds, it stayed friable even after winter rain. Under the fertiliser beds, it sealed over, then cracked. Same weather. Same site. Two very different experiences under a trowel.
That gap comes down to how the inputs act once they reach the ground. Commercial fertiliser is like fast sugar: nutrients delivered in a rush, pushed straight at plants. Harvest leftovers are more like a slow-cooked stew, feeding the whole underground community first-fungi, bacteria, worms, mites-who then cycle nutrients back to the roots.
As scraps break down they release nitrogen, phosphorus and potassium, along with a long list of trace minerals. Just as importantly, they build humus: the dark, springy fraction of soil that holds moisture, supports root growth, and buffers plants against stress. That sort of structure is difficult to replicate with anything that comes from a shiny bag on a shelf.
In other words, where fertiliser provides a quick hit, leftovers reshape the soil itself. It’s why so many experienced gardeners quietly shift their loyalty away from the garden centre aisle and towards their own compost bucket.
Kitchen scraps and harvest leftovers: how to turn them into a quiet superpower
The simplest approach needs no special equipment: chop, spread, cover, wait.
After each harvest, gather disease-free stems, leaves and roots and chop them into pieces roughly the size of a coin. Smaller pieces break down faster and are less likely to sit in sour, slimy patches.
Spread a thin layer across the soil-about as thick as a slice of bread-then cover with something carbon-rich: shredded cardboard, dry leaves, straw, or torn-up egg boxes. You’re essentially building a lasagne on the bed, minus the pasta.
Over the following weeks, worms tug fragments down into the soil. Fungal threads knit through the layers. The surface sinks gradually, and what began as a messy scatter starts to resemble dark, springy earth. No big reveal, no industrial product-just steady work happening under your feet.
A useful extra step (especially on bare beds heading into winter) is to add that dry “brown” cover a little more generously than you think you need. It helps to suppress weeds, reduces smells, and keeps birds from pulling scraps back out while they forage.
If you want a belt-and-braces option for small spaces, a covered caddy by the sink plus a small compost heap, wormery or bokashi bucket can make the process tidier. The end goal is the same: keep nutrients cycling locally rather than paying to export them in a bin lorry.
Common pitfalls to avoid
Even seasoned gardeners trip up on a few points:
- Going too thick in one spot. Overloading a single patch can create airless, slimy layers and unpleasant smells-more swamp than bed.
- Adding diseased or heavily infested plants. Sometimes the soil food web will deal with problems, and sometimes it won’t. That’s how fungal diseases and pests reappear as an unwanted sequel next season.
- Forgetting persistent weeds. Seed heads and vigorous perennial roots (such as bindweed) are better kept out of beds unless you’re confident your method will destroy them first.
And then there’s the guilt trap: imagining you must do this daily, measure every peel, and keep a log of every teaspoon of coffee grounds. Let’s be honest: almost nobody manages that every day. The gardeners who keep it up for years treat it like brushing their teeth-routine, not paperwork.
A long-time market grower summed it up like this:
“I don’t feed my plants anymore. I feed my soil, and the soil feeds the plants better than I ever did.”
His routine is straightforward. After every harvest, something returns to the beds. Carrot tops go back near the carrots. Tomato stems end up beneath tomatoes. Outer cabbage leaves are tucked between the brassicas. It’s a loop, not a line.
- Start small - trial it in one bed or even one large pot and watch what changes.
- Keep it clean - use only healthy, disease-free plant material.
- Think layers - greens (wet scraps) paired with browns (dry material).
- Stay curious - notice smell, texture and worm activity rather than fixating on products.
- Trust time - nature moves slower than a label, but the improvements last longer.
Why this “waste” quietly beats the bagged stuff
There’s real relief in realising kitchen scraps and harvest leftovers aren’t a nuisance to manage; they’re a resource waiting to be returned. Overripe tomatoes, stringy bean ends, and the mountain of pumpkin innards stop feeling like failures. They become the raw materials for next season.
This shift changes households, too. Children see that scraps don’t simply disappear “away”; they circle back into strawberries, peas, and the rose that finally blooms the way it did in the catalogue. In a year that feels as if it’s racing by, that loop can be oddly grounding.
Gardeners who swear by leftovers rarely talk about perfection. They talk about rhythm: a bucket by the sink, a spot in the garden for trimmings, and a few rough layers on beds after each harvest. Nothing heroic-just a different default.
And in a world where synthetic fertilisers cost more, use more energy, and can leave soils depleted over time, this old-fashioned habit suddenly looks thoroughly modern. Not as a trend or a lecture, but as a way of gardening that often gets easier the longer you stick with it.
Most of us know the moment of taking the bin out and thinking, “That’s a lot of food we didn’t really use.” The twist is that you still can use it-just not in the way you first pictured.
| Key point | Detail | Why it matters to you |
|---|---|---|
| Leftovers feed the soil life | Kitchen scraps and harvest leftovers nourish microbes, worms and fungi that support roots. | Helps grow stronger plants with fewer bought products. |
| Simple, low-cost method | Chop, layer on beds, cover with dry material, let time do the work. | Easy to try in any garden, balcony or small yard. |
| Improves structure, not just nutrients | Builds humus, retains moisture, prevents crusting and compaction. | Leads to healthier soil that performs better year after year. |
FAQ
- Can I use all kitchen scraps as fertiliser? Use vegetable and fruit scraps, coffee grounds, tea leaves and crushed eggshells; avoid meat, fish, dairy and very greasy foods to reduce smells and pests.
- How long do harvest leftovers take to become usable by plants? If chopped finely and applied in thin layers, they begin feeding soil life within weeks and can noticeably improve soil over a single growing season.
- Will this attract rats or other pests? Thin layers, a dry cover (leaves, cardboard, straw) and avoiding meat or cooked food keep your “fertiliser” close to invisible to scavengers.
- Is this method enough, or do I still need commercial fertiliser? Many gardeners move to mostly scrap- and compost-based feeding, topping up with an organic fertiliser only for very hungry crops-such as tomatoes in containers.
- Can I do this if I only have pots on a balcony? Yes: bury small amounts of finely chopped scraps a few centimetres below the surface, let them break down, and refresh the potting mix each year.


Comments
No comments yet. Be the first to comment!
Leave a Comment