Potatoes can sit in the cupboard for a few days and then, almost overnight, turn into something that looks faintly extraterrestrial.
The good news is that a small shift in how you store them can make potatoes behave themselves.
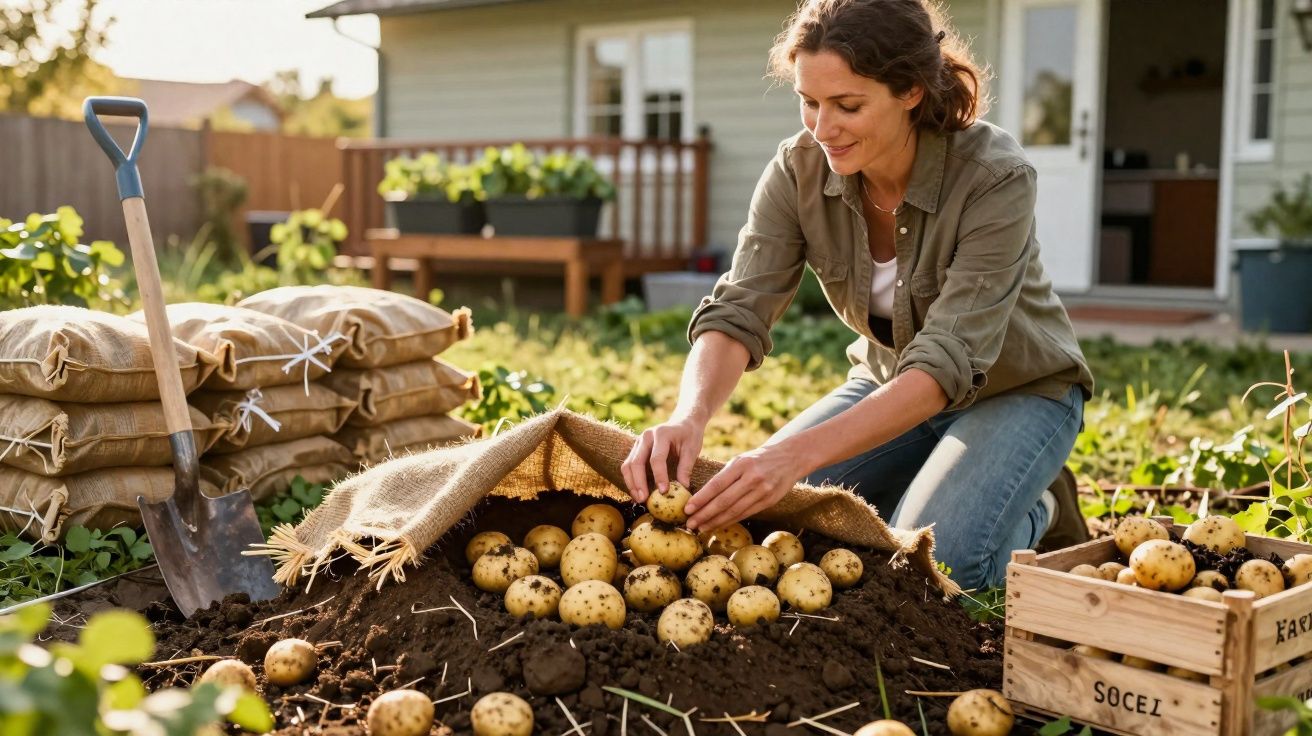
For plenty of home cooks, potatoes are dependable right up until the moment they aren’t: firm and clean one day, then sprouting, wrinkling and edging towards rot the next. With food prices continuing to climb, binning half a bag of spuds feels far more painful than it used to. A very old storage method is quietly returning-and, paired with a few modern, practical tweaks, it can keep potatoes in good condition for months rather than days.
Keep potatoes cool, dark, dry and away from fruit, and you’ll slow sprouting dramatically from the start.
Why potatoes sprout so quickly at home
Potatoes aren’t lifeless lumps of starch; they’re living tubers. After harvest, they naturally try to grow again, and if their surroundings feel a bit like spring, they switch back into “growth mode”.
A handful of common conditions make potatoes sprout faster:
- Warm temperatures: anything much above 7–10 °C encourages the tuber to wake up.
- Light: particularly daylight, which also turns skins green and can make them taste bitter.
- Humidity: excess moisture encourages mould and rot.
- Ethylene gas: given off by fruit such as apples and bananas, which speeds up ageing.
Many kitchens accidentally tick most of those boxes. Potatoes end up near the oven, beside the fruit bowl, or left in thin plastic bags that trap humidity-so it’s no surprise they sprout before you’ve worked through the bag.
Potato storage basics: the “cool, dark, dry” rule
Before you get into any specialist methods, it helps to treat potato storage like a simple checklist:
- Cool: aim for a consistently cool area rather than somewhere that heats up during cooking.
- Dark: light triggers greening and bitterness.
- Dry with ventilation: you want airflow, not a sealed environment that turns damp.
- Separate from fruit: keep potatoes away from ethylene gas sources.
Get those fundamentals right and you’ll already cut waste noticeably, even without a garden.
The old underground trick making a comeback
Long before fridges and year-round supermarkets, households had to make harvests last through winter. One of the most time-tested approaches-used across Europe and parts of North America-was storing root crops in the ground.
What an “earth clamp” actually is
An earth clamp (also known as a storage pit) uses the soil itself as a natural refrigerator. It’s ideal if you have a garden or an allotment, but the underlying idea is straightforward: the earth buffers temperature swings and helps keep conditions stable.
Gardeners create a shallow pit, add a barrier and ventilation, fill it with produce, then cover it so rain, light and pests stay out. Potatoes, carrots, beetroot, parsnips and cabbages generally store well this way.
An earth clamp turns a spare patch of garden into a low-tech cold store-no electricity required-and it slows ageing in potatoes dramatically.
How to build a basic potato clamp in the garden
If you’ve got outdoor space, this is more about careful set-up than fancy kit. Here’s a simplified, traditional method for a potato clamp:
| Step | What to do | Why it matters |
|---|---|---|
| 1. Choose the spot | Select a slightly raised, shaded place with good drainage. | Reduces the risk of waterlogging and overheating in sun. |
| 2. Dig the pit | Dig roughly 40–60 cm deep, and as wide as you need. | Depth helps smooth out temperature changes. |
| 3. Line the sides | Fit wire mesh or tough netting around the inside. | Discourages mice and rats from chewing in from the sides. |
| 4. Add a crate | Sit a wooden crate or slatted box in the pit. | Improves airflow and keeps potatoes off damp soil. |
| 5. Fill and layer | Add dry, sound potatoes, stacked loosely. | A damaged tuber can rot and spread problems quickly. |
| 6. Insulate | Cover with 10–20 cm of clean straw or dry leaves. | Insulates against frost and sudden warmth. |
| 7. Seal with soil | Top with a layer of earth over the straw. | Blocks light and helps keep rain out. |
In many UK conditions, this keeps potatoes usable through winter and into spring. You only lift what you need, while the rest stays in a steady microclimate that slows sprouting and general ageing.
No garden? You still have options
Most city homes can’t accommodate a storage pit, but you can still borrow the same principles-stable temperature, darkness and airflow-on a balcony or indoors.
Balcony solutions with potato sacks and tubs
On a decent-sized balcony, fabric grow bags and sturdy sacks can act like a mini clamp. They’re usually marketed for growing potatoes in small spaces, but they also work for storage if you prioritise darkness and ventilation rather than packing them in soil.
A practical “double-layer” approach:
- Put potatoes in a dark, breathable sack or paper bag.
- Place that bag inside a larger insulated container (a padded box or thick outer sack) with straw or crumpled paper around it.
- Leave a small gap for airflow and keep the set-up in the shadiest, most sheltered spot.
The outer layer reduces temperature swings from sun and wind, while the inner bag keeps conditions darker and drier, helping delay sprouting. In prolonged wet weather, shifting the container away from cold, damp surfaces can reduce condensation.
Indoor storage that actually keeps potatoes fresh
In a flat with no outdoor space, the realistic aim is to imitate a cool cellar. Most modern homes don’t have one, but many have a couple of areas that stay noticeably cooler and drier than the kitchen.
Indoors, potatoes usually do best somewhere low, dark and away from heat-so not under the sink, and not next to the oven.
Good indoor options include:
- A low cupboard in a hallway, well away from radiators.
- The bottom shelf of a pantry with no direct sunlight.
- A ventilated storage box in a cool utility room.
Choose a wooden crate, a thick paper sack, or a basket lined with newspaper. Skip sealed plastic bags: they trap moisture and encourage mould. Keep potatoes unwashed; brushing off loose soil is enough. Washing adds water, which is exactly what you don’t want in an enclosed space.
A modern step that helps: curing potatoes before longer storage
One useful practice that many home cooks miss is curing. If you’ve grown your own potatoes-or bought very fresh, soil-on ones-giving them a short period to dry and toughen their skins can make them last longer.
Spread them out in a single layer somewhere dark, dry and well ventilated for around 7–14 days. This helps minor scuffs heal and reduces the chance of rot spreading in storage. Once cured, move them into your chosen cool, dark set-up (cupboard, sacks, or an earth clamp).
Smart habits that cut waste and keep flavour
Beyond the storage location, a few small routines can make a noticeable difference-and they don’t require any special equipment.
Never mix potatoes with certain fruits
As fruit ripens, it releases ethylene gas. Apples, pears and bananas are common culprits, and that ethylene speeds up sprouting in potatoes (and can also affect onions and garlic). When everything gets piled into one bowl, you effectively create a small ageing chamber.
Keep potatoes fully separate from fruit. Potatoes and onions can share space only if it remains cool and dry, but fruit should be elsewhere. Simply switching from one basket to two can delay visible sprouting by weeks.
Rotate and inspect your stash
Rot often spreads from one compromised tuber to the next. One soft potato can gradually ruin an entire sack if it’s left unnoticed.
- Once a week, run your hand through the crate and lift a few potatoes.
- Take out any that are soft, show dark patches, or smell musty.
- Use potatoes with small, early sprouts first (mash and soup are ideal) within a day or two.
Long, pale sprouts and green skin can indicate rising glycoalkaloids, the plant’s natural defence chemicals. Trimming small green areas is common, but potatoes that are heavily green or very sprouted are better off in the compost rather than on the plate.
What nutrition and safety look like with older potatoes
When potatoes are stored correctly, they retain much of their nutritional value for months. Starch changes gradually, and while vitamin C does decline over time, it’s not an overnight drop-many people lose more nutrients in cooking than through careful storage.
Potatoes that are firm, unsprouted, smooth-skinned and free of green patches are typically safe to eat even after long storage.
Risk increases when texture and colour shift. Green areas and a pronounced bitter taste suggest higher levels of solanine and related compounds. These concentrate near the skin and in sprouts. Peeling helps reduce exposure, but if the flesh tastes bitter or the potato is strongly green, it has likely passed its safe window.
Why this old trick matters for modern kitchens
Keeping potatoes fresh for longer isn’t just about protecting a favourite staple; it directly reduces food waste, which still makes up a meaningful share of household emissions. For anyone watching the budget, stretching a 5 kg bag by even a few extra weeks can trim costs without giving up comfort food.
Whether it’s an earth clamp, a balcony sack, or a dark cupboard, the logic is the same: treat potatoes like living crops rather than tins. Provide cool darkness, dry air and basic protection, and you’ll get fewer sprouts, less rot and a better texture when you cook them.
If you enjoy a bit of self-sufficiency, these methods also pair neatly with home growing. A small patch-or even a couple of containers-can produce more potatoes than you’d want to eat in a single week. Knowing how to store them without a dedicated cellar bridges the gap between harvest time and the colder months, when hearty potato meals feel particularly welcome.


Comments
No comments yet. Be the first to comment!
Leave a Comment