It isn’t happening by chance.
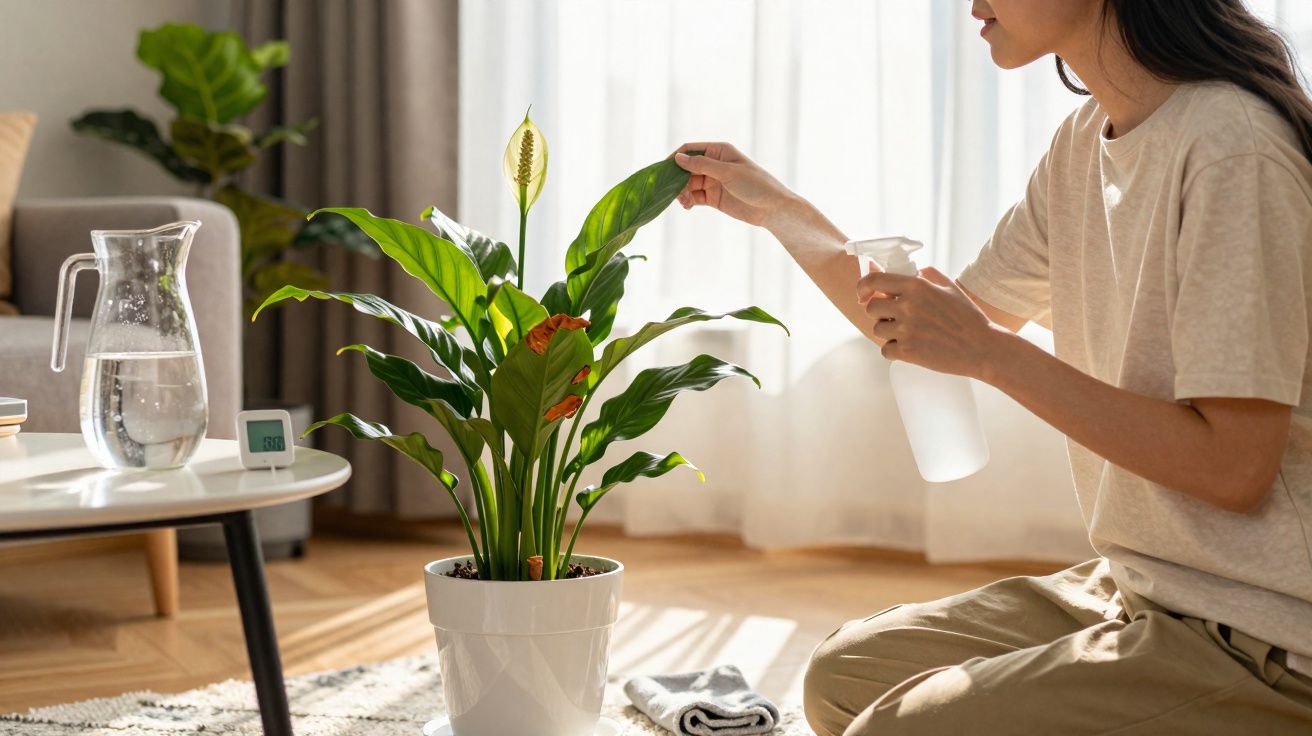
Spathiphyllum (peace lily) is famously tolerant, yet it shows discomfort quickly. Brown tips, crunchy edges and rusty patches are the plant’s way of flagging a problem with air, water or light. Below is how specialists read those signs-and the small tweaks that usually return leaves to a deep, glossy green.
What brown tips on a peace lily are really telling you
On a peace lily, browning is most often a mismatch in care rather than a terminal disease. Typical triggers include low humidity, underwatering, overwatering, chemicals in tap water, or too much sun. Because each issue leaves a slightly different “fingerprint” on the foliage, the pattern of damage often points you to the right remedy.
Most peace lilies do best with evenly moist compost, bright indirect light, softer water and humid air. If one element slips, the leaf margins usually complain first.
The five usual suspects for peace lily (Spathiphyllum) brown tips
Low humidity
When indoor air is dry, moisture is pulled from the peace lily’s thin leaves faster than the roots can replace it. The very edges often fade to tan, then turn fully brown, and the effect worsens near radiators, warm air vents, or in rooms with constant draughts.
- Aim for 45–60% relative humidity around the plant; many homes sit close to 30% in winter.
- Run a small humidifier nearby during the heating season; using a timer can help keep humidity consistent.
- Cluster plants together to create a shared microclimate, and set the pot on a pebble tray with water kept below the base of the pot.
- Misting tends to be short-lived and, if your water is hard, can leave spots on the leaves.
Underwatering
If the root ball dries out too far, the plant often wilts dramatically, then the tips dry and crisp. After watering, the peace lily usually stands back up-but any browned tissue will not revert to green.
- Check the compost twice a week; water when the top 2–3 cm (about the top inch) feels slightly dry rather than completely dusty.
- Water deeply until excess runs out of the drainage hole, then empty the saucer-small “sips” often leave the centre of the root ball dry.
- If the compost has shrunk away from the pot edge, stand the pot in water up to the rim for 10–15 minutes to fully rehydrate the mix.
Overwatering
Compost that stays wet excludes oxygen, which stresses roots and can lead to rot. A common sequence is yellowing leaves from the base of the plant followed by brown patches, slower growth, and a pot that feels heavy for days.
- Choose a pot with a proper drainage hole; avoid decorative cachepots unless there’s an inner nursery pot that can drain freely.
- In darker months, allow the top 2–3 cm (top inch) to dry before watering again.
- If roots smell sour or look soft and mushy, repot into fresh, free-draining mix and trim away damaged roots.
Chemicals in tap water
Many peace lilies are sensitive to fluoride and high mineral content in mains water. You may see browned tips, sometimes edged with a thin pale halo, and a white crust can develop on the compost surface or around the pot rim.
- Move to rainwater, distilled or filtered water. Letting tap water stand overnight can reduce chlorine, but it won’t remove fluoride.
- Every 2–3 months, flush the pot with clean water to rinse out accumulated salts.
Too much sun
Direct sun can scorch peace lily leaves. Look for bleached areas and crispy patches, usually on the side facing a window or a grow light.
- Position the plant a little further back from a bright window, or soften the light with a sheer curtain.
- Prioritise bright indirect light; north- or east-facing aspects often work well, or place it mid-room near a south-facing window.
Quick diagnostic snapshot
| Symptom | What to check | Likely cause | First fix |
|---|---|---|---|
| Crispy brown tips, otherwise green plant | Room humidity, heater nearby | Low humidity | Add humidifier, move from heat source |
| Sudden droop, tips brown after recovery | Compost bone-dry, pot feels light | Underwatering | Deep soak, then steady schedule |
| Yellowing leaves plus brown patches | Compost wet for days, pot heavy | Overwatering | Increase intervals; improve drainage |
| Brown edges with light halo, crust on compost | Signs of hard tap water | Fluoride/salt sensitivity | Use rain or filtered water; flush mix |
| Bleached, crispy spots facing window | Light pattern in the room | Sun scorch | Shift to bright, indirect light |
Should you cut brown leaves?
Yes. Remove fully browned leaves by trimming them off at the base with clean shears. Where only the tips are affected, snip away the damaged section and follow the leaf’s natural outline so it still looks tidy. Clearing dead tissue helps the plant focus on healthy growth and reduces the chance of fungal spores taking hold on decaying edges.
Keep the compost evenly moist rather than soggy. If you’re unsure, test with your finger before watering, not after.
Water, light and potting routine that works for peace lilies
- Water: Drench thoroughly, then wait until the top 2–3 cm (top inch) is just dry. Expect slower water use in winter.
- Water quality: Use rain, distilled or filtered water to avoid fluoride stress. A monthly flush helps prevent salt build-up.
- Light: Bright indirect light is best. Turn the pot a little each week for even growth.
- Humidity: Keep 45–60%. Pebble trays and compact humidifiers are low-effort solutions.
- Soil/compost: A peat-free indoor compost with added perlite or bark improves airflow to the roots.
- Fertiliser: Feed sparingly in spring and summer with a balanced fertiliser at a reduced strength. Don’t feed in winter.
- Pot: Use a container with a drainage hole, and only pot up when roots are circling the pot.
Two simple checks that prevent repeat browning (added guidance)
If you want to take the guesswork out of care, a small digital hygrometer can confirm whether you’re truly hitting 45–60% relative humidity (many rooms feel “fine” but sit far lower in winter). Likewise, spend a day observing where sunbeams land-direct sun for even an hour can be enough to cause sun scorch, whereas the same window may be safe if the plant is set back and kept in bright indirect light.
It also helps to match watering to pot and compost behaviour: terracotta dries faster than plastic, and finer compost holds more water than airy mixes with bark and perlite. Adjust intervals to what your potting setup actually does, rather than following a fixed timetable.
Extra pitfalls to watch for
Cold draughts can create brown spotting overnight. In winter, keep the plant away from external doors; in summer, avoid placing it in the path of air-conditioning airflow. Leaf-shine products can block pores and aggravate browning-wipe dust away using a damp cloth instead.
Pests don’t often cause classic brown tips, but spider mites love dry air and can leave speckled, stippled leaves. If you notice webbing, rinse the foliage in the shower and raise humidity. When mites persist, apply a gentle, plant-safe soap solution to both sides of the leaves.
If you need to reset a troubled plant
When multiple leaves have browned and the compost smells sour, remove the plant from its pot. Cut away any mushy roots with sterilised scissors, then repot into a fresh, airy mix. Water with filtered water and place it in bright indirect light. Avoid feeding for four weeks while the roots recover and re-establish.
A realistic weekly schedule
Choose one care day, but let the plant-not the calendar-decide the watering. Check compost moisture with your finger, rotate the pot by a quarter turn, refill the humidifier and top up the pebble tray. Wipe one or two leaves to remove dust. This five-minute habit prevents most browning problems before they take hold.
Good-to-know extras for long-term success
Peace lilies generally prefer a slightly snug pot; excessive unused compost stays wet longer and increases the risk of rot. Use room-temperature water to avoid shocking the roots. If your tap water is very hard, a small countertop filter can be a cost-effective upgrade for healthier foliage.
For flowers, strong bright indirect light matters more than heavy feeding. As blooms fade, the flower stalks naturally brown-trim them at the base to keep the plant neat and to encourage fresh growth.


Comments
No comments yet. Be the first to comment!
Leave a Comment