It first caught my eye on a dreary Tuesday morning while I was in the shower, staring at a tap I’d only cleaned a couple of days earlier. The chrome should have been gleaming, but instead it looked as though it was wearing a dull, chalky coat - and that crust seemed to be getting thicker by the week. I’d already worked my way through the usual line-up of bathroom cleaners: overpowering fragrances, stern warning labels, and the kind of fumes that make you want to hold your breath. None of it stopped the limescale from returning as if it paid rent.
With the extractor fan buzzing and my patience running out, I tried something I hadn’t considered before. I left the bathroom, went straight into the kitchen, opened the cupboard, and picked up something practically every household has - but almost nobody thinks of as the answer to a bathroom problem.
That was the moment a basic kitchen staple quietly succeeded where the “tough” chemicals had repeatedly failed.
The unglamorous enemy hiding in your bathroom
Limescale rarely announces itself in a dramatic way. It begins as a faint cloudiness on taps, a slightly gritty patch on the shower screen, or a pale ring around the base of the toilet that refuses to shift. You tell yourself you’ll tackle it properly at the weekend - then the weekend passes, and another one follows. Eventually you notice your once-bright bathroom has taken on that tired, dull “seen-better-days” hotel finish.
This is what hard water does in slow motion: mineral deposits accumulating day after day, quietly cementing themselves to anything that regularly meets hot water.
One reader described hitting breaking point on a Saturday after spending 45 minutes scrubbing her shower doors with a strong branded cleaner that promised “zero limescale in seconds”. The truth was less impressive. The glass improved slightly, but stubborn chalky streaks still hugged the edges like they belonged there.
She’d already gone round the full carousel of products - gels, sprays, foams - different packaging, the same sharp chemical smell. Each attempt delivered a small lift, followed by the same let-down when the deposits returned. After a while it feels oddly personal, as if the bathroom is quietly keeping score.
The key thing to understand is that limescale isn’t “dirt” in the normal sense. It’s largely calcium carbonate: minerals left behind once water evaporates. So you’re not simply wiping away grime - you’re trying to break down a hard deposit clinging to metal, glass and ceramic. Many traditional cleaners rely on stronger acids, plus perfume to mask the chemical edge.
What your bathroom often needs instead is something that can dissolve those minerals steadily, with repeat use, without leaving you coughing your way through a synthetic citrus fog. That’s where an unassuming kitchen ingredient earns its place.
White vinegar and limescale: the kitchen staple that quietly wins
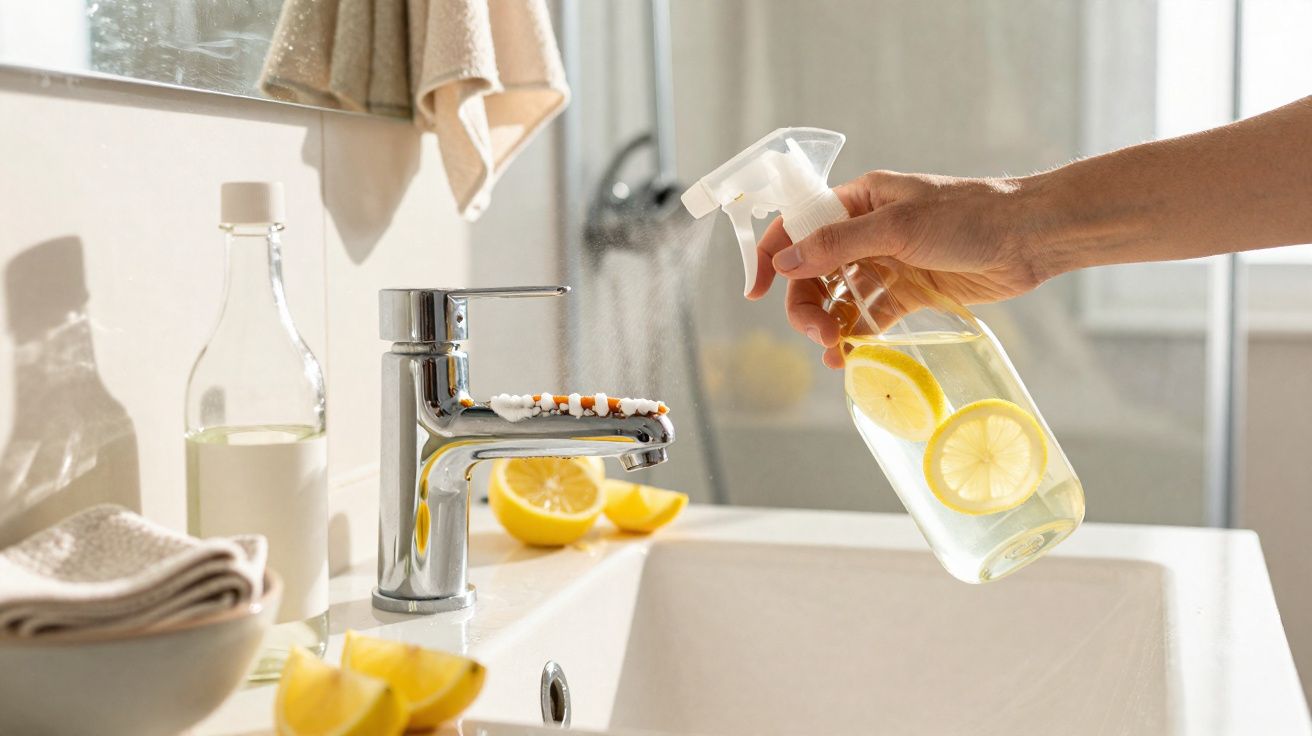
The real game-changer is plain white vinegar. Not a premium “eco” spray with glossy branding - just the inexpensive, sharp-smelling bottle that might end up on chips or in a quick dressing. Thanks to its mild acidity, it can break down limescale surprisingly well by gradually eating away at mineral build-up.
The approach is almost laughably straightforward:
- For taps and showerheads: pour white vinegar into a small plastic bag, slip it over the fixture so the affected metal is submerged, then secure it with an elastic band. Leave it for at least 1 hour, then wipe and rinse.
- For glass and tiles: mix equal parts warm water and vinegar in a spray bottle, coat the surface well, leave it to sit, then gently scrub with a non-scratch sponge.
With enough contact time, that dull white crust starts to soften and lift rather than stubbornly hanging on.
If you tried vinegar once and thought, “That’s not doing much,” you’re in good company. Vinegar gets written off too quickly. One man admitted he gave it a half-hearted go: sprayed, waited five minutes, wiped, saw no instant transformation - and went straight back to the green gel with the hazard warnings.
What changed his mind was a particularly grim bathroom moment: shower door filmed over with limescale, chrome mixer tap looking almost grey. This time he soaked paper towels in vinegar, pressed them along the tap and the door frame, and left them for 2 hours while he worked from home. When he removed them, he said the limescale “slid off like wet chalk”. It wasn’t flawless after one round - but for the first time in ages, the metal underneath actually shone.
There’s a simple chemistry reason it works. Vinegar contains acetic acid, which reacts with calcium carbonate in limescale and breaks it down into substances you can rinse or wipe away. Because it isn’t as aggressive as some commercial descalers, it needs time - particularly on older, heavier build-up. If limescale has built up over years, it won’t vanish in 30 seconds just because a label claims it will.
That gentler strength is a big part of the appeal. Vinegar won’t fill your bathroom with harsh fumes, and you’re not sending mystery compounds down the drain. Used regularly, it shifts from an occasional “emergency rescue” to quiet, routine prevention - and the bathroom stops feeling like a battleground.
How to use vinegar like a quiet cleaning pro (taps, showerheads and more)
A reliable routine is almost boringly effective. Begin with the worst limescale hotspots: taps, showerheads, the seam where glass meets metal, the base of the toilet, around the sink drain, and any edges where water sits.
Soak cotton pads, reusable cloths or paper towels in white vinegar, then press them firmly onto the affected areas. On vertical surfaces, smooth them down so they cling properly.
Leave them in place for 30–60 minutes (or longer for stubborn deposits). This is the step most people rush - but it’s where the acetic acid does the real work. After soaking, use a soft brush or sponge to loosen what’s left, then rinse with warm water.
For kettles and taps with internal build-up, fill with a 50/50 mix of water and vinegar, leave for 1 hour, then flush through thoroughly with fresh water.
Common reasons vinegar “fails” (and how to avoid them)
There are a few predictable mistakes that make people abandon vinegar too soon:
- Too little time or too little product: a quick spritz and a three-minute wait won’t shift years of hard water residue.
- Reaching for an abrasive scourer: harsh pads can scratch chrome or glass, making future limescale cling even more easily.
- Judging the method by the smell: yes, the bathroom may briefly smell like a chip shop. Open a window, run the fan, and remember that the scent fades quickly once rinsed and dried - often faster than the lingering “lemony” chemical perfumes.
And realistically, very few people do this daily. A patient deep clean every 1–2 weeks is still a meaningful win.
“Switching to vinegar felt almost ridiculous at first,” one homeowner told me. “I thought there’s no way a cheap bottle beats the powerful stuff. But I was fed up with the burning smell. The first time I wiped my tap after a proper long soak and saw it shine beneath the crust, I actually laughed. It made me realise how long I’d been fooled by marketing.”
Best spots for vinegar
Taps, showerheads, glass panels, tile grout, kettles, and around drains respond particularly well to slow vinegar soaks.When to avoid it
Don’t use neat vinegar on natural stone such as marble or travertine, and take care with delicate finishes that may react to acid.Simple upgrades
Warm the vinegar slightly for extra impact, add a small drop of washing-up liquid to help with soap scum, or repeat shorter soaks across a week for very old build-up.Why it feels good to use
You get visible results without choking fumes, using something familiar that you already have at home.Long-term payoff
Regular, gentle vinegar sessions can slow future limescale, so each clean becomes quicker and easier over time.
Two small prevention habits that make limescale slower to return
Once you’ve removed the existing limescale, prevention becomes much easier. A quick wipe of taps and the shower screen after use (even just with a microfibre cloth kept in the bathroom) reduces the amount of water left to evaporate - which means fewer minerals get left behind as calcium carbonate.
If you live in a hard water area and the build-up is constant, it may also be worth looking at longer-term options such as a water softener or a showerhead designed to reduce mineral deposits. These won’t replace cleaning entirely, but they can noticeably slow the pace at which limescale reappears.
A quick safety note
Avoid mixing vinegar with other strong cleaners. In particular, never combine it with bleach or chlorine-based products. If you’re switching methods, rinse surfaces thoroughly between products and allow the area to ventilate.
From dreading the scrub to quietly owning it
Once you watch vinegar work on limescale, something subtle shifts. You stop assuming that only the strongest, most intimidating product can save your bathroom. The balance changes: instead of battling harsh chemicals and hoping they don’t splash, you’re using something familiar - calmly, and on your own terms.
That doesn’t mean the job becomes “effortless”. There will still be days when the shower door looks rough and the tap catches the light in exactly the wrong way. But it feels far less overwhelming when you know a bottle from the kitchen can steadily undo the damage. You don’t need a perfect system, or a colour-coded caddy, to begin.
Most people recognise that quiet embarrassment when they glance around the bathroom and feel as though they’ve fallen behind - even if nobody else will ever see it. Limescale has a strangely emotional edge: it suggests neglect, even when life is simply busy. The real magic of vinegar isn’t only the chemistry; it’s that it lowers the stakes. You’re no longer choosing between suffocating fumes and giving up.
Next time you spot that white crust creeping up the base of a tap, you might remember the bottle near the cooking oil. You might soak a cloth, press it on, and walk away. You might even share a before-and-after photo when the shine comes back - slightly proud that you did it without a hazmat-level cleaner. Small domestic victories, but they count.
| Key point | Detail | Value for the reader |
|---|---|---|
| White vinegar dissolves limescale | Mild acetic acid breaks down mineral deposits on taps, glass and ceramics | A low-cost, lower-tox option compared with harsh chemical descalers |
| Contact time beats brute force | Soaking cloths or vinegar-filled bags on problem areas for 30–120 minutes | Less scrubbing, fewer scratches, and better protection for finishes |
| Regular light use slows future build-up | Weekly or fortnightly vinegar routines on high-contact zones | Bathrooms stay cleaner for longer with less effort overall |
FAQ
Can I use any vinegar, or does it have to be white vinegar?
White distilled vinegar is best for cleaning because it’s clear, inexpensive, and has consistent acidity. Apple cider vinegar and darker vinegars can stain or leave residue, so they’re less suitable on pale surfaces.Is vinegar safe on all bathroom surfaces?
It’s generally fine on chrome, ceramic, glass, and most tiles. Avoid natural stone (marble, limestone, travertine), and test a small hidden area first if you’re unsure about a particular finish.How do I deal with the strong vinegar smell?
Open a window, run the extractor fan, and let the room air out after rinsing. You can dilute with water or add a few drops of essential oil, but the smell typically disappears quickly once the surface is dry.How often should I use vinegar on limescale?
In hard water areas, a light vinegar clean once a week or every two weeks on taps and shower glass helps prevent heavy build-up. For kettles or showerheads, a deeper descale every 1–3 months is usually enough.What if the limescale is really old and thick?
Use repeated soaks: apply vinegar-soaked cloths or bags several times over a few days, gently scrubbing between rounds. For extremely stubborn spots, you can combine vinegar with a paste of baking soda - but always test a small area first.


Comments
No comments yet. Be the first to comment!
Leave a Comment