That slim run of timber along the bottom of the wall almost never gets attention, yet it outlines the entire room and quietly influences how everything feels. When skirting boards turn yellow, pick up chips or show stains, the space can look instantly less crisp. Plenty of homeowners put off repainting skirting boards because they worry about splashing the floor, trapping dust in the finish, and spending hours hunched over. There’s a straightforward, low-fuss approach doing the rounds with DIYers that allows you to repaint skirting boards in place - without pulling them off and without ruining your flooring.
Why skirting boards deserve a proper makeover
Interior designers often make the same point: newly painted walls paired with worn skirting boards create a faint but persistent impression that something has been overlooked. You may not identify it immediately, but you still sense it. In older rentals and busy family homes, skirting boards usually take the punishment first: knocks from the vacuum, impacts from children’s toys, mops, shoes and even pet bowls.
A quick refresh on skirting boards can lift a room almost as much as repainting an entire wall, for a fraction of the budget.
On the practical side, a decent paint finish on skirting boards helps protect the bottom of the wall from damp, scuffs and day-to-day bumps. The hard part is working close to the floor, keeping the line tidy and avoiding runs. That’s exactly where this “secret” method - common among decorators but rarely explained - earns its keep.
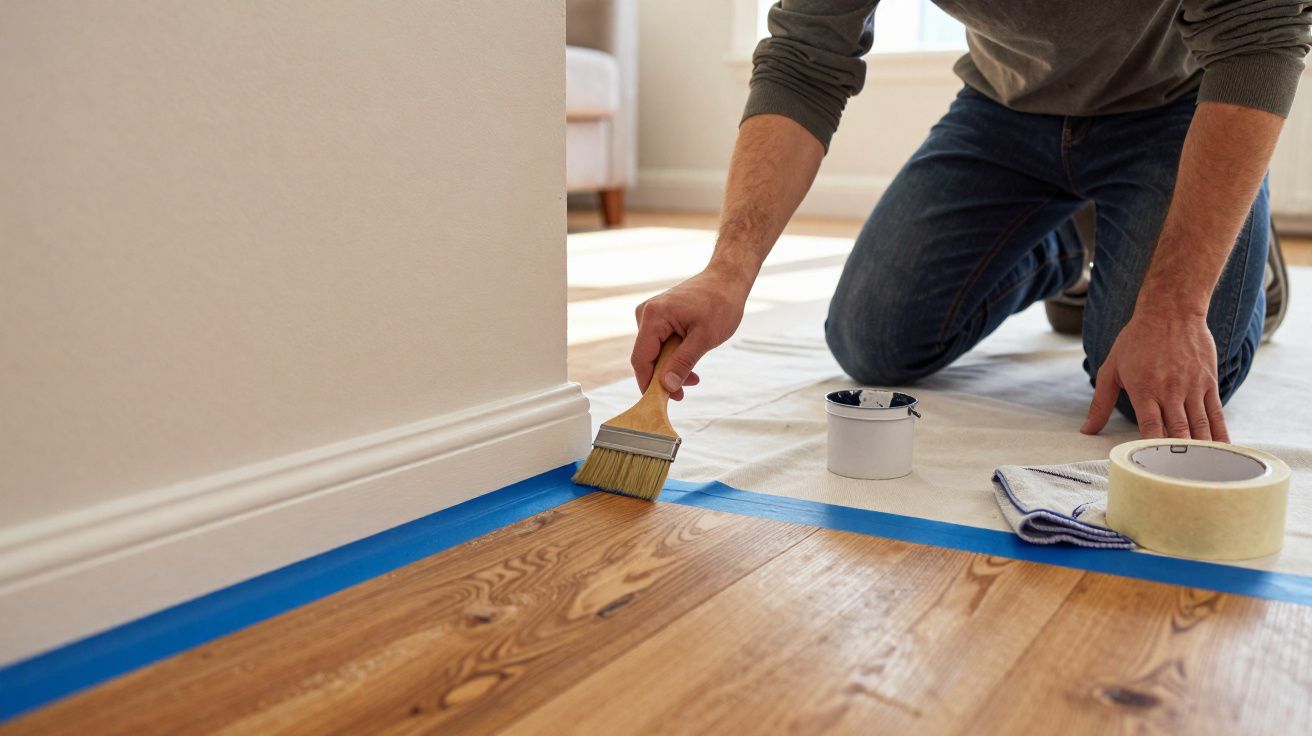
First rule: protect the floor like a crime scene
Experienced painters don’t begin by cracking open the tin. They start by shielding the surrounding surfaces. A perfect edge on the skirting counts for little if your timber floor or carpet ends up dotted with tiny white specks for years.
How to shield different types of flooring
The idea stays the same for most floors, but the best protection varies slightly by surface:
- Hardwood, laminate, tiles: painter’s tape plus a narrow run of protective paper or a strip of card.
- Vinyl floors: low-tack painter’s tape so you don’t pull up or mark the finish.
- Thin carpet: tape pressed lightly into the pile, sometimes using a wide filling knife to help tuck the edge.
- Thick carpet: a stiff plastic strip or a spare piece of laminate slid under the skirting where you can.
The aim is consistent: form a close-fitting barrier right at the wall–floor junction. Position the tape line a few millimetres away from the skirting so the brush has room to move, while any tiny flicks of paint are caught.
Painter’s tape: the quiet star of the job
Masking tapes aren’t all equal. Budget rolls can allow paint to seep underneath; others rip as you remove them or leave glue behind. Decorators typically go for a medium-tack painter’s tape around 38–50 mm wide. That extra width gives you a buffer if your hand slips or you need to pause the brush for a moment.
Press the tape firmly along the edge with a fingertip or a plastic scraper so no tiny pockets of air remain where paint can sneak in.
Timing matters as well. You want the tape to stay put while the edge is vulnerable, but you don’t want it stuck under a hardened skin of paint. Many pros peel it away as soon as the final stretch has been painted and is beginning to set - often 15 to 45 minutes later, depending on the product used.
Dust and grease: the hidden enemies of a smooth finish
If you’ve ever painted skirting boards without preparation, you’ll recognise the result: little pimples in the surface as dust and fibres become trapped in the drying coat. Adhesion can also fail if grease, polish or old wax sits between the paint and the wood.
The minimal cleaning routine that saves the finish
You don’t need harsh chemicals. A sensible pre-paint routine commonly looks like this:
- Run the vacuum along the skirting to pick up grit, crumbs and hair.
- Wipe with a lightly damp microfibre cloth to remove fine dust.
- Use a soft brush to get into grooves on moulded or decorative profiles.
- Allow everything to dry fully so the new paint doesn’t seal in moisture.
Behind sofas and around radiators, dust often builds up and tangles with old cobwebs. Taking an extra minute here prevents obvious flaws in the spots where low winter sunlight shows every imperfection.
Degreasing high‑traffic areas like hallways and kitchens
Near entrances, skirting boards tend to collect road grime and traces of shoe polish. In kitchens, a thin greasy layer can form even away from the hob. A gentle degreaser, diluted washing-up liquid or soap is usually enough. What matters is rinsing with clean water and drying with a separate cloth so nothing is left behind.
For glossy or previously varnished boards, a very light sanding with fine abrasive pads or extra‑fine steel wool helps the new layer bond and level.
The sanding should only take the shine off - it shouldn’t cut into the timber. Afterwards, a quick vacuum is useful again so fresh dust doesn’t settle into the wet paint.
The “secret” tool: a cutting‑in brush for sharp, controlled lines
Many DIYers instinctively grab a mini roller or a straight-edged brush. Decorators, however, often prefer a pointed cutting-in brush designed for edges and tight corners. It doesn’t look special at first: bristles tapered to a gentle point, a round or oval ferrule, and a short handle that sits comfortably in the hand.
Why this brush changes everything
Because of its shape, you can guide the tip along the skirting edge without flooding the joint. The action feels more like drawing a line with a marker than pushing paint with a broad brush. With a little practice, it can reduce the need for heavy masking - although most people still use tape as a safety net.
Control comes down to loading. Rather than dunking the whole brush, decorators usually dip only the first third of the bristles, then wipe lightly on the tin’s edge or a grid to shed excess. The bristles should be coated, not dripping.
A lightly loaded cutting‑in brush gives more control, fewer runs and a cleaner edge than a soaked roller fighting gravity.
Choosing the right type of paint for skirting boards
Skirting boards get more wear than walls: constant scuffs and frequent wiping. Standard wall emulsion generally won’t last. Most professionals choose paints made for woodwork or trim, available in water-based or solvent-based options.
| Type of paint | Strengths | Points to watch |
|---|---|---|
| Water‑based (acrylic) | Low odour, quick drying, easier clean‑up with water. | May need an extra coat on dark colours or over glossy finishes. |
| Solvent‑based (oil / alkyd) | Hard, durable film, smooth levelling, good on high‑traffic areas. | Stronger smell, longer drying, requires white spirit or similar for cleaning. |
A satin or semi-gloss finish is often the sweet spot: smart-looking, lightly reflective, and generally easy to wipe without immediately showing marks. If the timber is very dark or stained, using a proper primer can help stop bleed-through.
The actual painting: short, confident strokes in one direction
The sequence is usually consistent. Tackle the upper, most noticeable sections first, then work methodically around the room. Kneepads or a folded towel help protect your knees and reduce the urge to rush the final metre.
How decorators handle each section
A common approach is to paint in neat lengths of roughly 60 to 80 cm:
- Cut in along the top edge using the pointed brush, staying just under the wall line.
- Cover the main face of the skirting with a few horizontal passes.
- Finish by lightly “pulling” the paint in a single direction, often from one end of the section to the other.
That last pass aligns brush marks and evens out the thickness. Constantly changing direction can leave ridges and obvious stop–start points.
Keeping the brush moving in one consistent direction helps the eye read the surface as smooth, even when the underlying wood carries small defects.
At corners where two lengths meet, the cutting-in brush earns its place again. Fully paint one side first and let it set, then do the other so the overlap looks crisp rather than messy.
Classic mistakes when repainting skirting boards
Decorators regularly spot the same problems from one flat to the next. They’re usually not about talent - they come from rushing or missing the boring steps.
What tends to go wrong
- Painting over dust, which then turns into bumps or tiny pits in the dried coat.
- Not degreasing, particularly in kitchens and hallways, which can lead to peeling later.
- Choosing wall emulsion instead of trim paint, so scuffs and marks appear within weeks.
- Loading the brush too heavily, causing drips and thick edges that take ages to dry.
- Peeling tape off long after the paint has cured, which can tear the fresh film along the line.
Fixing these issues once the paint has hardened often means sanding sections back and redoing them - far more time-consuming than the preparation you tried to skip.
Turning a small chore into a winter upgrade project
Repainting skirting boards suits the quieter part of the year when people wash curtains and rotate rugs. Because the total area is relatively small, the spend on materials stays sensible - especially compared with redecorating an entire room.
Taste in colour has shifted too. Rather than defaulting to bright white, some homeowners now opt for:
- Soft greys to outline pale walls in modern flats.
- Deep navy or charcoal against neutral walls for a bold base line.
- Muted greens or clay shades in older homes to complement period details.
It’s a reminder that a modest architectural feature can steer the feel of a space. In households with children or pets, darker skirting can disguise everyday scuffs, while satin finishes still wipe clean with a damp cloth.
Going further: when to repaint doors, frames and window sills as well
Once the skirting looks clean and sharp, the rest of the woodwork can suddenly look tired. Door frames, internal doors and window sills often have the same original paint system. Doing them at the same time creates a more consistent look and can increase the perceived standard of a rental, or a home being prepared for sale.
If you already have the tape, brushes and paint out, upgrading the rest of the trim usually only adds a few extra hours but transforms the space.
If you’re planning energy improvements or a future floor replacement, repainting now also gives you a chance to check for small gaps where draughts enter or where moisture might be affecting plaster. Sealing those minor issues before painting helps protect the new finish and can make the home feel more comfortable in colder months.


Comments
No comments yet. Be the first to comment!
Leave a Comment