USB wall sockets look like a harmless convenience upgrade: charge your phone straight from the wall, with no bulky plug adaptor and far less cable clutter. That apparent simplicity is exactly what tempts people to dive in with a bit of confidence and a screwdriver. Miss one specific electrical safety check, though, and you’re not only risking scorched wiring - in the worst case, you could end up with an electric shock.
Why preparation for electrical work matters more than bravery
Adding USB wall sockets can feel like a straightforward DIY job, but technically it’s full of traps: incorrect testing, insufficient back-box depth, overloaded circuits, and bargain products with no real protection circuitry. Anyone who gets familiar in advance with how the circuit is arranged, which test tools to use, and the key standard values can avoid stress, reduce risk, and end up with a safe, convenient day-to-day charging point.
Especially in older homes, it pays to look at the bigger picture. When new tech is being fitted into the wall, it’s often the ideal moment to have the whole installation checked by a professional - from the consumer unit, to the depth of the back boxes, right through to the quality of the components being installed.
Before the first turn of the screwdriver: is it truly dead - or just assumed?
Why switching off the circuit breaker isn’t enough
The usual reflex is to go to the consumer unit, switch off the breaker you think controls that room, and get on with it. In theory that sounds safe; in many buildings, the reality is very different.
Common reasons include:
- older installations where circuits have been altered repeatedly
- labels on breakers that no longer match what they control
- circuits that have been joined so one breaker feeds multiple rooms
The result: the breaker is off, but the conductors at the socket can still be live. If you trust the label and the lever without checking, you may end up working on an energised circuit.
"A switched-off breaker does not automatically mean a dead socket - what counts is a real measurement, not a glance at the switch."
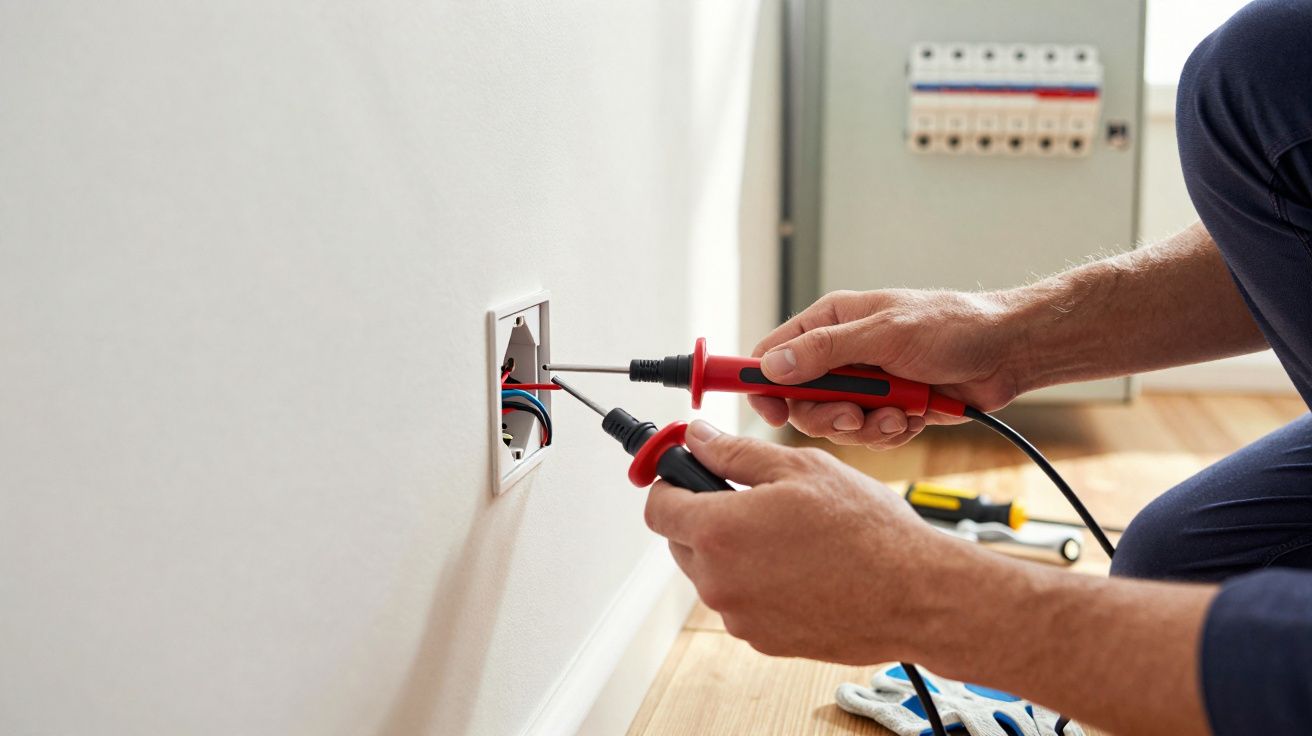
The only sensible tool: a proper voltage tester
Many DIYers reach for a transparent “neon” screwdriver tester that glows vaguely when you touch the end with a finger. At best, those are a rough hint - not a safety device.
Far better is a proper two-pole voltage tester: a tool that reliably confirms whether there is genuinely no voltage present at the terminals. In professional terms, this is a “dead-test verifier” - essentially a two-pole tester compliant with current standards.
The routine should always be the same:
- Switch off the breaker at the consumer unit.
- Prove the tester works by checking it on a socket you know is live.
- Measure at the socket you’re going to work on to confirm there is genuinely no voltage.
- After the work, test again before finally tightening everything down.
Only when the tester clearly shows “0 volts” should a screwdriver go anywhere near the terminals. Anything else is risky guesswork.
The underestimated space hog in the wall: why 30 mm isn’t enough
Period back boxes meet modern electronics
Once you remove the faceplate, most walls reveal a standard flush-mounted back box. In many homes it’s only about 30 mm deep. That’s fine for a basic socket - and not much else.
A USB wall socket contains significantly more hardware:
- a small circuit board
- a transformer to convert 230 V down to 5 V
- additional components for voltage regulation and protection circuitry
All of that needs space behind the visible front. Trying to “force” the USB module into a shallow box is where problems begin.
The 40 mm rule for USB wall sockets
For most modern USB inserts, a minimum installation depth of 40 mm is sensible - and in some cases even 50 mm, depending on the model. With 30 mm you reach the limit quickly.
"Installing a USB wall socket in a box that’s too shallow leads to crushed cables, faceplates that sit crooked, and an increased risk of damage."
Typical signs the back box is too shallow:
- The conductors can only be pushed back with force.
- The front plate won’t sit flush against the wall.
- The screws are difficult - or impossible - to tighten properly.
In that situation there’s only one real fix: remove the old back box and replace it with a deeper one. Yes, it’s dusty and takes time. In return, the wiring sits without strain, the electronics have space to breathe, and the installation remains stable and safe over the long term.
Protection at the consumer unit: without the right breaker, it isn’t a safe charging point
Why a 16 A protective device makes sense
USB wall sockets may look small, but they are still a permanently installed load on your home’s electrical system. The circuit supplying them needs appropriate protection.
A common rating for socket circuits is 16 A. This miniature circuit breaker (MCB) is designed to disconnect the supply in an overload, before the cables in the wall overheat.
If you add several USB wall sockets to an existing socket circuit that’s already heavily used, without considering the total load, you risk:
- excessively warm cables within the wall
- breakers tripping frequently
- in the worst case, heat damage and scorching
When in doubt, it’s worth getting an electrician to check whether the cable size, protective device, and the planned number of sockets are properly matched.
A 30 mA RCD as a life-saving safeguard
Beyond overload protection, personal protection is critical. A modern socket circuit should be protected by a residual current device (RCD) with a 30 mA trip current.
"A working RCD can disconnect the power in milliseconds in an emergency - and can make the difference between a nasty shock and a fatal accident."
Especially with equipment that’s handled regularly - smartphone, tablet, charging cable - there should be no compromise. If an older consumer unit doesn’t have this protection at all, it needs to go right to the top of the to-do list before any further fixed loads are installed.
USB socket quality: cheap can wreck your battery - and your home
What buyers should look for in the product itself
Online marketplaces are full of USB wall sockets for just a few pounds. The price range may look tempting, but it often says a lot about what’s going on inside.
Key items to look for on the packaging or product listing:
- markings such as CE, plus other recognised test marks
- a clear stated output voltage and current (e.g. 5 V, 2.4 A per port)
- information about built-in protection against overload, short circuit, and overheating
If those details are missing entirely, it’s reasonable to suspect corners have been cut on components. That can affect not only safety, but also the lifespan of the devices you charge.
Charging power: why 2.4 A per port is a sensible benchmark
Many people know the problem with cheap plug-in chargers: the phone charges, but painfully slowly. The same issue can crop up with underpowered USB wall sockets.
A practical guideline is around 2.4 A per USB outlet at 5 V. That’s typically enough to charge current smartphones and many tablets in a reasonable time. If the figure is noticeably lower, charging times increase significantly.
| Output current per port | Typical effect |
|---|---|
| 1.0 A | fine for small devices; smartphones charge very slowly |
| 2.0–2.4 A | everyday charging speed for many devices |
| over 3.0 A (with fast-charging protocol) | faster charging, but only choose proven brand quality |
If you’re using multiple USB outlets on a single socket, also check whether the stated current is per port or a total shared across all outputs.
The final check before turning it back on: is everything properly seated?
Terminals, insulation, faceplate - what to inspect one last time
Before switching the breaker back on, it’s worth taking a careful look inside the back box:
- Is each conductor firmly clamped, with no exposed copper sticking out?
- Does the cable sheath run right up close to the terminal area without being crushed?
- Are there no damaged or kinked bare cores?
- Can the unit slide into the box without pressure, so no cables are pinched?
- Does the faceplate sit flat against the wall?
Only then should the breaker be turned back on. If the RCD stays set and no breaker trips, you can do a function test using an undamaged cable and the device you intend to charge. If the charging indicator lights up immediately and stays steady, the electrical side of the job is done.


Comments
No comments yet. Be the first to comment!
Leave a Comment