Many amateur gardeners fixate on premium varieties or specialist fertilisers and miss a quiet but decisive factor: the correct potato planting depth. What happens below the surface determines whether tubers sprout vigorously, rot, or turn green and bitter. The good news is that a handful of simple rules can significantly increase what you harvest from your plot.
Why potato planting depth matters so much
A potato is essentially a storage battery. The seed tuber contains enough energy to produce roots, stems and, later, a new crop of tubers. How well that works depends heavily on how much soil sits above it.
"The ideal depth ensures the tuber sits dark, cool and moist enough - while the shoots still reach the light quickly."
If a potato is set too deep, the young shoots take longer to reach the surface and use up reserves on the way. Plants then emerge weaker, stay smaller and are more prone to stress. If it is planted too close to the surface, other issues follow:
- Late frosts hit the tender shoots directly.
- Strong sun dries the soil out quickly.
- New tubers can turn green and produce solanine.
So the right depth directly influences emergence speed, plant resilience and, ultimately, the size of your crop.
The sweet spot for potatoes: how deep they should go
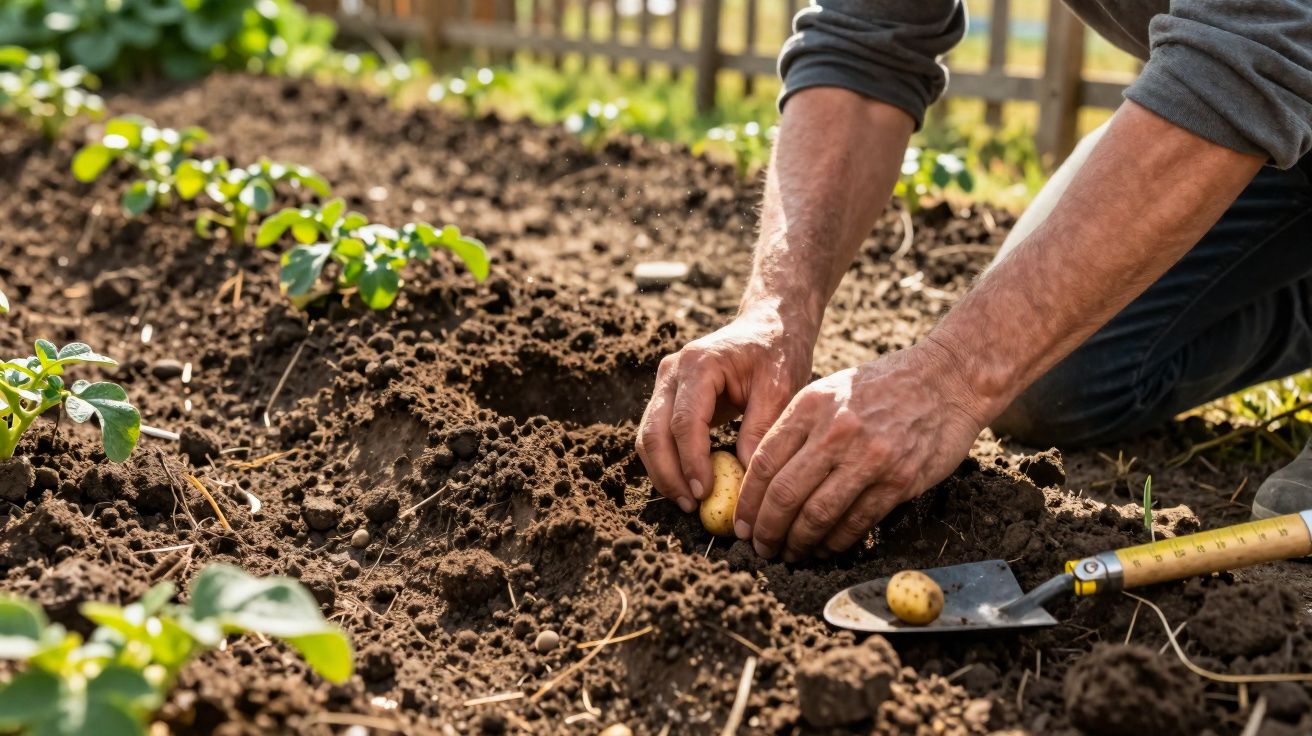
Garden guides and seasoned growers tend to agree on a clear rule of thumb: cover the tubers with about 10–15 cm of soil.
"As a rule of thumb: place potatoes so that there are 10–15 centimetres of soil from the top of the tuber to the soil surface."
In practice, that looks like this:
- Loosen the bed thoroughly to 15–20 cm depth, removing stones and breaking up large clods.
- Place the potatoes in the drill with the “eyes” (sprouts) facing upwards.
- Backfill with crumbly soil until the tuber is covered by 10–15 cm.
This depth brings several advantages at once:
- The soil is a little warmer than right at the surface, so shoots get going faster.
- Temperature swings are smaller, helping plants cope better with cold snaps.
- Moisture levels stay more even, without water sitting around for weeks.
Planting noticeably deeper delays sprouting and the plant “spends” its stored energy in the dark. Planting noticeably shallower increases the risk of frost and drought damage - and later, green tubers.
Adjust planting depth to soil type and local climate
The 10–15 cm range is not a rigid number. It’s a band you can fine-tune depending on soil, weather patterns and how you manage the bed.
Heavy soils: plant a little shallower
In clay-heavy, dense soils, water can sit easily - especially in spring. Plant too deep and you increase the risk of seed tubers rotting.
- Loosen the soil well before planting and crumble down coarse clumps.
- If needed, work in a little sand or well-rotted compost to improve structure.
- When in doubt, stay closer to 10 cm than 15 cm.
That way, the tubers get more air and aren’t trapped for days in cold, wet pockets, reducing fungal problems and rot.
Light, sandy soils: increase depth slightly
In sandy, very free-draining soils, water runs down quickly and the top layer dries out fast on warm days.
Here it pays to use the upper end of the range:
- Aim for 10–15 cm, leaning towards 15 cm.
- Incorporate compost generously to hold water and nutrients.
- Later, use mulch (e.g. straw, grass clippings) to slow drying.
The extra depth helps create a cooler, more consistently moist zone where tubers develop comfortably.
Frost, drought and timing
Local climate matters too. In areas prone to late frosts, you can set potatoes a touch deeper and then earth up promptly. This gives both shoots and tubers better protection.
In very dry locations, deeper planting alone won’t solve the problem. You’ll also need:
- A mulch layer after shoots emerge, to reduce evaporation.
- Targeted watering during long dry spells if required.
- Avoid planting too early, so the hottest period doesn’t coincide with the vulnerable start.
"Don’t always plant deeper to ‘find cool moisture’ - it’s better to work with mulch, soil care and earthing up."
Spacing, rows and earthing up potatoes: without these, yield suffers
Even perfect depth won’t help much if plants later crowd each other or tubers end up exposed to light. That’s why three other factors are essential: spacing, row layout and consistent earthing up.
The right spacing for strong plants
| Parameter | Recommended value |
|---|---|
| Distance from tuber to tuber within the row | 30–40 cm |
| Distance between two rows | 60–75 cm |
| Soil covering the tuber at planting | 10–15 cm |
With these gaps, plants have room for foliage and roots. Water and nutrients are used more efficiently, and tubers can bulk up evenly without being forced aside by neighbours.
Why earthing up makes the difference
If you simply plant potatoes and then leave them alone, you can easily give up a third of the potential harvest. Earthing up - often called “banking up” - is an overlooked boost.
Once plants reach about 15–20 cm tall, pull soil up to the stems from both sides. The base of the plant ends up buried in a small ridge or mound.
"Earthing up doesn’t just protect - it creates new ‘living volume’ in the soil, where additional tubers can form."
The benefits at a glance:
- Developing tubers stay in the dark and don’t turn green.
- Plants stand more firmly in wind and heavy rain.
- You can hoe between rows more easily and remove weeds.
- The raised ridge creates extra sites for tubers - more yield per plant.
Most gardeners repeat this one or two more times during the growing season, each time the plants have put on fresh growth.
Common planting-depth mistakes - and how to avoid them
Many potato-bed problems trace straight back to planting depth and what happens afterwards. Three frequent pitfalls are:
- Far too deep planting: shoots emerge late and plants stay weak, especially in cold springs.
- Rather shallow planting without later earthing up: green, bitter tubers and sunscald on the skins.
- Planting into wet, unworked soil: lack of air, rot and fungal issues, even if the depth itself is correct.
If you’re unsure, mark one tuber in the first few rows and dig one up after two weeks. You’ll quickly see whether shoots are struggling or pushing strongly through the soil.
Practical examples for different garden situations
A suburban garden with heavy clay calls for a different approach than a weekend plot on sandy ground. Two real-world scenarios:
Example 1: Heavy soil in a cool spot
Here it helps to use raised beds or slightly elevated ridges. Potatoes sit in looser, faster-warming soil rather than a cold clay basin. Aim for a planting depth of roughly 10–12 cm, then earth up actively as soon as the plants have grown.
Example 2: Sandy soil in a very sunny spot
In these gardens, potatoes are better set 13–15 cm deep. Compost - and later mulch - helps retain moisture. Between rows, you can deliberately leave low companion under-sowings such as clover or phacelia to shade the soil and protect against erosion.
What the key terms mean - and how to use them well
If you’re not confident yet, terms like “earthing up” or “mulching” can be confusing. In plain English:
- Earthing up: pulling soil from between the rows up against the stems. This builds small ridges around each potato plant.
- Mulching: covering the soil between plants with organic material such as straw, leaves or grass clippings. The layer reduces drying and suppresses competing plants (weeds).
Combined with the right depth, both strategies deliver a double benefit: sturdy, healthy growth above ground and ideal conditions for tubers below. If you internalise this simple routine - 10–15 cm depth, well-loosened soil, correct spacing, consistent earthing up - you’ll notice the change by harvest time, when you’re lifting not just a few bowls but whole crates of firm, healthy home-grown potatoes.


Comments
No comments yet. Be the first to comment!
Leave a Comment