Anyone who starts preparing the first beds as winter draws to a close is usually thinking about variety choice, frost protection and slugs. Hardly anyone realises that even 1 mm too much soil over the seed can wreck the plan for crisp carrots. A modest rule borrowed from professional vegetable growing decides whether spring brings an empty strip of soil-or a lush green row of carrots.
Why carrot rows stay bare even though the packet was full
Plenty of gardeners have seen it happen: you wait for weeks, a seedling appears here and there, and the rest of the bed looks lifeless. It’s easy to blame supposedly “poor” seed or the whims of the weather. In reality, carrots usually fail much earlier-right at the moment they start in the ground.
Carrot seeds are exceptionally small and delicate, with only tiny energy reserves. Every extra obstacle underground-every additional millimetre-costs the seedling strength. If its stored energy runs out, it gets stuck below the surface and dies before it ever reaches the light. From above, it simply looks as though nothing grew at all.
"The most important success factor with carrots isn’t the variety and rarely the temperature - it’s the exact sowing depth."
The overlooked enemy: physical resistance in the soil
In early February, the soil is typically cool and damp. When nothing germinates, many people put it down to “soil that’s too cold”. Yet early carrot varieties can cope with low temperatures perfectly well, as long as they’re reasonably protected under horticultural fleece or a tunnel.
What causes far more trouble is heavy, cloddy ground. If the seed furrow is pulled roughly and then filled back in with the same sticky, loamy soil, those tiny seeds are effectively sealed under a concrete lid. The sprout tries to push upwards, hits a compacted or crusted layer, and burns through its last reserves right there.
The result is simple: the carrot seedling has already died, while the gardener is still patiently waiting for the first hint of green.
Carrot sowing depth: the “half a centimetre” rule that matters
Professional growers follow a straightforward but uncompromising guideline: carrots must be sown extremely shallow. That means 0.5 cm to a maximum of 1 cm deep-no more.
Why so shallow? Because:
- Too deep (2–3 cm): the seed may germinate, but it uses up all its energy trying to reach the surface. The seedling dies underground.
- Too shallow (left on the surface): wind and sun dry the seed out quickly before it can germinate.
- Ideal (5–10 mm): a short path to daylight, enough moisture, minimal resistance-the plant breaks through successfully.
So the critical zone genuinely sits in the millimetre range. If you cut a deep groove with a hoe and then cover it generously, you end up burying your carrots-quite literally-without meaning to.
The sand and fine-soil trick
Once the depth is right, the next crucial question is what you use to cover the seed. A common mistake is to pull the heavy garden soil you moved aside straight back over the top. On wet clay, that layer can dry into a hard crust-too tough for fragile seedlings to push through.
A much safer approach is this combination:
- Pull a shallow drill in the bed, no deeper than 1 cm.
- Scatter carrot seed as evenly as you can.
- Cover with a very fine, sieved material:
- either high-quality, finely sieved vegetable compost/soil,
- or-better still-washed river sand.
Sand has two clear advantages:
- It doesn’t set into a hard crust, even after heavy rain.
- The pale strip marks the row, making later weeding much easier.
"Covering carrots with sand is like giving them a lift to the surface: light, free-draining, and without barriers."
Water gently rather than washing everything away
Even perfect sowing depth won’t help if watering ruins it. A strong jet from a watering can can flush seeds out of place or push them deeper into the soil. That immediately destroys the carefully set half-centimetre depth.
Best options are:
- A watering can with a very fine rose, held slightly upward so the water falls like gentle rain.
- For small areas, a sturdy spray bottle that keeps the surface evenly damp.
For the first few weeks, the seedbed must never dry out completely, but it mustn’t sit waterlogged either. Aim for soil that stays evenly moist and crumbly. Depending on temperature, it can take up to four weeks in late winter before the first green threads appear. This stage demands patience-and consistent re-wetting.
When precision really pays off
Millimetre-accurate work can feel a bit excessive at the start. But anyone who does it once will see the difference: instead of patchy rows, you get dense, uniform bands of carrots. That not only saves seed, it also reduces the fiddly job of thinning.
At the same time, you use the bed far more efficiently. Where previously only every third or fourth plant made it, now almost every seed position becomes a genuine carrot plant.
These vegetables benefit from the same rule
This millimetre principle isn’t limited to carrots. Other fine-seeded crops react in a similarly sensitive way to the wrong depth and coarse covering soil:
- Radishes: can sit a little deeper than carrots, but 1 cm works very well.
- Leaf lettuces: also have small seeds; a heavy covering layer causes problems here too.
- Parsley: germinates slowly and benefits from a fine, loose covering.
If you give these crops the same care-shallow drill, fine covering, gentle watering-you’ll cut down springtime frustration in the vegetable bed noticeably.
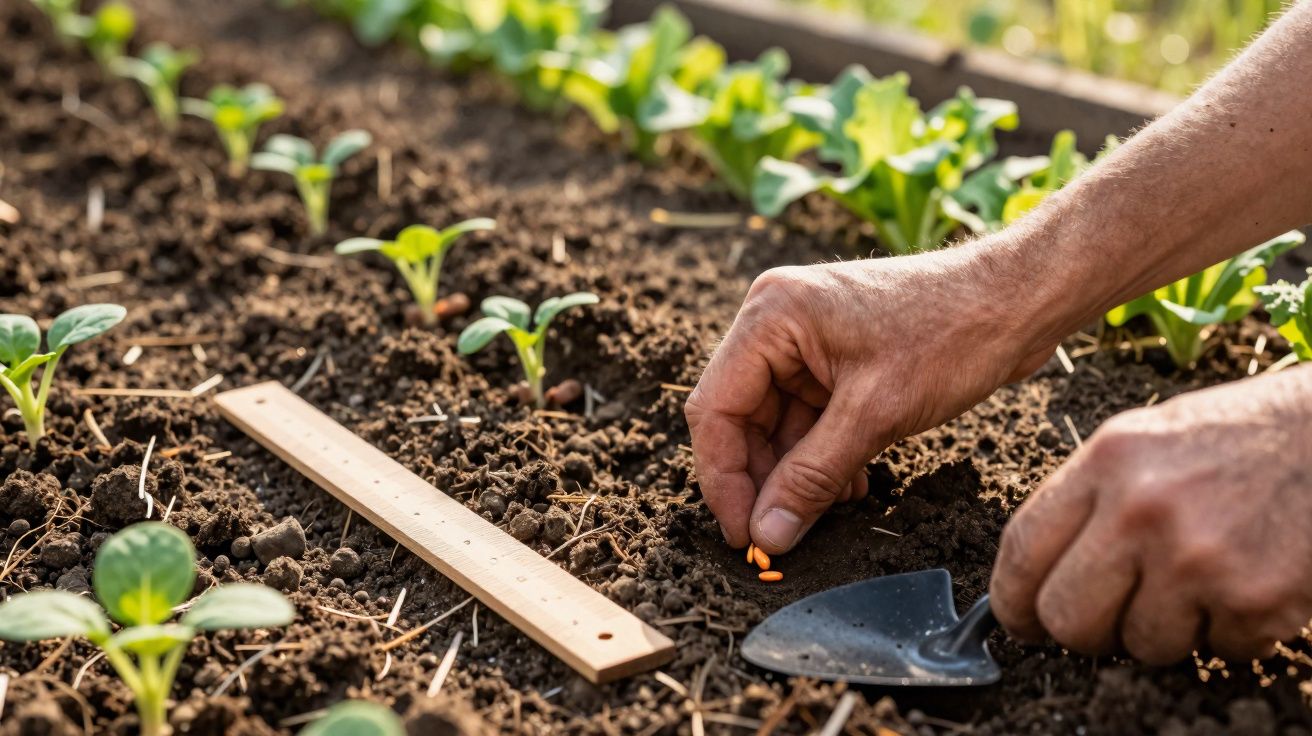
Practical check: how to verify sowing depth in the bed
In day-to-day gardening it’s difficult to judge millimetres in soil. One simple aid makes it much clearer:
- Use a ruler or a wooden stick and mark 0.5 cm and 1 cm in colour.
- Place it in the drill as a quick test before you sow.
- Note how the furrow looks against the markings-after one or two beds you’ll develop a reliable feel for it.
If you like using tools, you can also make a basic sowing gauge with notched marks. It sounds a bit like a school craft project, but it prevents a lot of failed attempts in spring.
What can go wrong if you ignore the depth
Sowing too deep doesn’t only cause total failure. Sometimes a portion still germinates, but later and weaker. The plants remain thin, produce less leaf growth, and end up with noticeably smaller roots. In the worst case, the surviving carrots look “more or less okay”, but they would have delivered much better results if they’d started at the right position in the soil.
There’s another knock-on effect: gaps in the row create space for weeds. Where no carrots emerge, opportunistic plants establish quickly. That increases the work of hoeing and hand weeding, because there’s no closed stand to shade the soil surface.
Why this millimetre question is more than gardening fussiness
Growing your own vegetables costs time, water, space and patience. Carrots are one of those crops that stay in the ground for a long time yet don’t need much room-provided they grow densely and evenly. A simple rule, applied consistently to sowing depth, turns carrots into a dependable crop rather than a lucky dip.
At heart, it’s about understanding that small seeds offer very little margin for error. Every extra millimetre demands energy that simply isn’t there. Anyone sowing with the attitude that “a little more won’t hurt” badly underestimates this effect. Precision on sowing day pays back weeks later in the harvest basket-visibly, measurably and, above all, in flavour.


Comments
No comments yet. Be the first to comment!
Leave a Comment