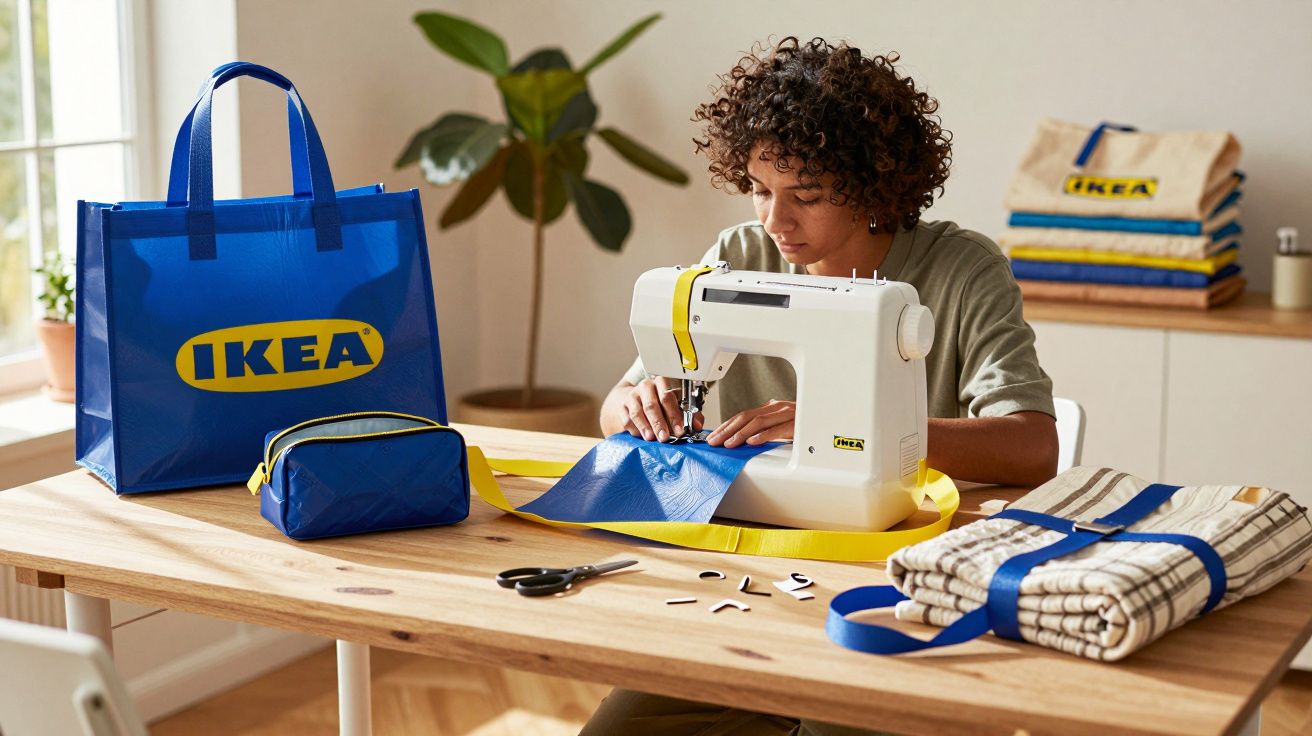
In 2026, they’re suddenly becoming free sewing material-with an element of surprise.
If you shop at IKEA even semi-regularly, you’ll almost certainly have them at home: the big blue carrier bags. Most end up as boot organisers or get shoved behind the coat rack. Yet the material has far more potential than simply hauling bottled water and loo roll. With just a few straightforward steps, those tough bags can be turned into brand-new everyday helpers-practical, low-cost and impressively hard-wearing.
Why the blue IKEA bag is perfect DIY material
The familiar blue IKEA carrier bags are made entirely from polypropylene: a highly durable, non-woven plastic. It’s sturdy yet light, resists splashes, and can be wiped clean with a damp cloth. It stands up well to friction, dust and moisture, and-according to the manufacturer-can comfortably carry up to 25 kg.
Polypropylene from the blue bags combines three rare qualities: extremely tough, easy to sew, and close to indestructible in daily use.
Unlike many woven fabrics, this plastic doesn’t fray. That means edges don’t necessarily need finishing, which makes it especially beginner-friendly. At the same time, it’s stiffer than cotton, so bags, pouches and mats tend to hold their shape without collapsing.
Reusing old carrier bags also saves you buying new outdoor fabric or faux leather. It’s kinder to your budget-and better for the environment-because the plastic stays in use longer rather than ending up in landfill or being incinerated.
Three unexpected sewing projects using the blue IKEA bag (polypropylene)
1) A toiletry bag and a wet bag for travel
A classic first project is a toiletry bag made from the blue material. Carefully unpick or cut open the bag along the seams until you have a flat sheet. From that, cut a rectangle to your preferred size.
Sew in a zip along the top, then stitch the sides together using a simple straight stitch. Thanks to the water-resistant surface, toothpaste, shower gel and razors stay reliably separated from your clothes-ideal for holidays or trips to the gym.
The finishing touches are where it gets interesting. If you sew on cotton binding tape (bias binding) or narrow strips taken from the blue or yellow-and-blue straps as edging, you get a crisp, industrial look that can feel surprisingly designer. Small loops made from webbing work as a carry handle or a hanger for the bathroom.
Using the same method, you can also make a wet bag for damp swim kit. Simply scale it up and deliberately allow room for trunks, a bikini or wet tops-so the rest of your beach bag or rucksack stays dry.
2) An XXL beach bag that shrugs off sand and water
Because polypropylene copes well with weight and moisture, it’s excellent for a large beach tote. Start with a complete carrier bag and strengthen the base: add a second layer of the same material (or a neatly cut offcut) and stitch it firmly in place.
If you topstitch the side seams as well, the bag stands up better and won’t constantly flop in on itself. Inside, a large zipped pocket brings order-sun cream, phone, keys and wallet stay secure and are better protected from sand.
- reinforced base for towels and drink bottles
- large internal zipped pocket for valuables
- straps additionally topstitched for heavier loads
- easy to rinse out-ideal for the beach and the lake
The original handles can be reinforced with clearly visible topstitching. It doesn’t just add a streetwear feel-it also helps the bag cope with family gear, picnics and toys.
3) A picnic blanket that keeps you dry
For days out in the park, a picnic blanket works brilliantly with a blue-bag underside. Sew several opened bag panels together into a large rectangle. Add a soft top layer using an old bedsheet or unwanted duvet cover.
If you like, sandwich in a thin layer of padding-such as an old fleece or throw. The result is a three-layer picnic mat: waterproof-ish underneath to block damp ground, comfortable on top against the skin.
Finish the edges with bias binding or strips cut from the strap material. Add a stitched carry loop and a fastening tab, and the blanket becomes a compact bundle that stores neatly in the car, pushchair or hallway cupboard. After the picnic, plain water or a damp cloth is usually enough to clean the underside.
How to sew polypropylene properly
If you’ve never sewn this material before, you only need minor adjustments to your machine. Denim/jeans needles in size 90 or 100 are a proven choice because they’re robust enough. Set a slightly longer straight stitch-around 3–4 mm-so the material isn’t weakened by too many perforations.
With the right needle and a longer straight stitch, the blue bag can be sewn almost as easily as cotton.
A standard polyester thread (the same type used for clothing) is sufficient. Since the cut pieces don’t fray, edges stay tidy. However, the plastic can feel a bit scratchy against skin, so binding with cotton tape or strap strips is a smart move-particularly for toiletry bags, blankets and children’s projects.
Extra tip for cleaner results: consider using fabric clips instead of pins, because pinholes in polypropylene are permanent. If your machine struggles to feed the material evenly, a walking foot (or even a strip of tissue paper under the seam, torn away afterwards) can help the stitches stay consistent.
What else you can make from handles and offcuts
If you fully dismantle a carrier bag, it’s worth saving every last piece. The wide straps can be repurposed into key fobs, towel-hanging loops, or attachment points for carabiners. They also work well as tough loops on rucksacks or on children’s ride-on toys.
Smaller pieces of the material are useful for plenty of everyday items:
- protective cover for notebooks or school exercise books
- passport cover
- sunglasses case
- flexible dividers for drawers or storage boxes
For a sharper finish, sew pieces together with raw edges visible, then cover those edges afterwards with binding tape or strap strips. It creates clean lines and gives even tiny projects a professional, deliberate look.
A sustainable 2026 trend: turning shopping bags into long-lasting essentials
In 2026, the idea of the circular economy is becoming increasingly mainstream. Rather than throwing old plastic away, many households are transforming existing products into new, useful items. A former shopping bag becomes a tough picnic mat, a travel organiser or a family-sized beach tote.
The benefit is obvious: there’s no need to buy and manufacture new material. At the same time, the home-sewn versions often outlast many budget alternatives from the high street. That bold blue adds a punchy accent-especially when paired with contrasting edging or bright zips.
For beginners, blue-bag projects are an easy entry point into upcycling. Mistakes barely show, costs are minimal, and the material is forgiving of less-than-perfect seams. Once you’ve made a toiletry bag or a picnic blanket from the plastic, confidence often grows quickly-laptop sleeves, bike saddle covers, or covers for garden cushions are just as achievable.
If you have children, they can be involved too: drawing pattern pieces, choosing shapes, and deciding colour combinations. It’s a hands-on way to build awareness of how much value can be extracted from things that might otherwise be binned-while creating one-off items you’ll instantly recognise at the lido or in the park.

Comments
No comments yet. Be the first to comment!
Leave a Comment