The very first thing I clocked wasn’t her eyeliner or her foundation.
It was her brows.
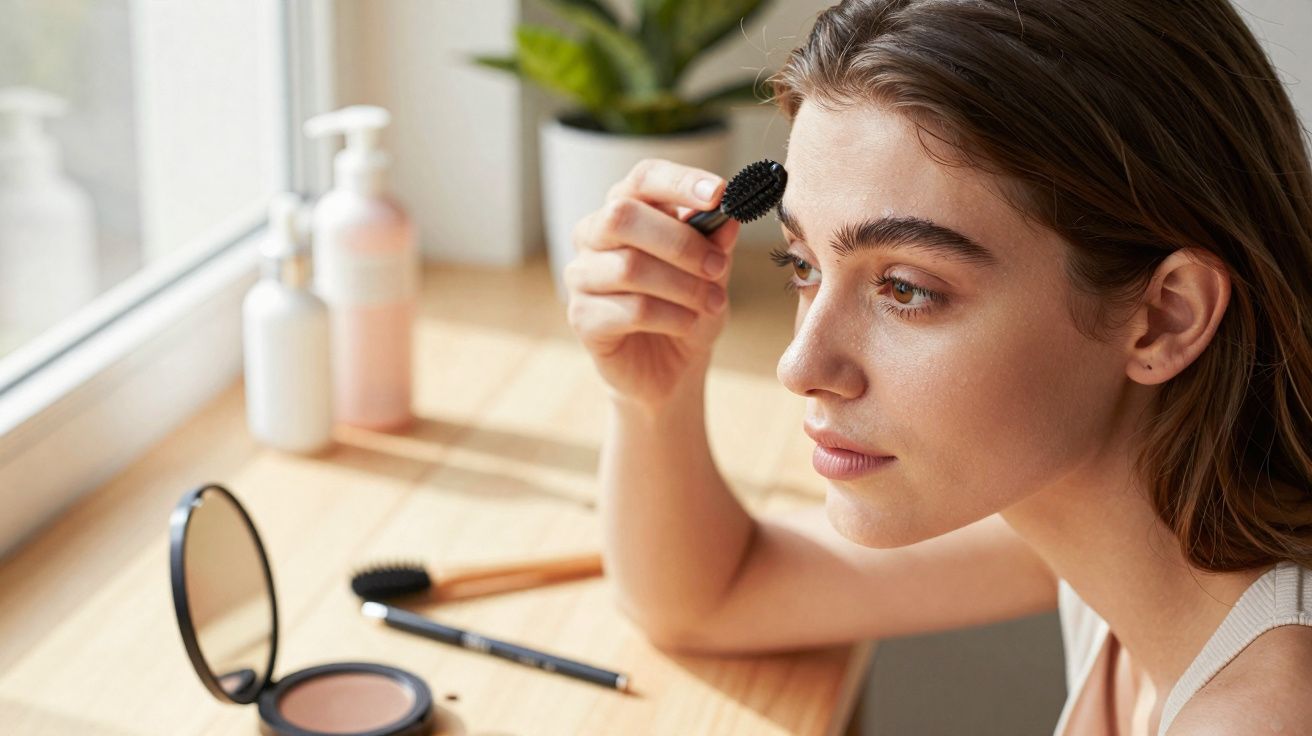
I was perched in a bustling city café, halfway through a tepid latte, watching a make-up artist at the next table tidy up her friend’s face. She didn’t fuss over contour and she barely looked at the lashes. Instead, she removed the end of one brow, then redrew the tail a few millimetres higher and paused to assess it.
All at once, the whole face shifted.
Her friend instantly looked less tired and less “dragged down” - as if she’d actually had a full eight hours’ sleep rather than scrolling TikTok until 1 a.m. The jawline seemed cleaner, the eyes looked more alert. Nothing extreme, just… lifted.
That was the moment it clicked: the tiniest change in eyebrow placement can mimic a mini facelift you can wash off before bed.
And once you spot it, you can’t stop seeing it.
The tiny brow tweak that fakes a lifted face
Scroll through any selfie-heavy feed and you’ll notice the pattern: two people who, on paper, could be the same age - yet one face reads brighter, fresher, more lifted.
Same blush, same lip gloss, same phone filter. Often, the real difference sits in the brows.
Because eyebrows frame the upper third of your face, a tail that drops downwards can pull your whole expression south. When the tail finishes slightly higher - and a touch shorter - the eyes appear more open and the cheekbones look more defined.
This is the eyebrow placement trick make-up artists quietly rely on.
It isn’t about buying a new product or committing to a dramatic reshape. It’s about adjusting where the brow begins, where it peaks, and, most importantly, where it ends.
A London-based bridal MUA told me she now spends longer fine-tuning eyebrow placement than she does applying eyeliner on wedding mornings. She mentioned one bride who arrived with her usual routine: a long, flat brow, heavily filled through the tail. She was stunning, the dress was impeccable - yet on camera the eyes looked slightly closed off.
So the artist gently removed the last 1 cm of the brow, raised the tail by a few millimetres with a fine pen, and softened the colour at the ends.
When they took a test photo, the bride actually gasped.
She didn’t look like a different person - just like a more awake version of herself. That tiny edit changed how the light hit her eyes and how her whole face translated in photos she’d keep for the rest of her life.
There’s a straightforward reason this works so well. Your brain reads angles and lines as emotional signals: downward slopes around the eyes and mouth can suggest tiredness or sadness, while upward angles register as fresher and more positive.
A low, elongated brow tail can make the outer corner of the eye look like it’s drifting down. If the tail sits level with - or slightly higher than - the brow head, you get a subtle “lifted” effect without surgery, threads or anything invasive.
From a structural standpoint, a higher tail also reveals more visible lid space. That can make eye make-up look cleaner, lighter and more modern. It’s why this placement trick turns up on red carpets, on runways, and in those holiday photos of your mate where they somehow look unfairly well-rested.
How to place your brows for a brighter, more lifted look (eyebrow placement)
This starts before you even touch a pencil.
Sit upright directly in front of a mirror and let your face relax. No raised brows, no “photo face”. That neutral expression is the most accurate guide.
Now picture three gentle reference points:
- where your brow begins (roughly in line with the side of your nose)
- where the highest point sits (around the outer edge of your iris)
- where the tail finishes
Here’s the twist: instead of pulling the tail down towards the outer corner of your eye, stop it slightly higher, angling softly towards the top of your ear.
When you fill, keep the front airy and light, build the pigment through the middle, then taper neatly into that lifted tail.
You’re not drawing a big tick. You’re encouraging the line upwards - just a little.
This is where many of us go wrong: we keep extending the tail because we assume longer automatically equals more glamorous.
On a tired Tuesday, that habit can work against you. A tail that’s too long can drag attention sideways and down - especially if it’s dark, dense or blocky.
If your eyes often look a bit “sad”, or your concealer seems to bunch at the outer corner no matter what you do, your brow tail may simply be sitting too low. Shortening it by even 2–3 mm and lifting the endpoint can make the whole area look cleaner almost immediately.
Take it slowly.
Remove a tiny amount from the tail, step back, then take a quick selfie in natural daylight. Your phone camera is ruthless - but helpful.
“Brows are architecture,” says Paris-based make-up artist Eléa Martin. “You don’t need to rebuild the house. You just realign one beam and suddenly the whole room feels bigger and brighter.”
- Lift the tail so it sits slightly higher than the brow head, not lower.
- Keep the strongest pigment through the middle, not at the very front or the very end.
- Create hair-like strokes at the front to avoid a stamped-on look.
- Use a clean spoolie brush to blur any harsh downward angle.
- Lock in the lifted tail with a clear or tinted gel so it lasts all day.
Two extra details that make the lift look believable:
First, match your tool to your texture. A fine pencil or pen is best for hair-like strokes and a crisp, lifted tail; powder can be softer but may drop the shape if you overextend the end. Second, keep the underside of the tail clean. A tiny bit of tidy concealer (blended well) under the highest point and tail can sharpen the “lift” without making the brow look overdone.
If your brows are sparse or uneven:
Work with what’s there rather than trying to force symmetry. Most faces aren’t perfectly even, and brows rarely sit identically. Sketch the tail lightly, then use gel to brush hairs slightly upwards and outwards. Over time, consider letting the tail area grow in (if it’s been over-tweezed) so the lifted guideline becomes easier to maintain without heavy product.
Living with lifted brows (and making the hack your own)
Once you start experimenting with brow placement, you’ll notice just how much it changes the “mood” of your face.
Some days you’ll want maximum lift and extra space for a graphic liner; other days you might prefer a softer, straighter brow that feels understated and effortless.
The best part of this trick is how flexible it is. For work, you can keep it very subtle - lifting the tail just enough to look like you slept well. For evenings out, you can pair the higher tail with a touch of shimmer on the brow bone to reflect light and intensify the effect.
Let’s be realistic: hardly anyone does this perfectly every single day.
But having this one tweak in your back pocket means that when you care about how you’ll look in photos, you’ve got a reliable, low-effort way to brighten your whole face in about five minutes.
| Key point | Detail | Value for the reader |
|---|---|---|
| Lifted tail placement | Finish the brow slightly higher and a touch shorter, aiming gently towards the top of the ear | Creates a natural “mini facelift” effect and opens up the eye area |
| Soft, strategic filling | Keep pigment light at the front, fuller through the middle, and tapered at the tail | Avoids a heavy, drooping result and keeps brows looking modern and fresh |
| Check in real lighting | Test the updated shape with selfies in natural daylight and make small tweaks | Helps you tailor the hack to your features and day-to-day style |
FAQ:
- Does this eyebrow lift hack work on hooded eyes? Yes. A slightly higher, shorter tail can reveal more visible lid space on hooded eyes, so your liner and shadow are less likely to disappear into the crease.
- What if my brows are naturally very straight? You don’t need a pronounced arch. Simply finish the tail a little higher than the start, then use a tinted gel to comb hairs subtly upwards for a gentle lift.
- Can I do this if I’ve overplucked my brows? Absolutely. Use a fine brow pen or pencil to draw a lifted tail with hair-like strokes, then slowly grow your natural hairs towards that new guideline.
- Will lifting the tail make my brows look too “Instagram”? Not if you keep the front soft and avoid harsh, blocky edges. A fluffy finish with a bit of skin showing through keeps it believable.
- Should my brow tail ever go lower than the front? For a bright, lifted look, no. Keeping the tail level with or slightly higher than the brow head visually opens and elevates the entire eye area.
Comments
No comments yet. Be the first to comment!
Leave a Comment